Getting started with the Documents app in Odoo
Getting started with the Documents app in Odoo
Odoo Documents app supports centralized management of attachments that are scattered on the system or documents uploaded from other sources.
Some notable features:
- Organize documents by workspace structure;
- Granting access rights flexibly by teams, groups;
- Categorize documents;
- Share documents internally and with partners;
- Set up automatic actions for documents.
Requirements
This tutorial requires the installation of the following applications/modules:
- Documents Management
Installing Documents app
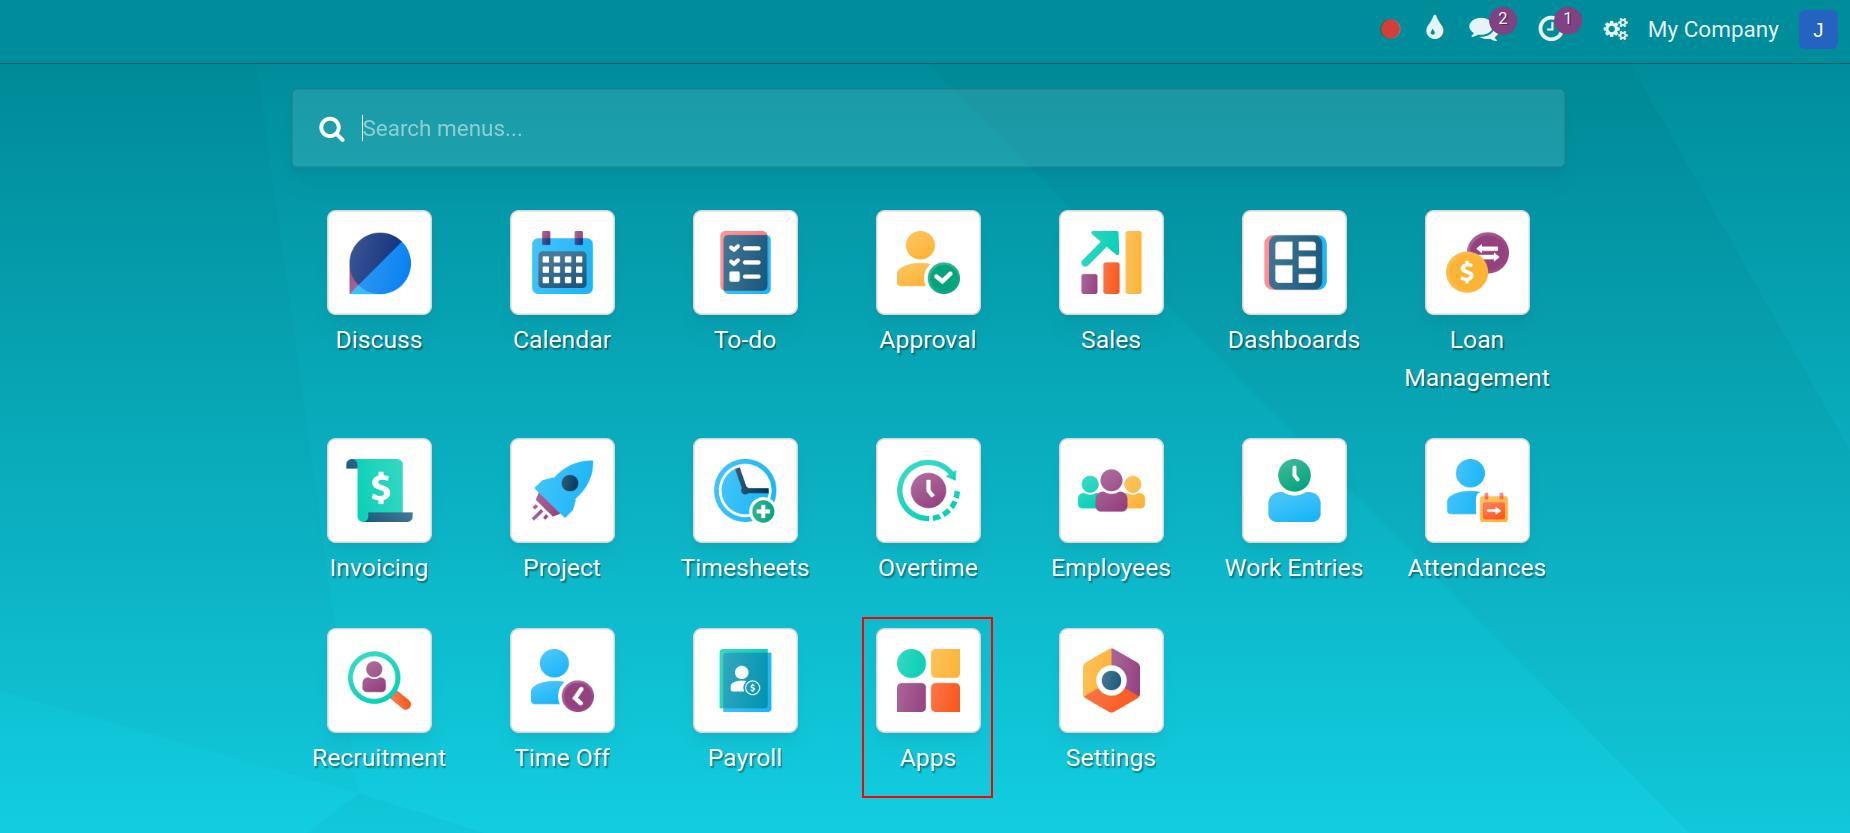
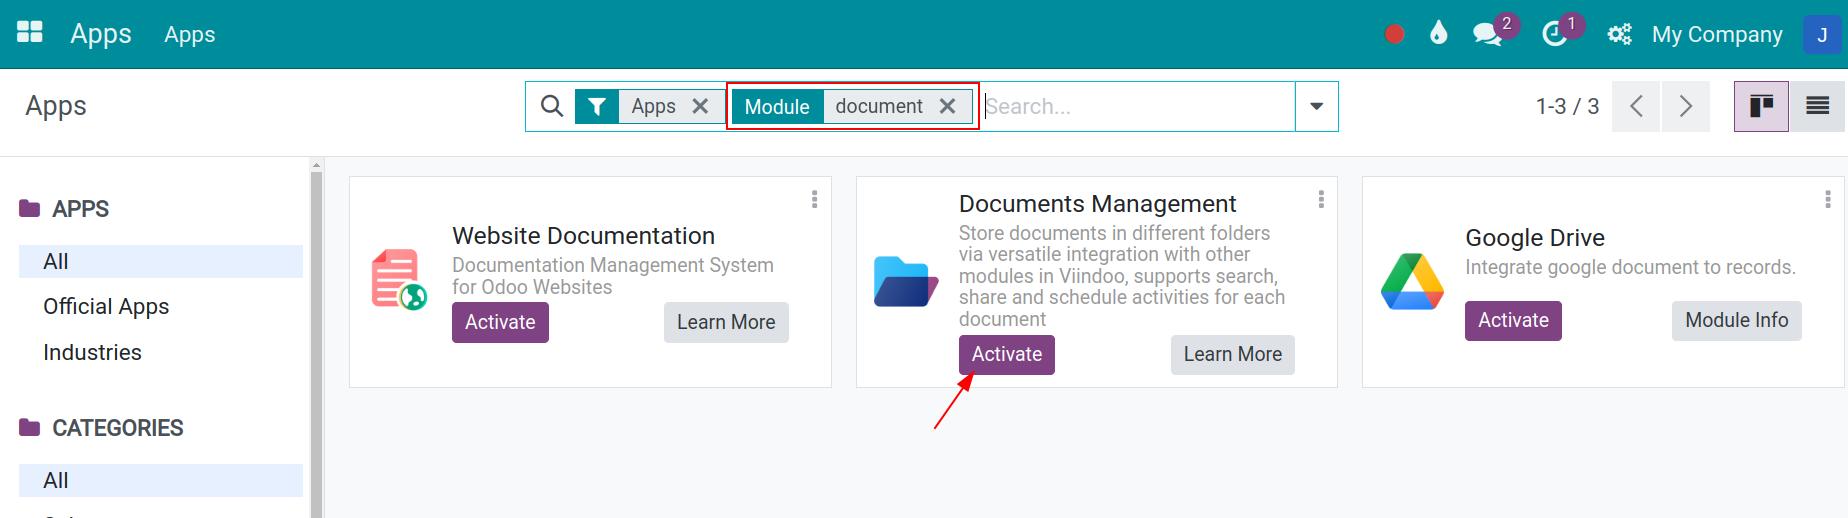
To install the app, navigate to Odoo Apps and search for the Documents Management module then press Activate.
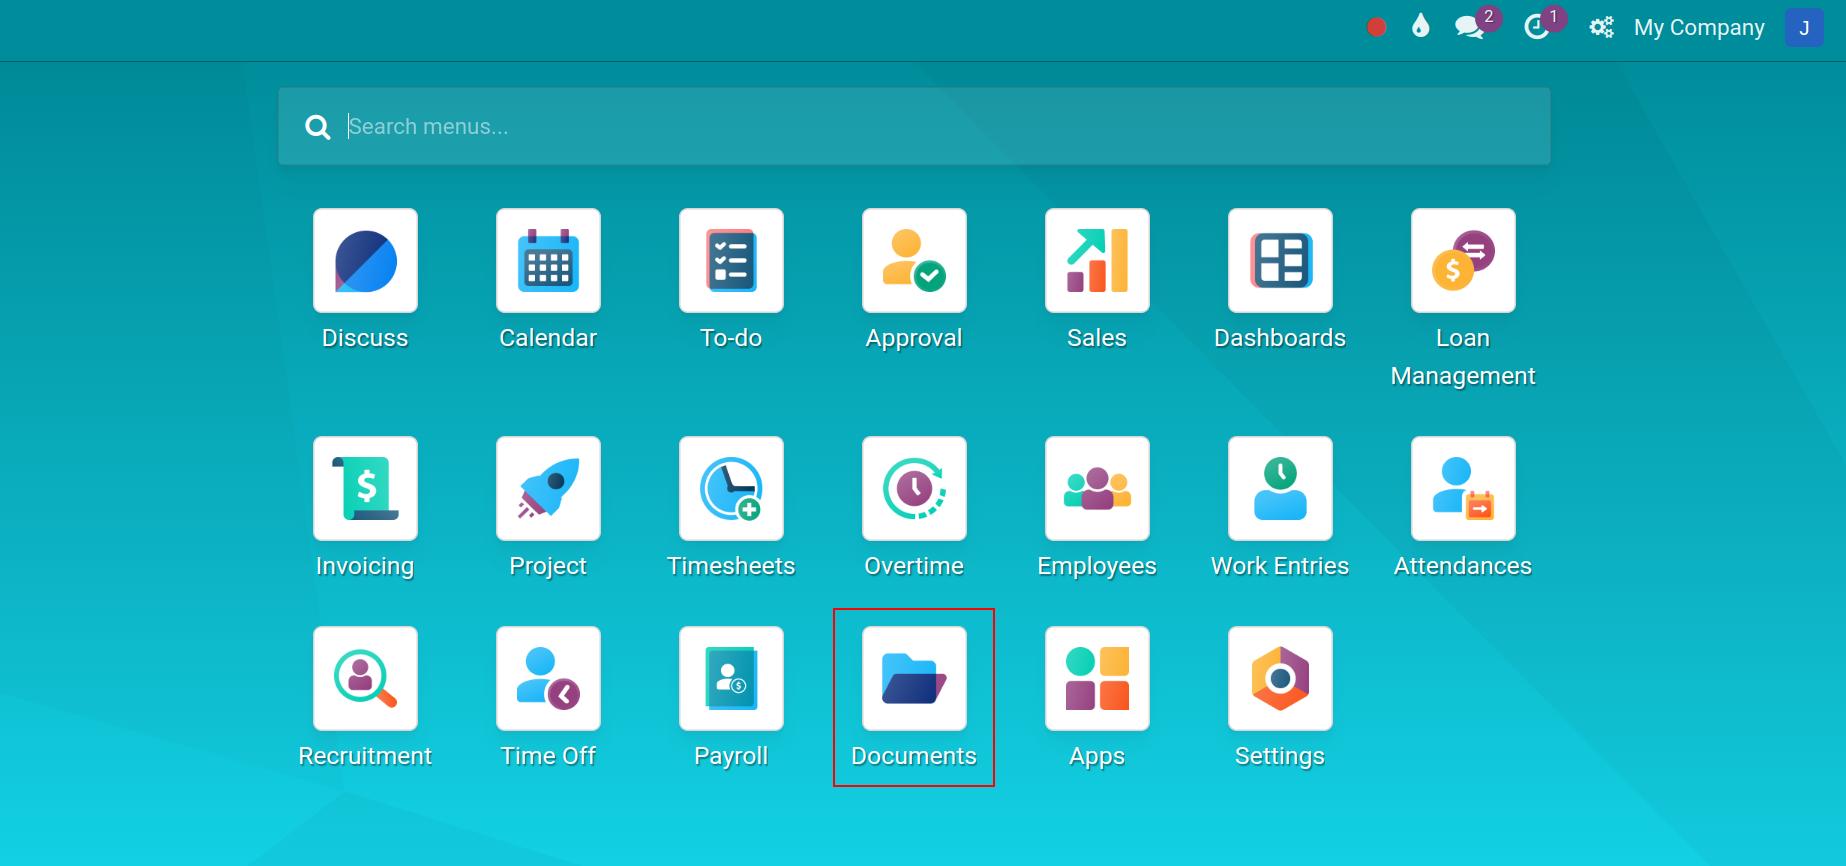
Once installed, the Documents app will be displayed on your apps list.
Permissions configuration for the Documents app
Navigate to Settings > Users & Companies, and choose the user account that needs to be authorized.
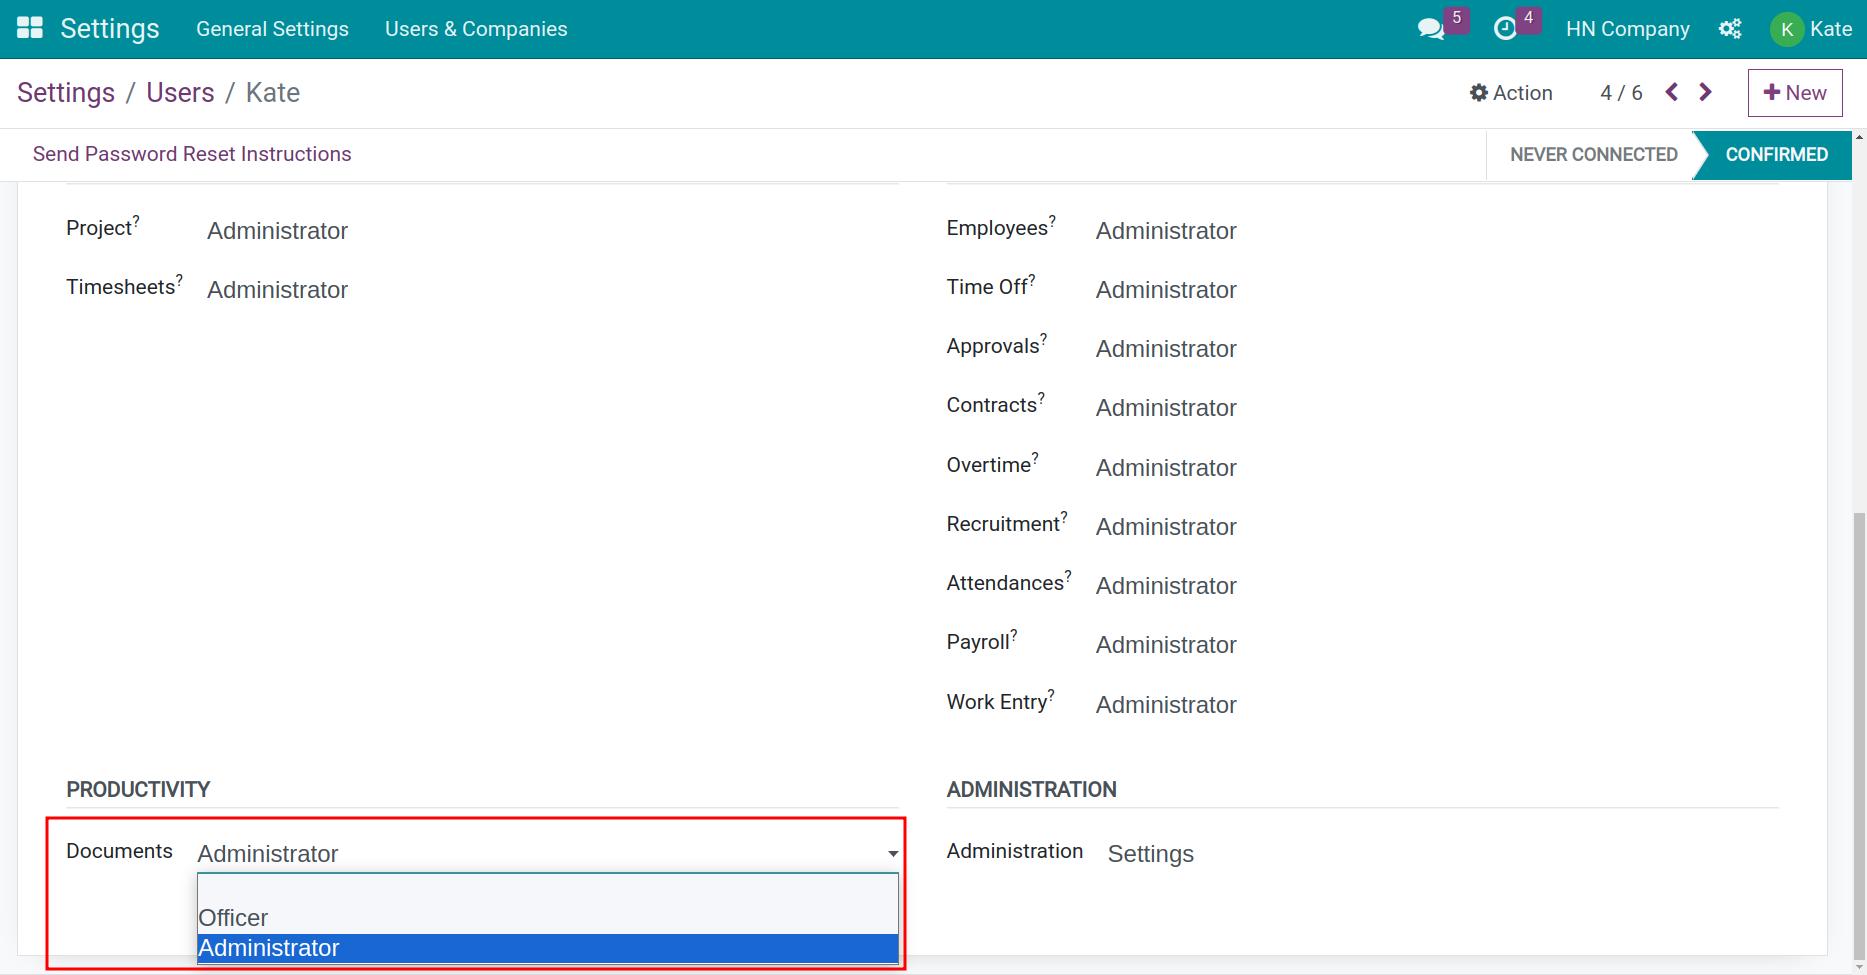
From here, navigate to the Productivity > Documents section and select one of the access rights below:
- Set it blank: By default, the users are not able to manipulate documents in the Document Application, but you can add appropriate rights for them to each document folder according to the instructions in the following article Create and authorize document workspaces.
- Officer: The users can access all and upload documents with this right.
- Administrator: The user has full access to the Documents app.
See also
Related articles
- Categorize documents with tags
- Upload documents to Odoo
- How to share documents in Odoo
- Document approval
- The status of the document
Optional modules
- Documents - HR
- Documents - Accounting
- Documents - Payroll
- Documents - Sale
- Documents - Inventory
Upload documents to Odoo
Upload documents to Odoo
There are two ways to upload documents:
- Method 01: Upload documents directly from the Documents app interface.
- Method 02: Upload documents from the chatter of other apps.
This article will guide you to upload documents following the above two ways with Odoo .
Requirements
This tutorial requires the installation of the following applications/modules:
- Documents Management
Upload documents from the Documents app
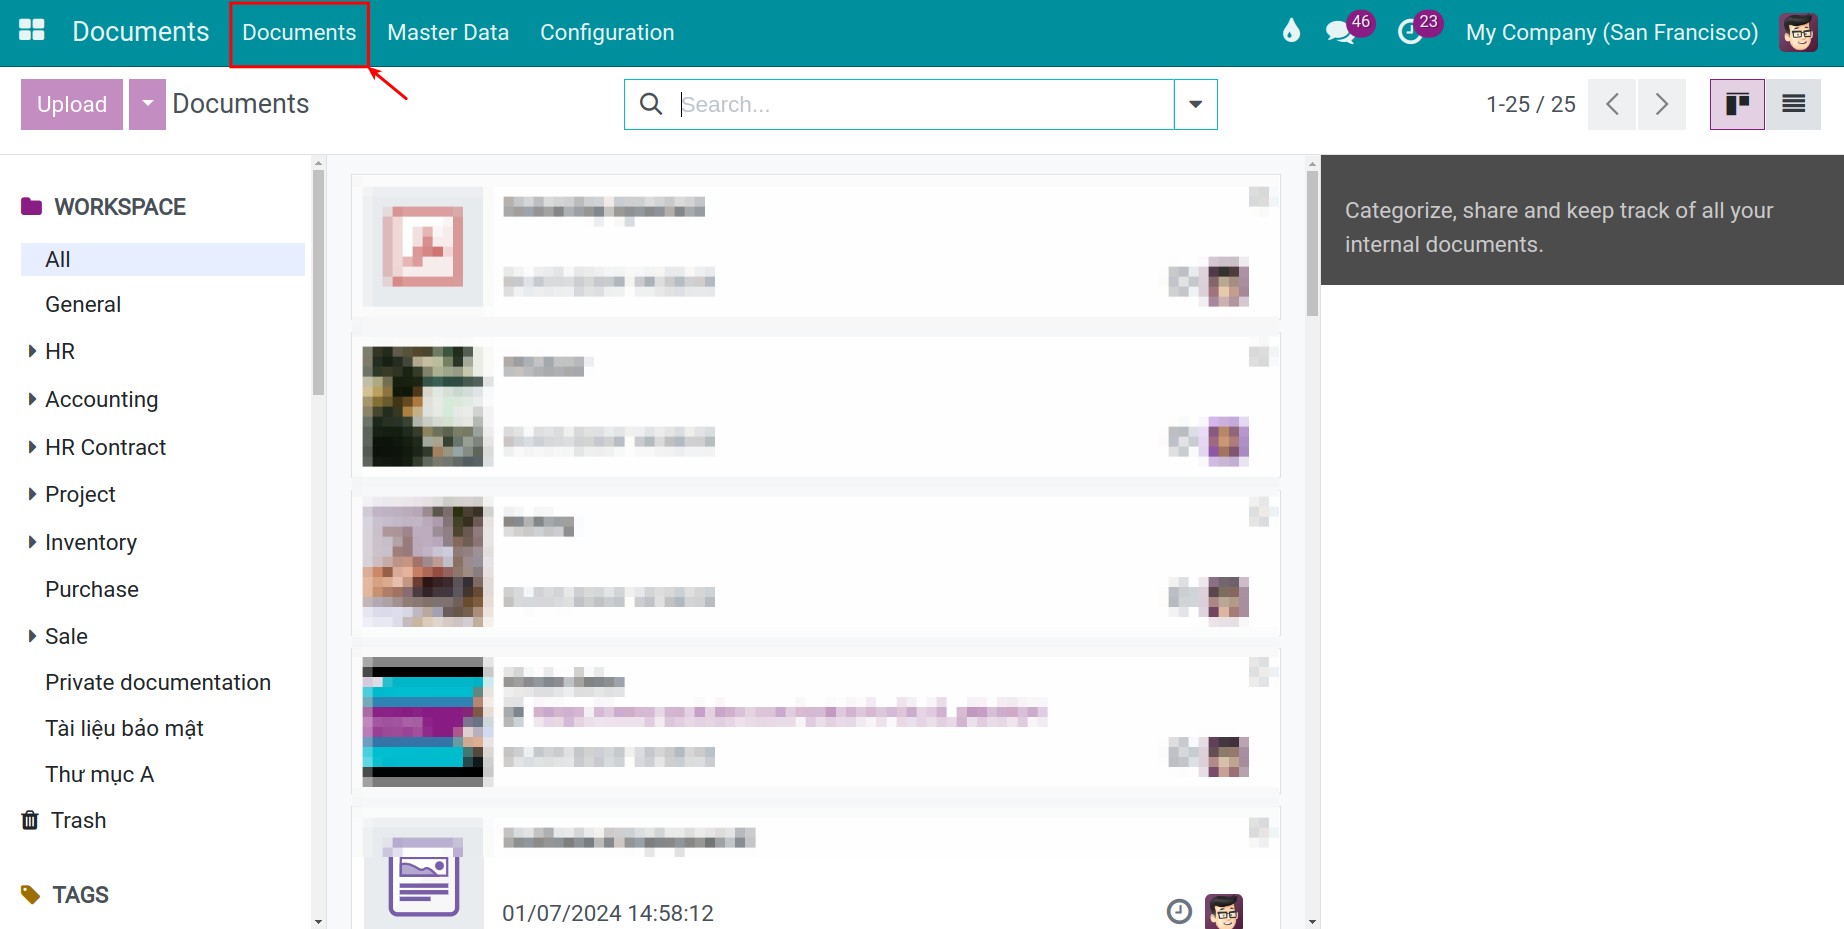
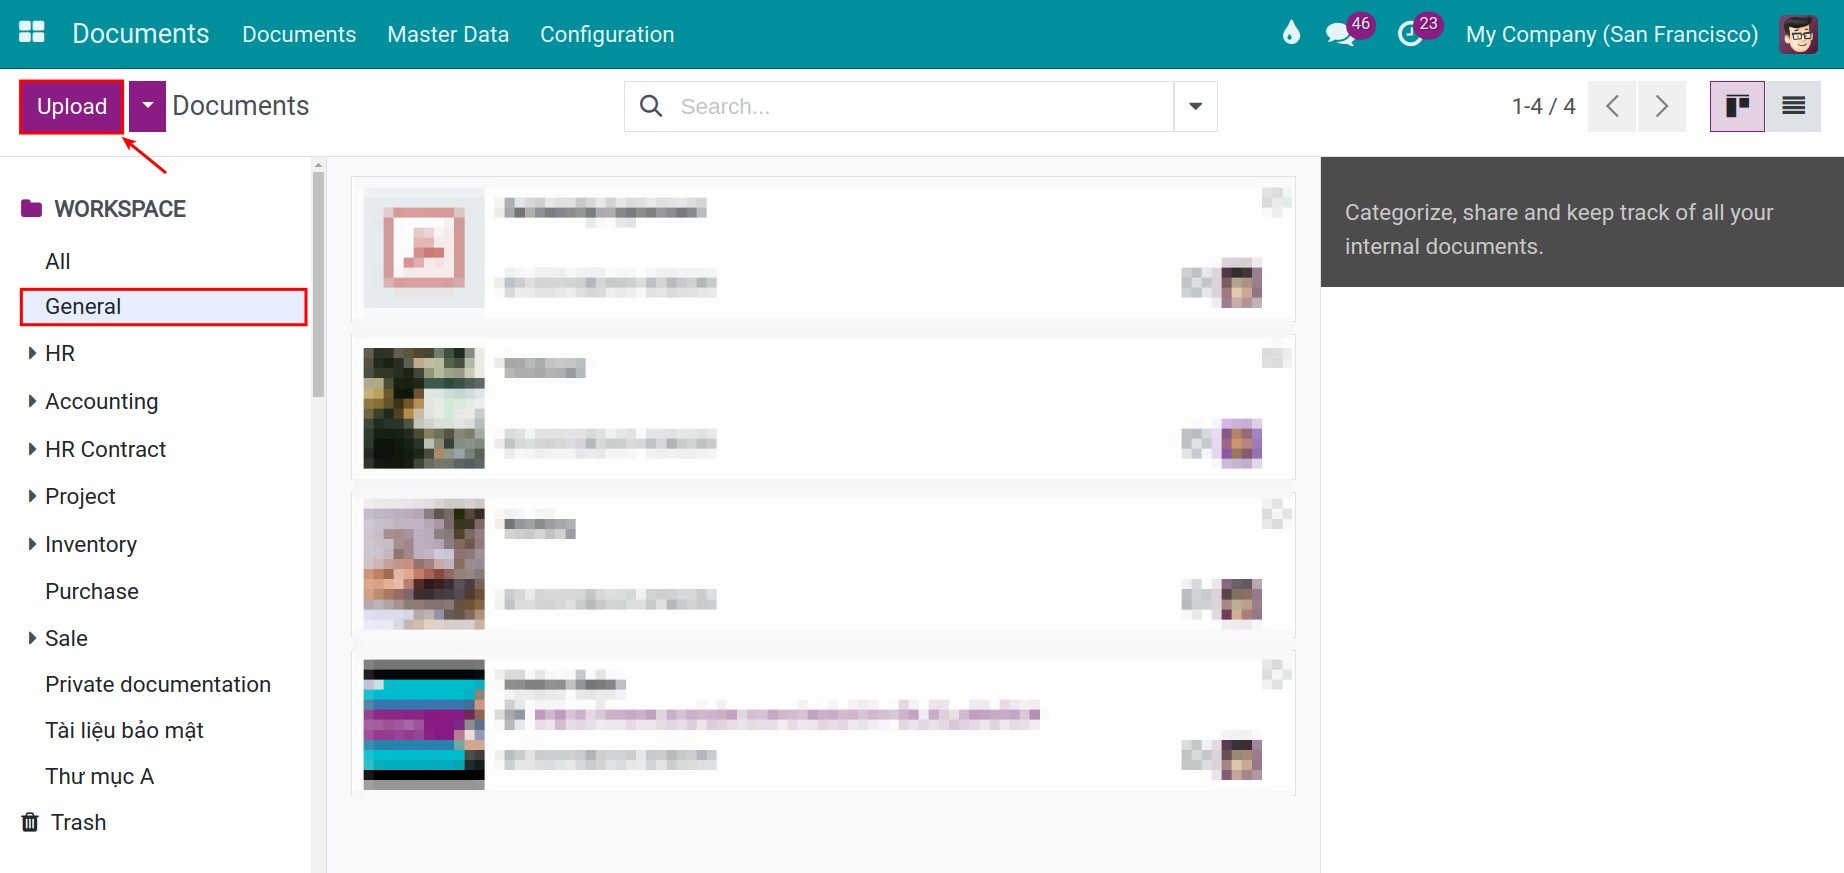
Navigate to Documents > Documents to access the documents management view.
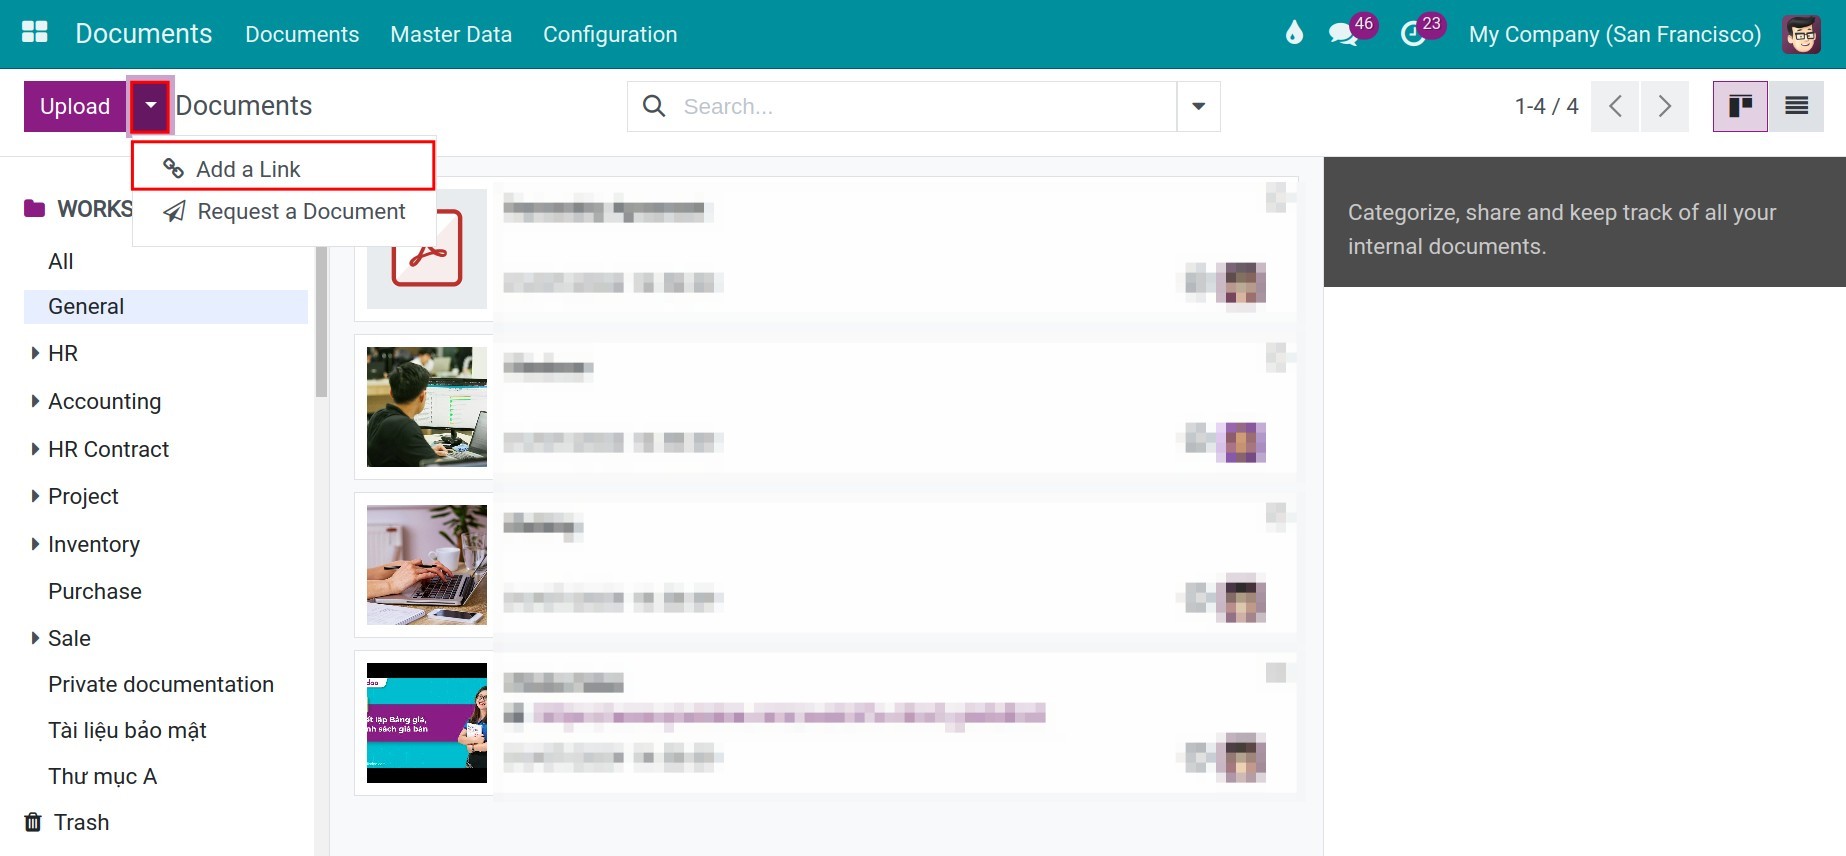
From here, select the Workspace where you want to upload documents to, which is located on the left side of the screen, then opt for one of the following options:
- Select Upload to upload documents from your computer to the system.
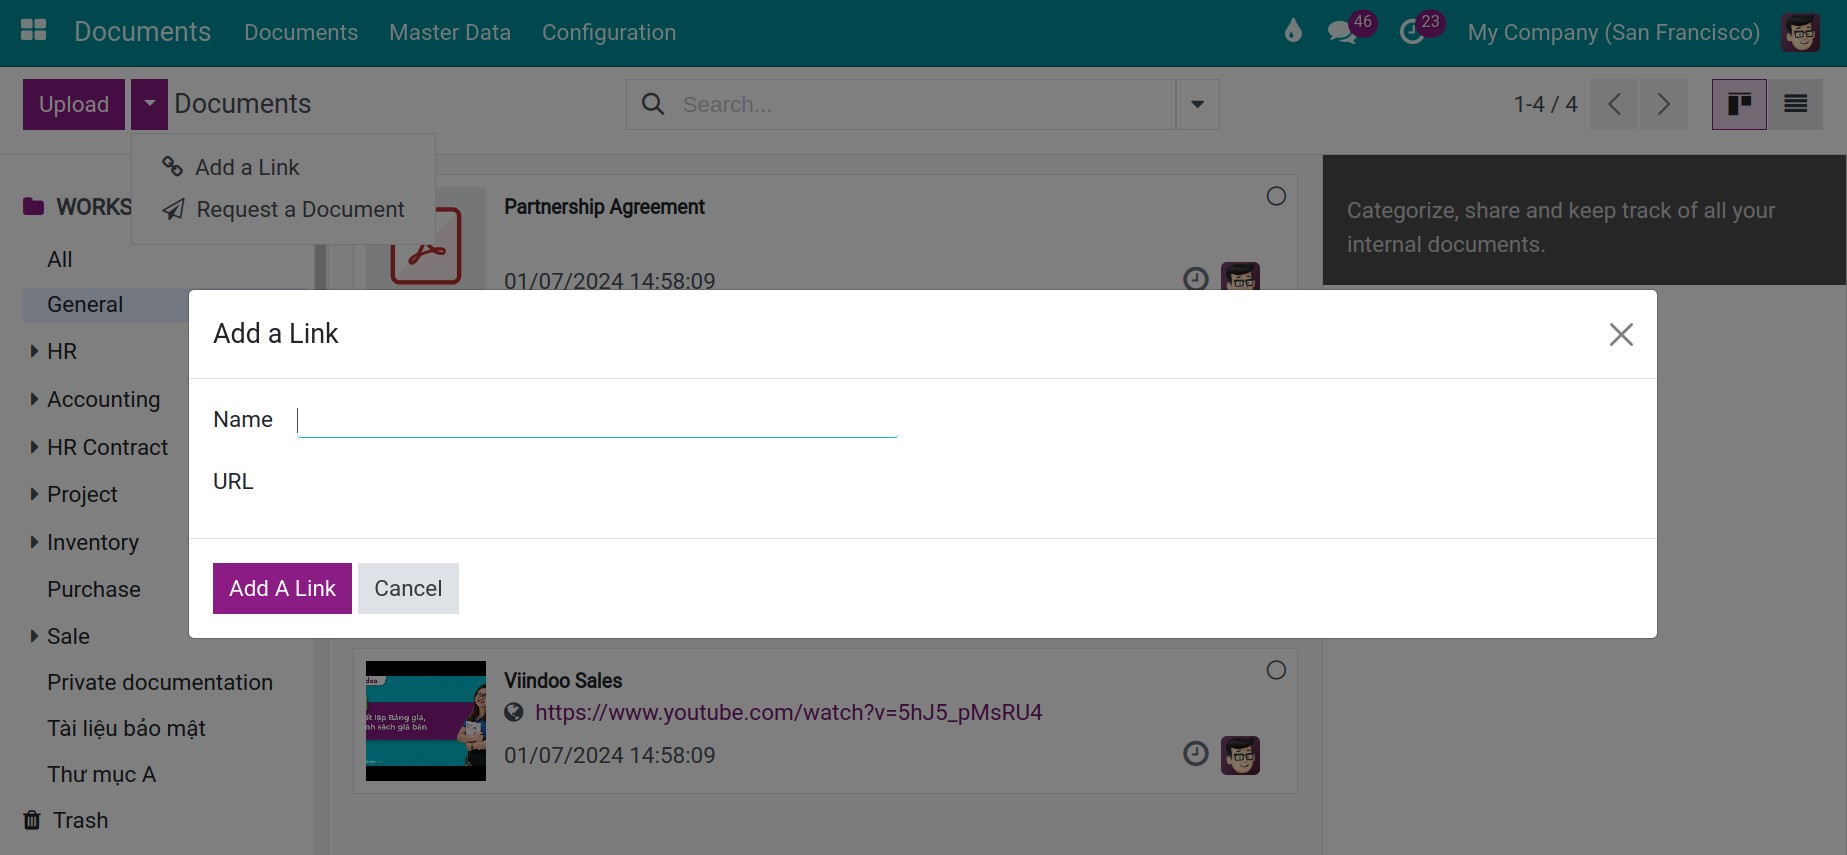
- Select Add A Link to attach documents as a link.
You will be redirected to the interface to add information for this attached link including a name and its URL. Then press Add A Link to complete the operation.
Upload documents from the chatter section of other apps
Odoo Documents app supports centralized management of attached documents scattered across chatters of other apps on a single interface. To do so, you need to set up a document generation rule which allows the synchronization of documents uploaded from other apps to the Documents app.
Mechanism to automatically create documents
Navigate to Documents > Configuration > Document Generation Rule then press New to set up a new document generation rule between the Documents app and other apps.
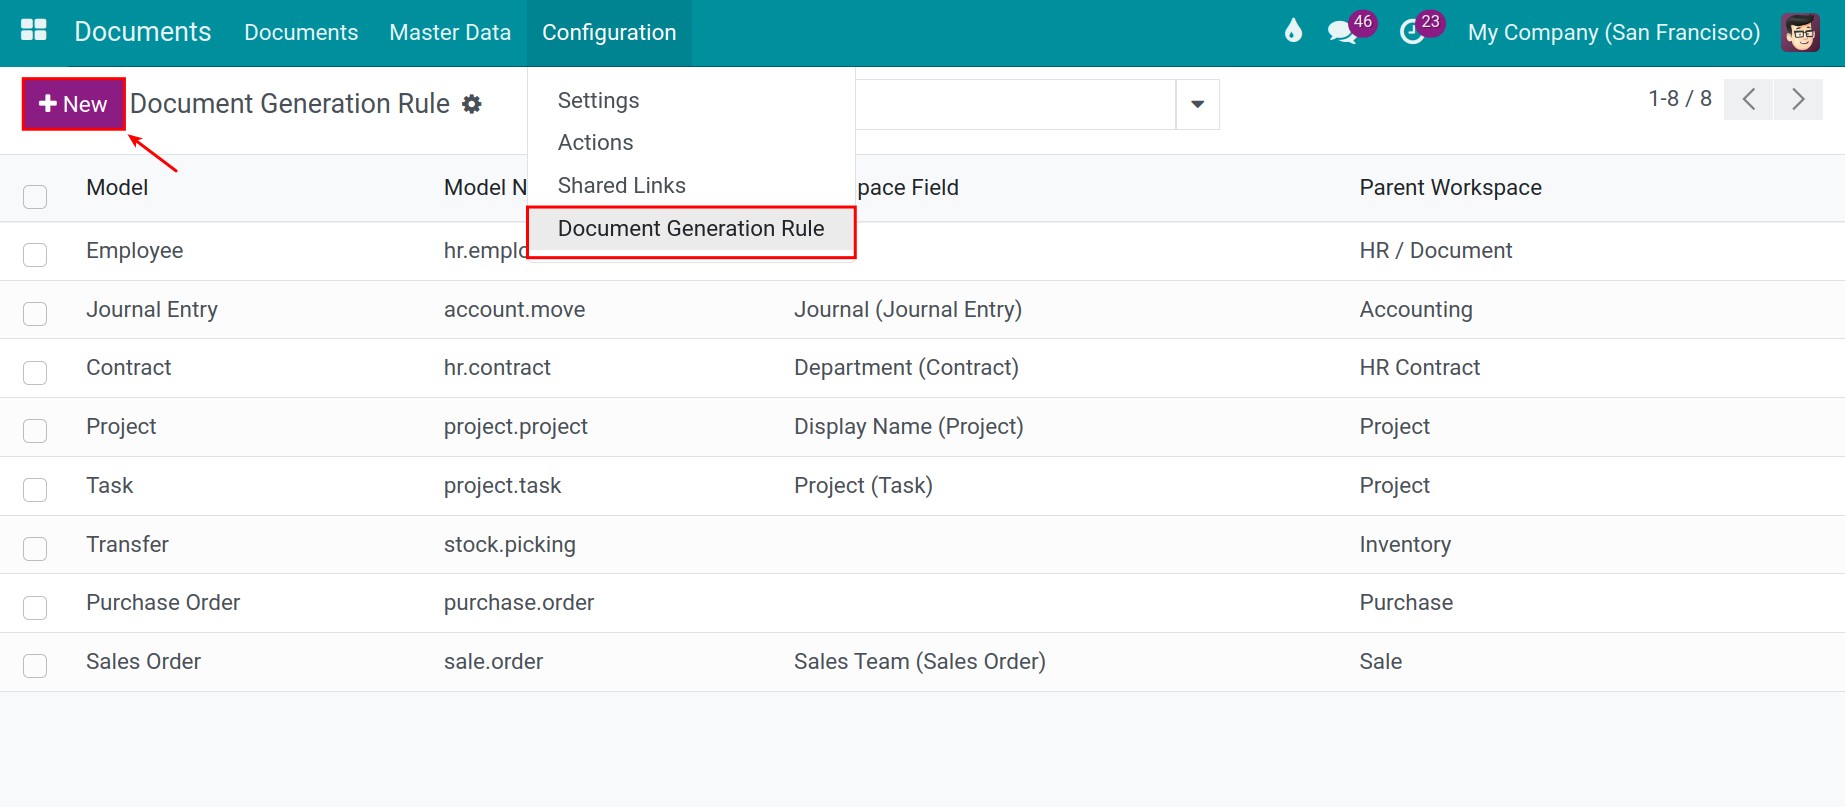
Next, insert the following information:
- Model: Select a model belonging to other apps in the system which need to be linked in order to centrally manage attached documents in the Documents app.
- Tags: Workpaces created by this generation rule will automatically have these tags attached to them.
- Workspace Field: Workspaces created by this rule will be categorized by the fields chosen from here.
- Parent Workspace: Workspaces created by this rule will be the child workspace of this chosen workspace.
- Actions tab: Press Add a line to insert new actions. Workspaces created by this rule will automatically have actions added from here.

- Access Right tab: Configure access rights for workspaces created by this rule.

Then save to store the settings.
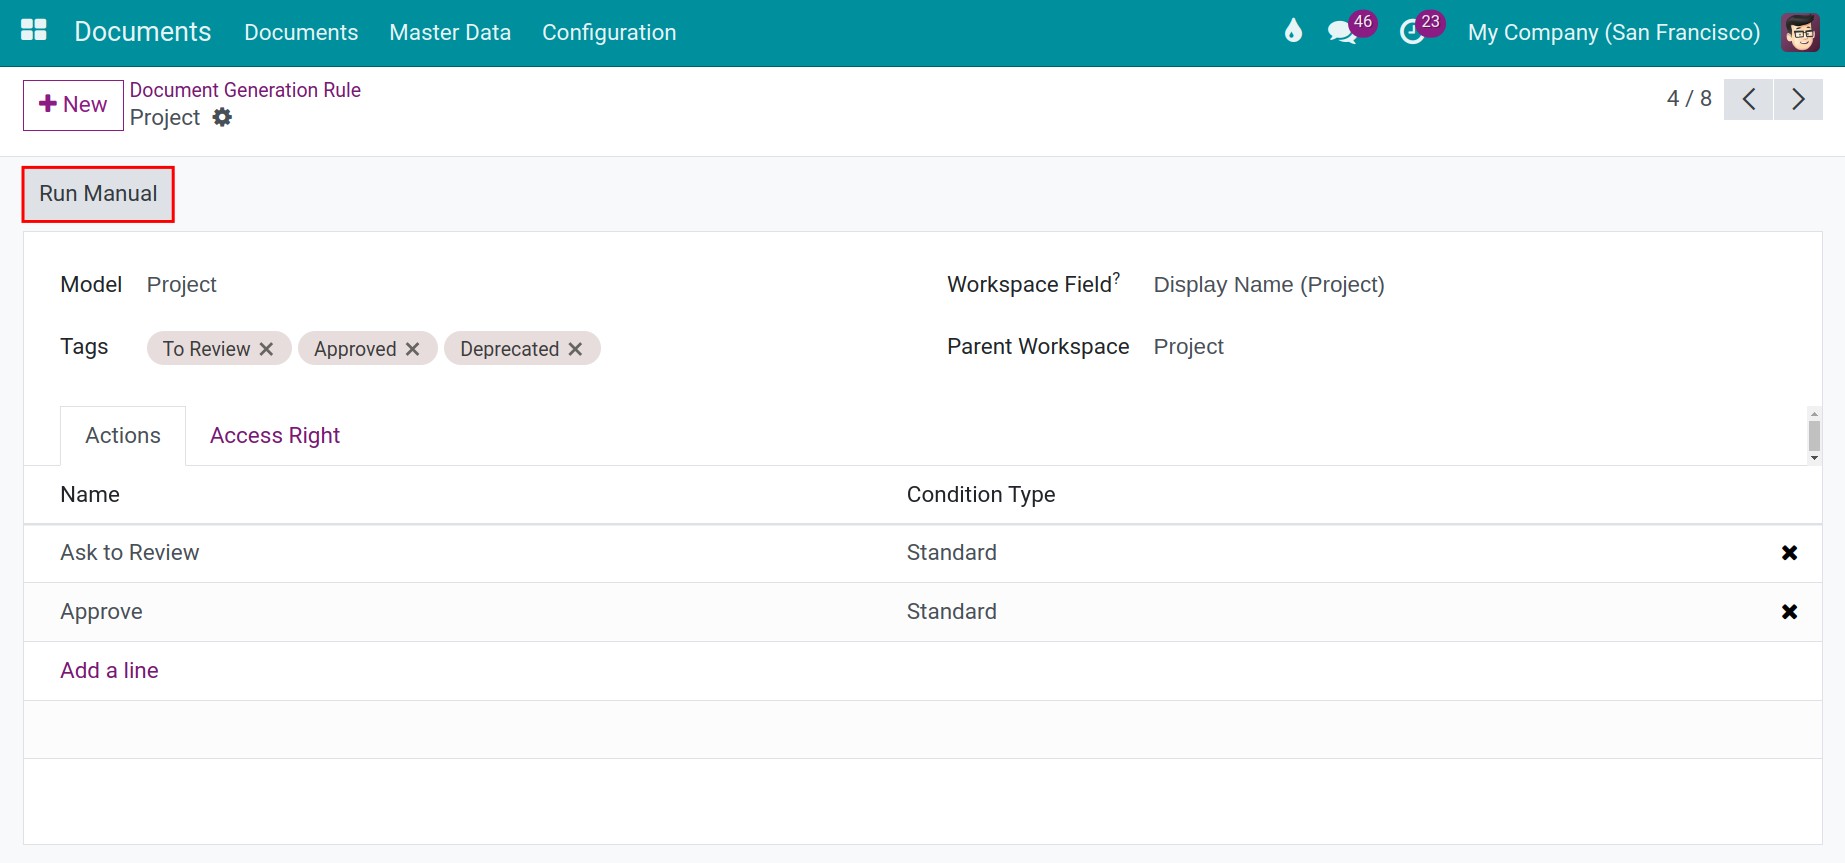
Documents uploaded from the moment the document generation rule for a certain model is created will be updated simultaneously on the Documents app. On the other hand, you can select Run Manual to update all the documents generated before the generation rule creation.
Download documents from other applications
Let’s practice with the example below to have a better understanding of this generation rule.
- Step 01: Configure a Document Generation Rule with the information below:
- Model: Select the Project model.
- Tags: To Review, Approved, Deprecated.
- Workspace Field: Name (project.project).
- Parent Workspace: Select the Project workspace.
- Actions tab: Add actions, including Ask to Review and Approve.
- Access Right tab: Set up the following project access rights:
- Readable Teams: Select the Project team.
- Writable Groups: Select the Project / Administrator group.
- Readable Groups: Select the Project / User group.
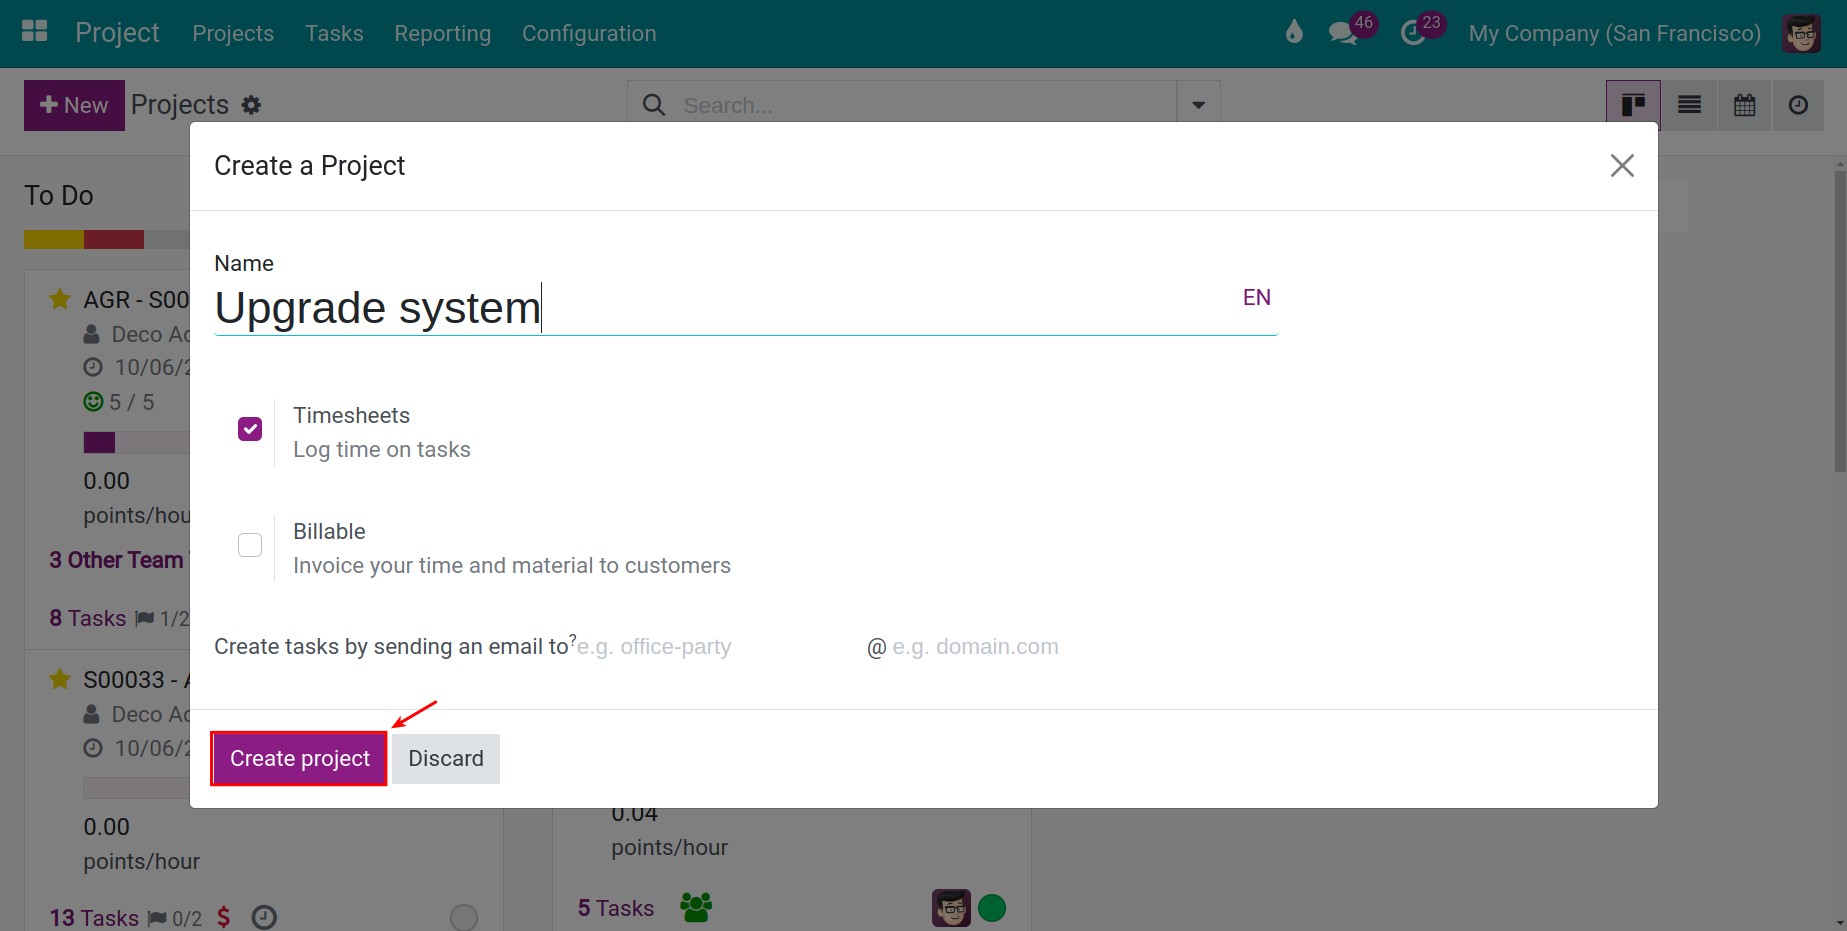
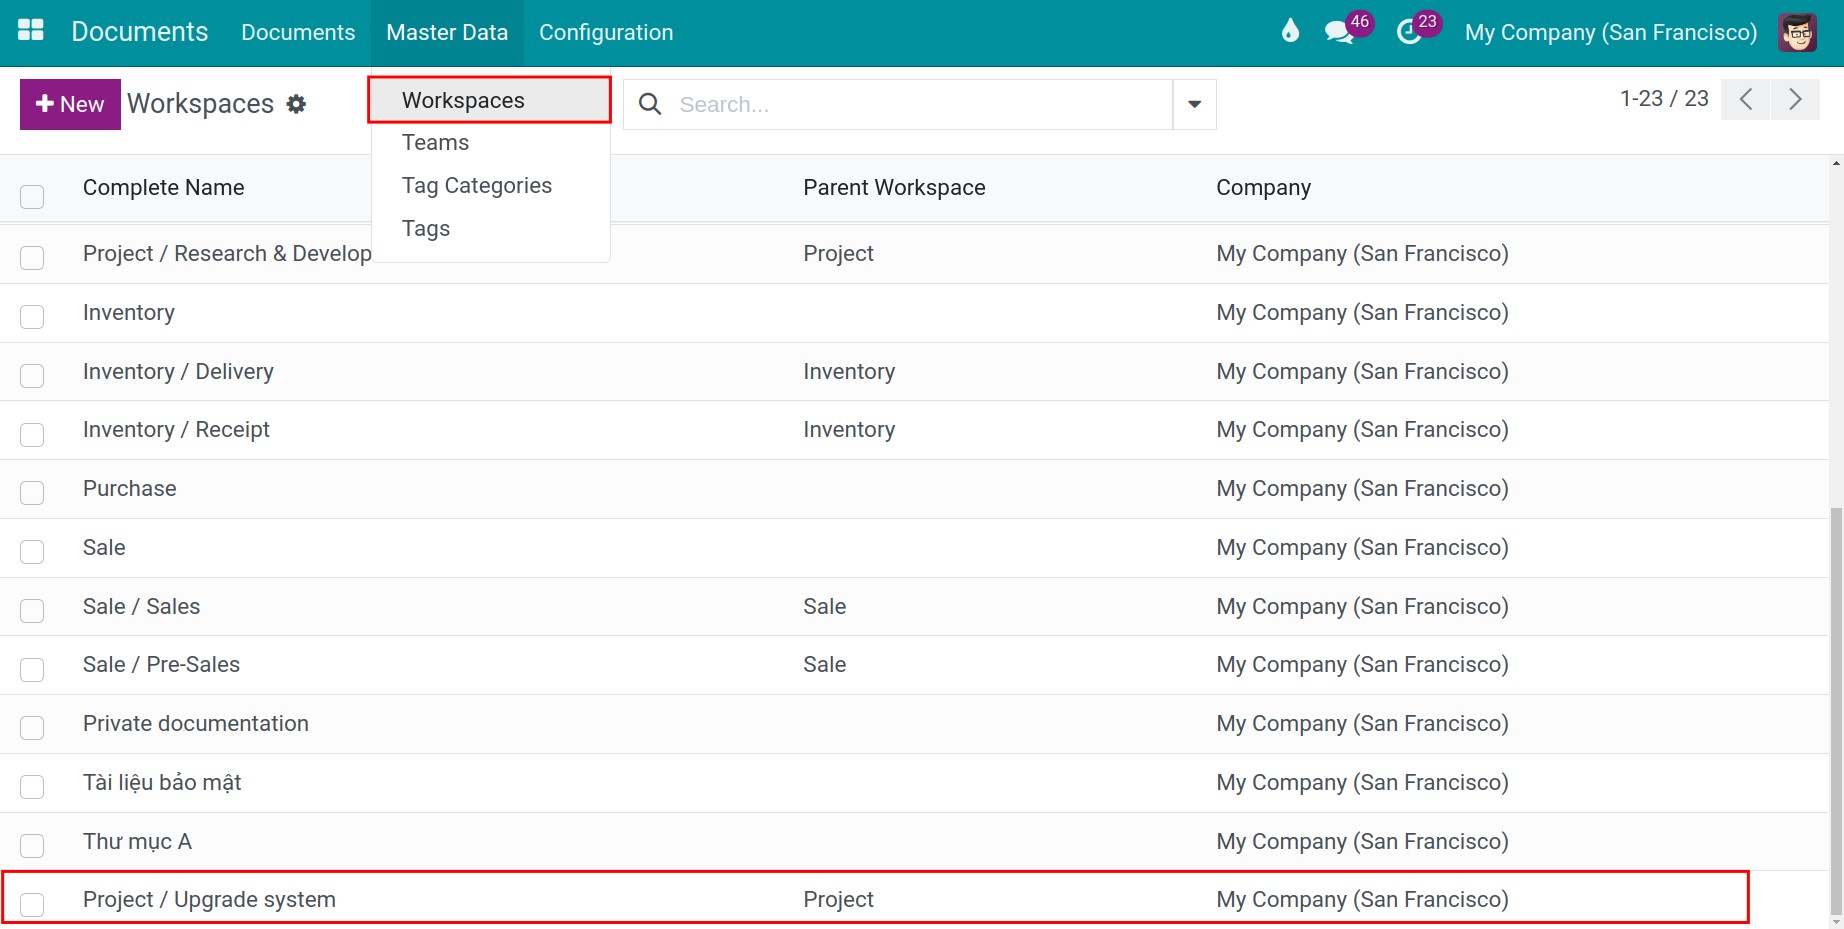
- Step 02: Navigate to Project > Project and select New to set up a new project named Upgrade system.
- Step 03: On the newly created project view, choose the pin icon and Add attachments to attach new documents to this project.
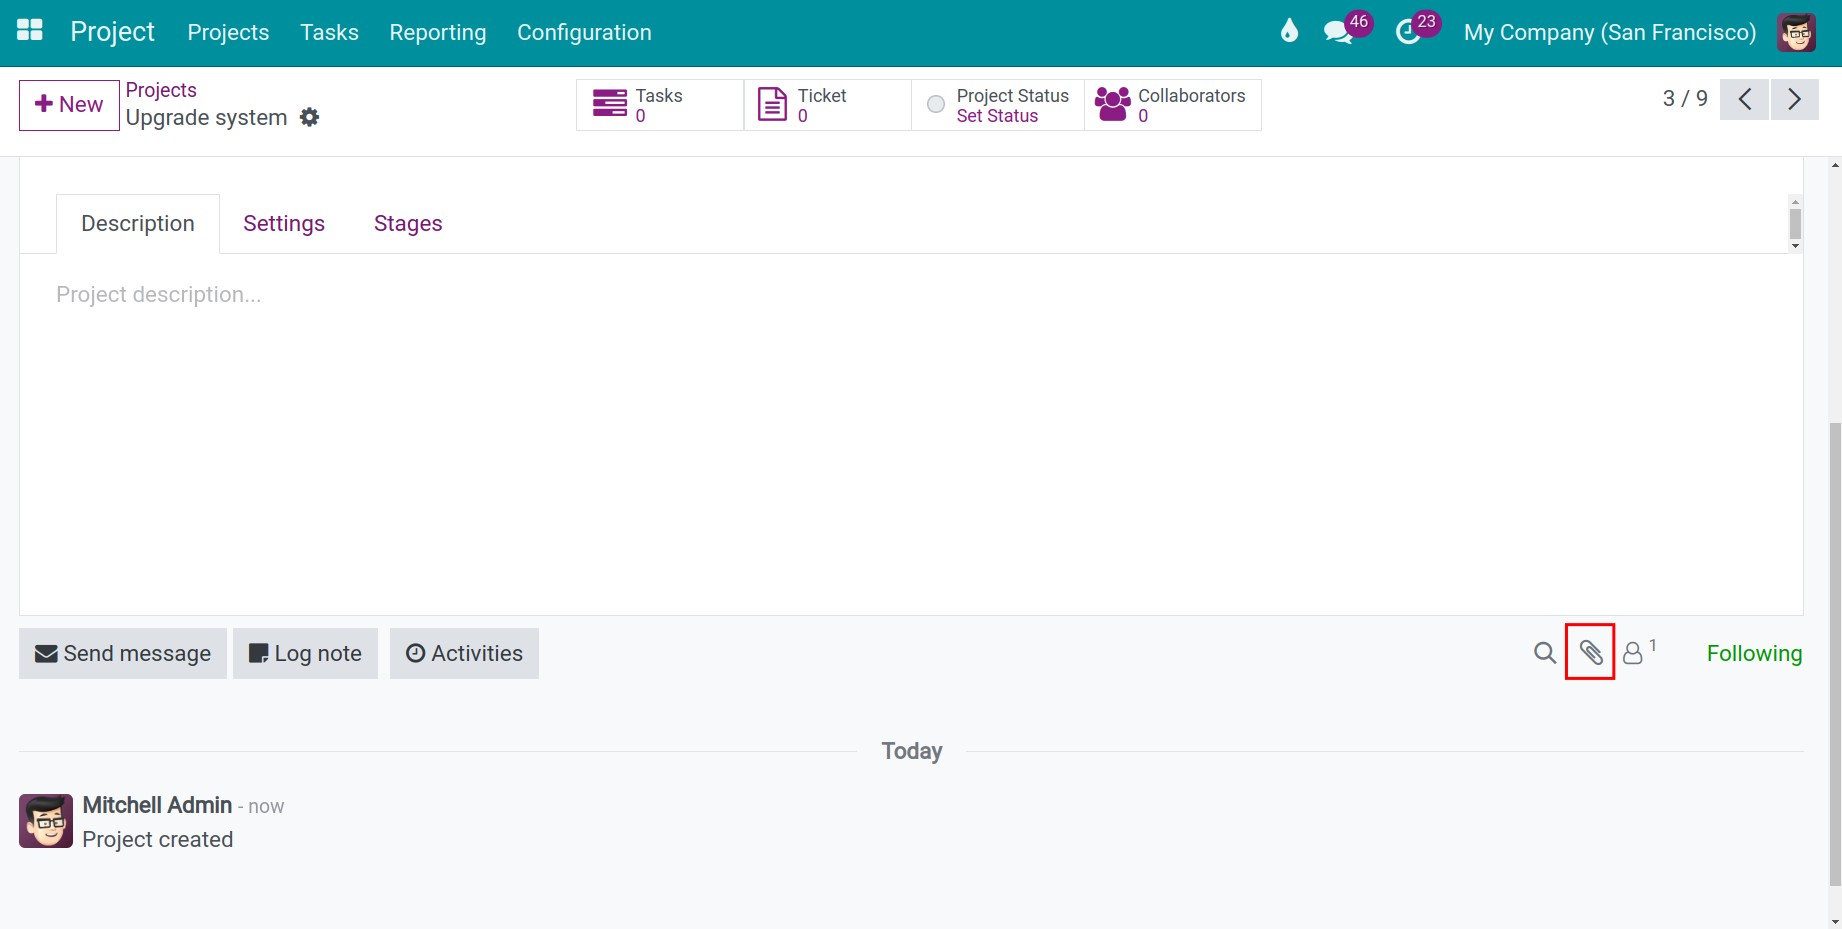
You can navigate to the Document icon on the project view to search for attached documents.
- Step 04: Review all the workspaces and documents automatically updated on the Documents app by the previously configured rule.
When the first document of this project is attached, the workspace of that document on the Documents app is also created. Navigate to Documents > Master Data > Workspaces to search for this workspace.
Information of this workspace is also pre-configured following the settings on the Document Generation Rule.
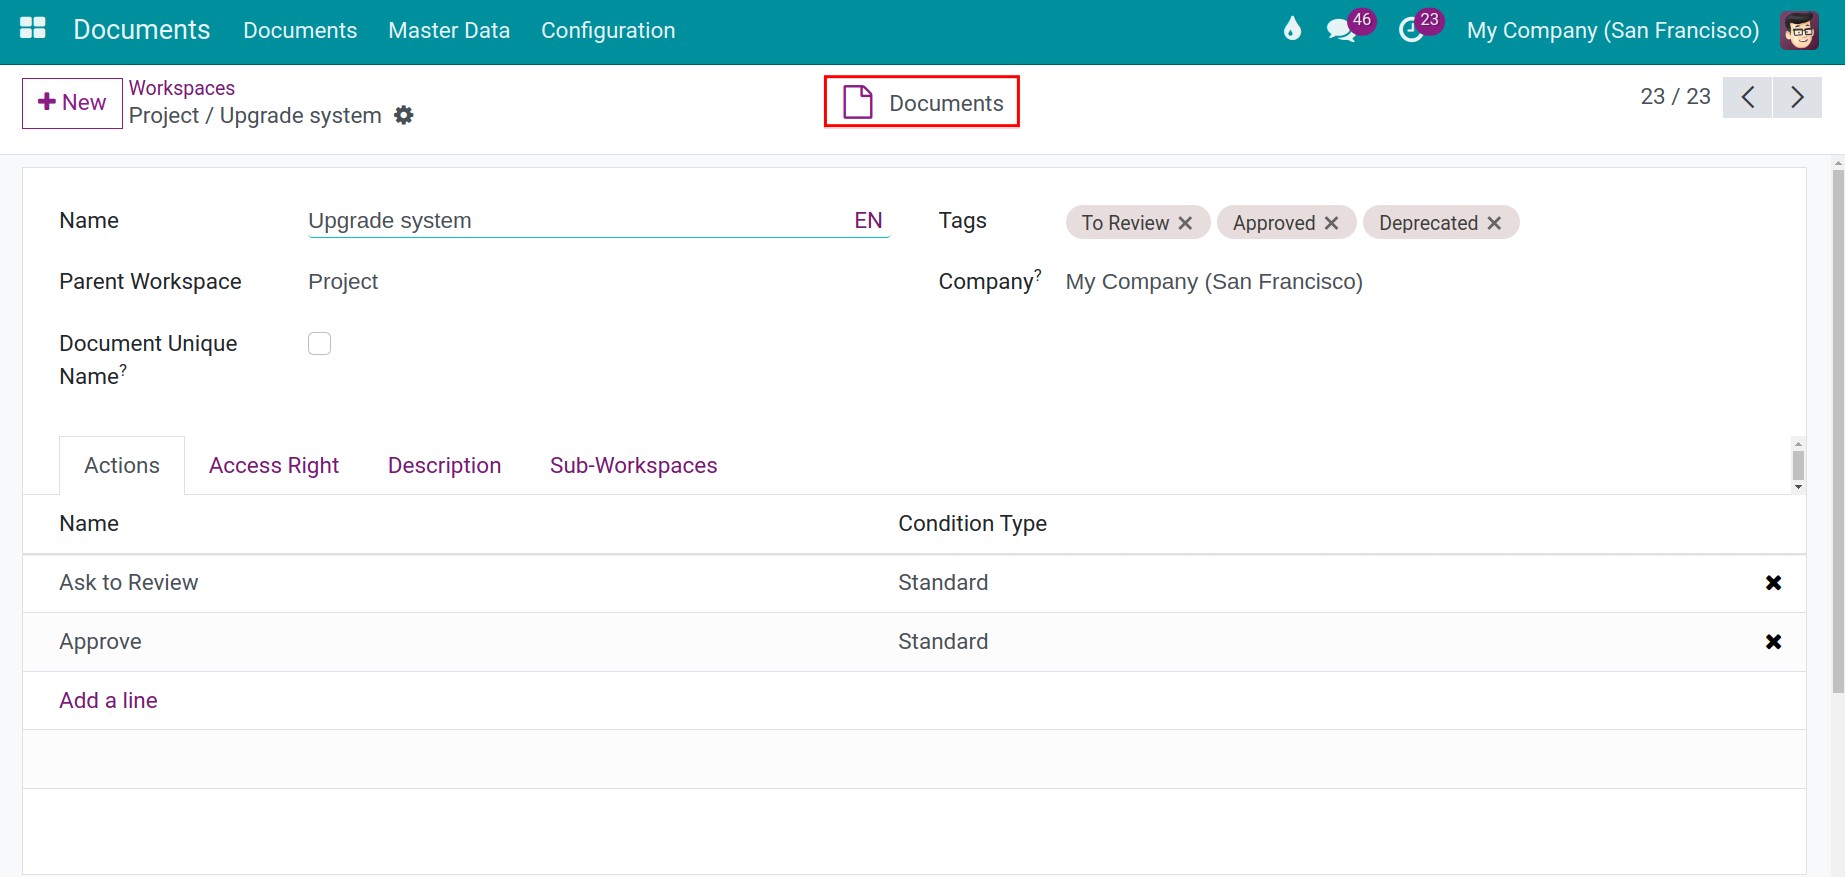
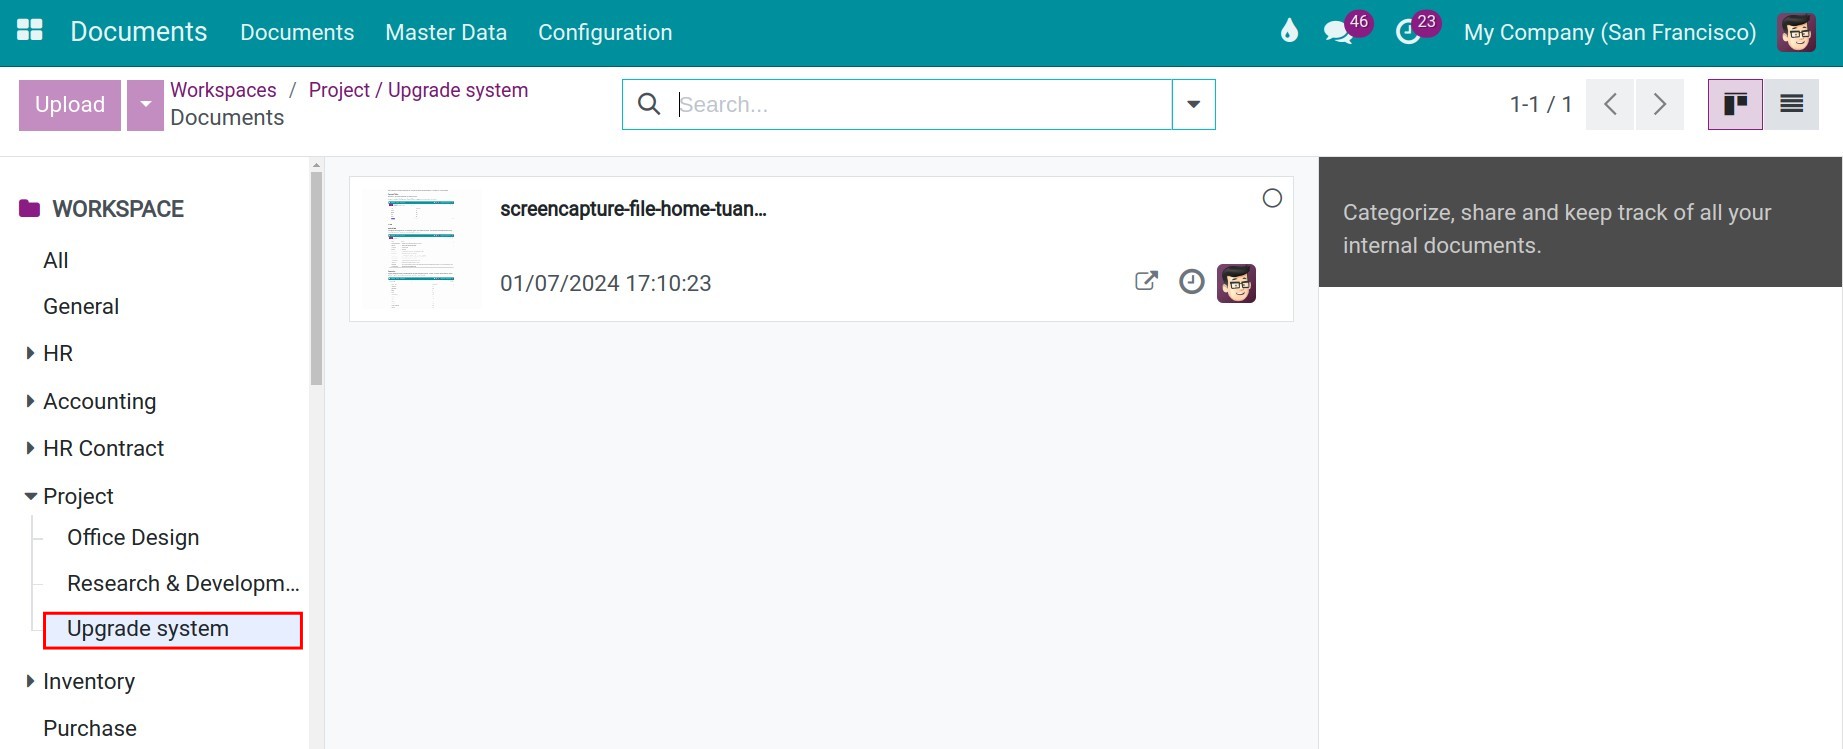
From here, you can also navigate to the Documents icon to view all the attached documents.
Besides, you can navigate to Documents > Documents to view information on workspaces and documents of the newly created project.
See also
Related articles
- How to share documents in Odoo
- How to search document in Odoo
- Document approval
- The status of the document
Optional modules
- Documents - Project
- Documents - HR
- Documents - Accounting
- Documents - Payroll
- Documents - Sale
Create and authorize document workspaces
Create and authorize document workspaces
Requirements
This tutorial requires the installation of the following applications/modules:
- Documents Management
Create a documents workspace/folder
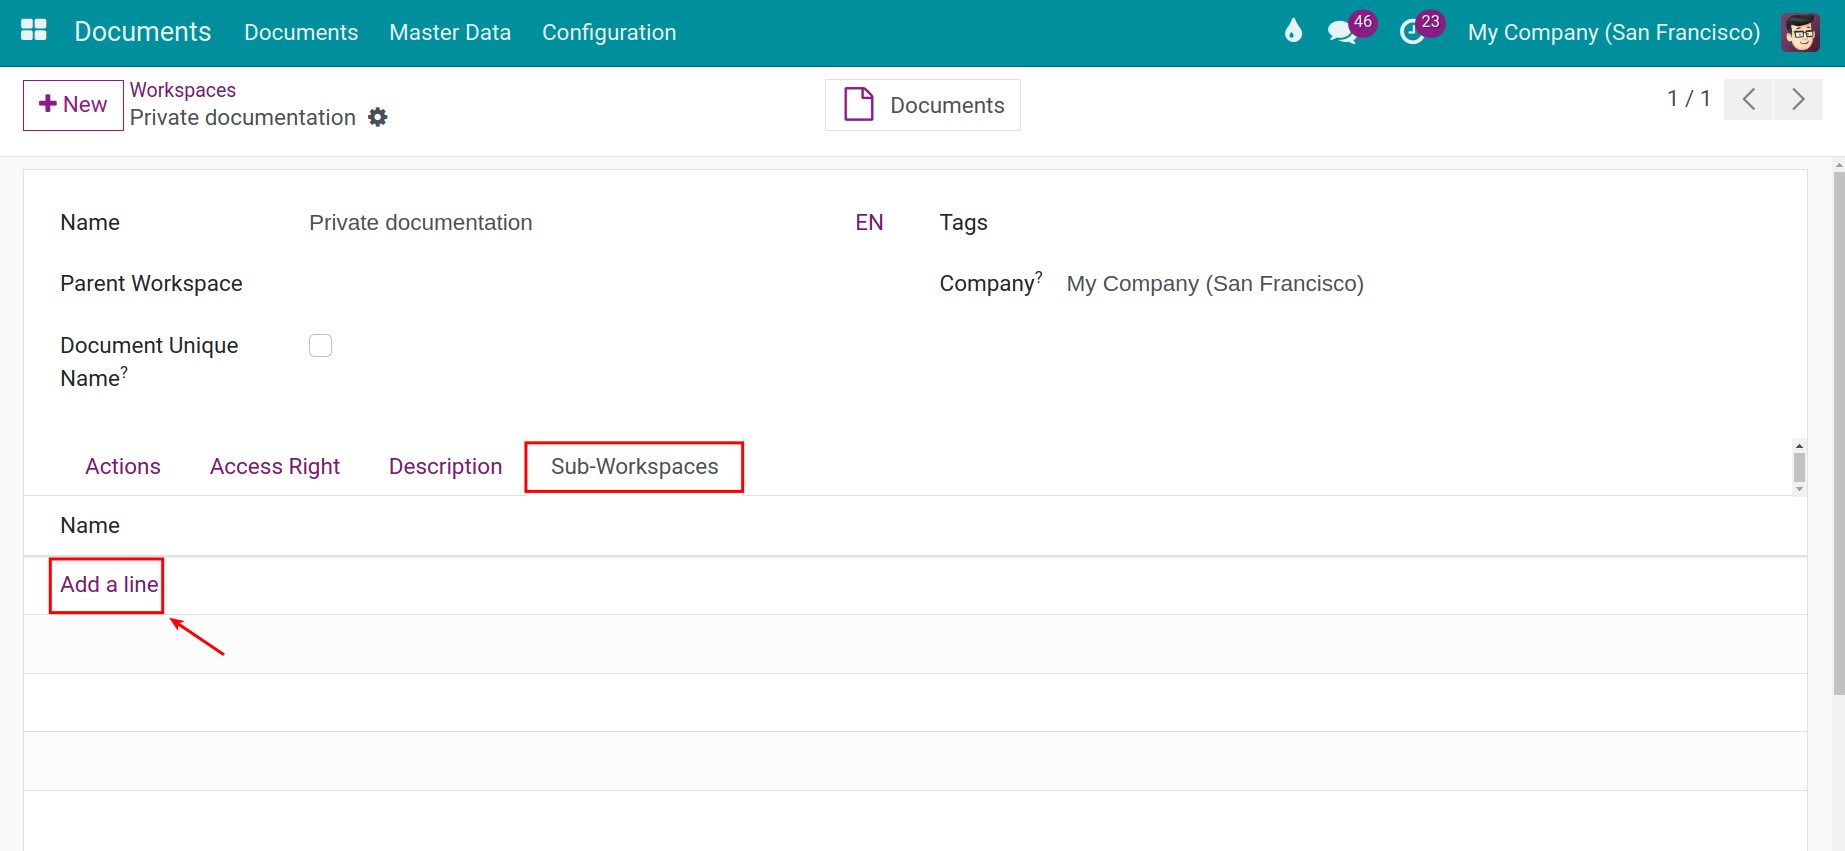
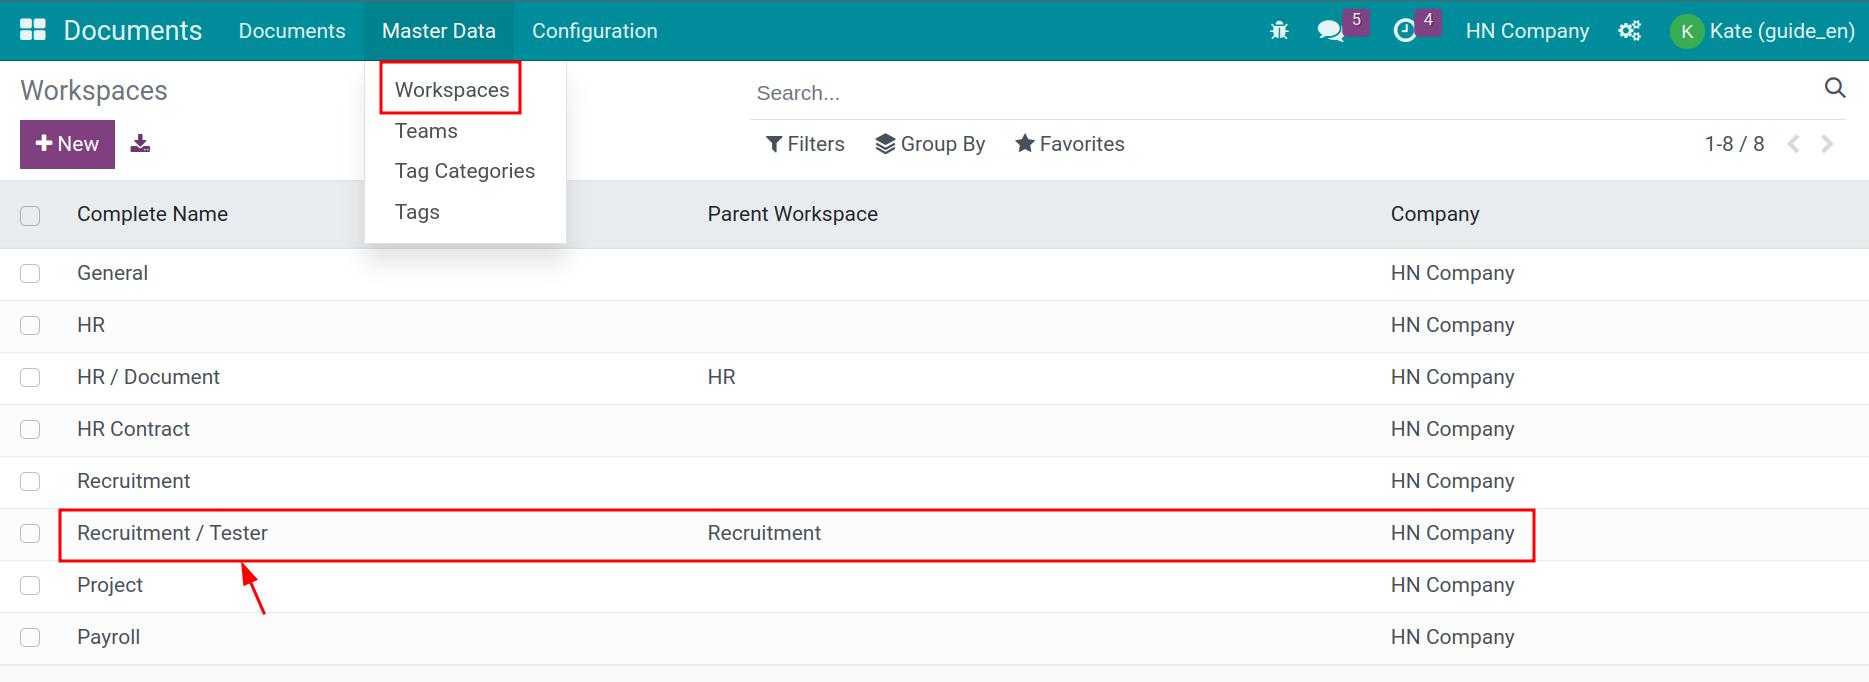
To create a new workspace, navigate to Master Data > Workspaces > New.

In which:
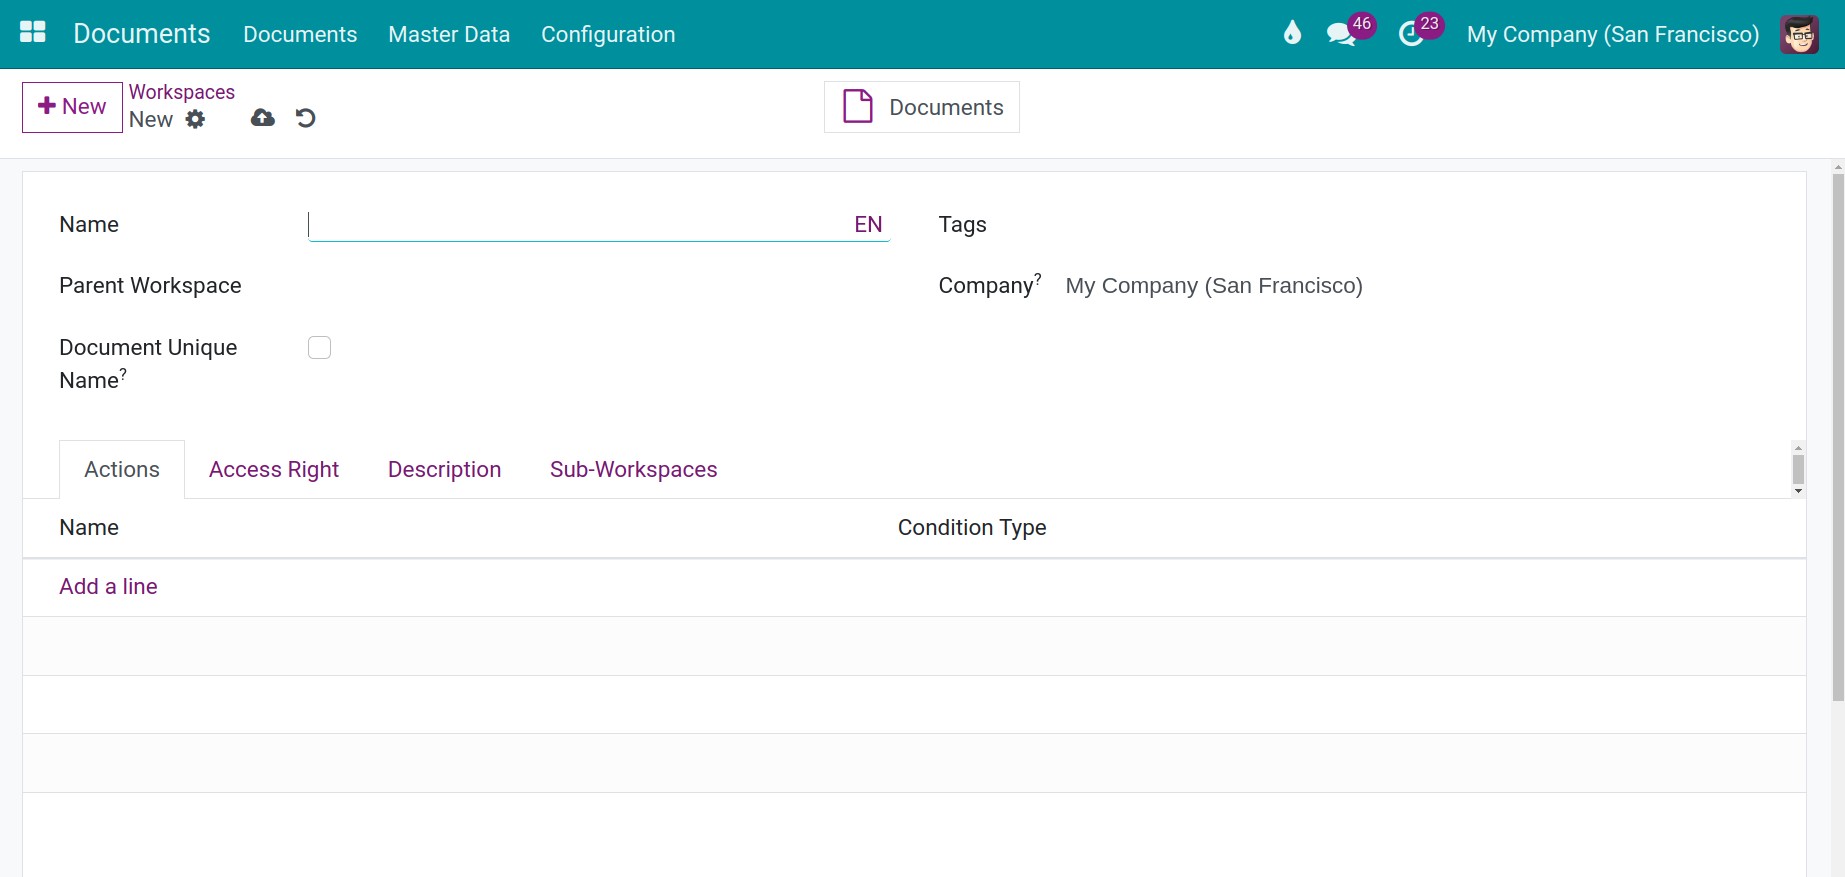
- Name: Choose a name for this workspace.
- Tags: Add tags to categorize this documents workspace.
- Parent Workspace: Select the parent workspace of this workspace (if applicable).
- Document Unique Name: If enabled, documents in this workspace cannot have duplicated name.
With parent workspace, its sub-workspaces will be listed in the Sub-Workspaces tab.
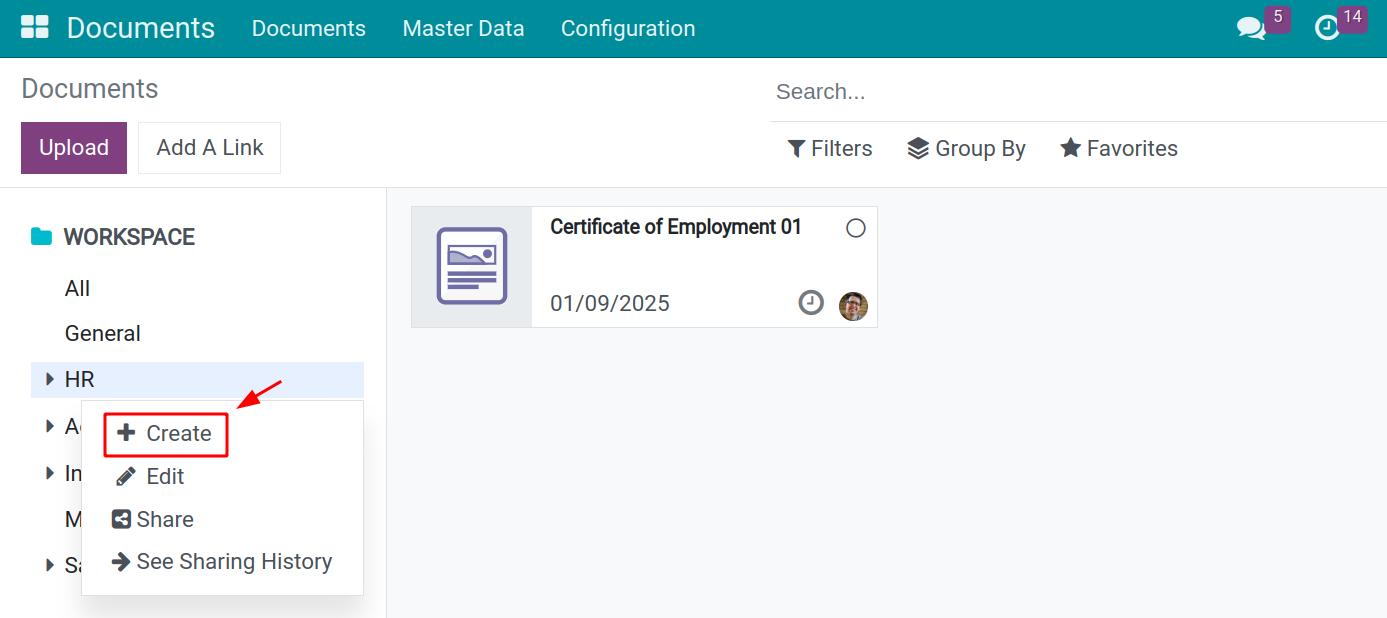
You can also quickly create a new sub-folder inside an existing folder by clicking on the Configuration button on that folder and press Create.
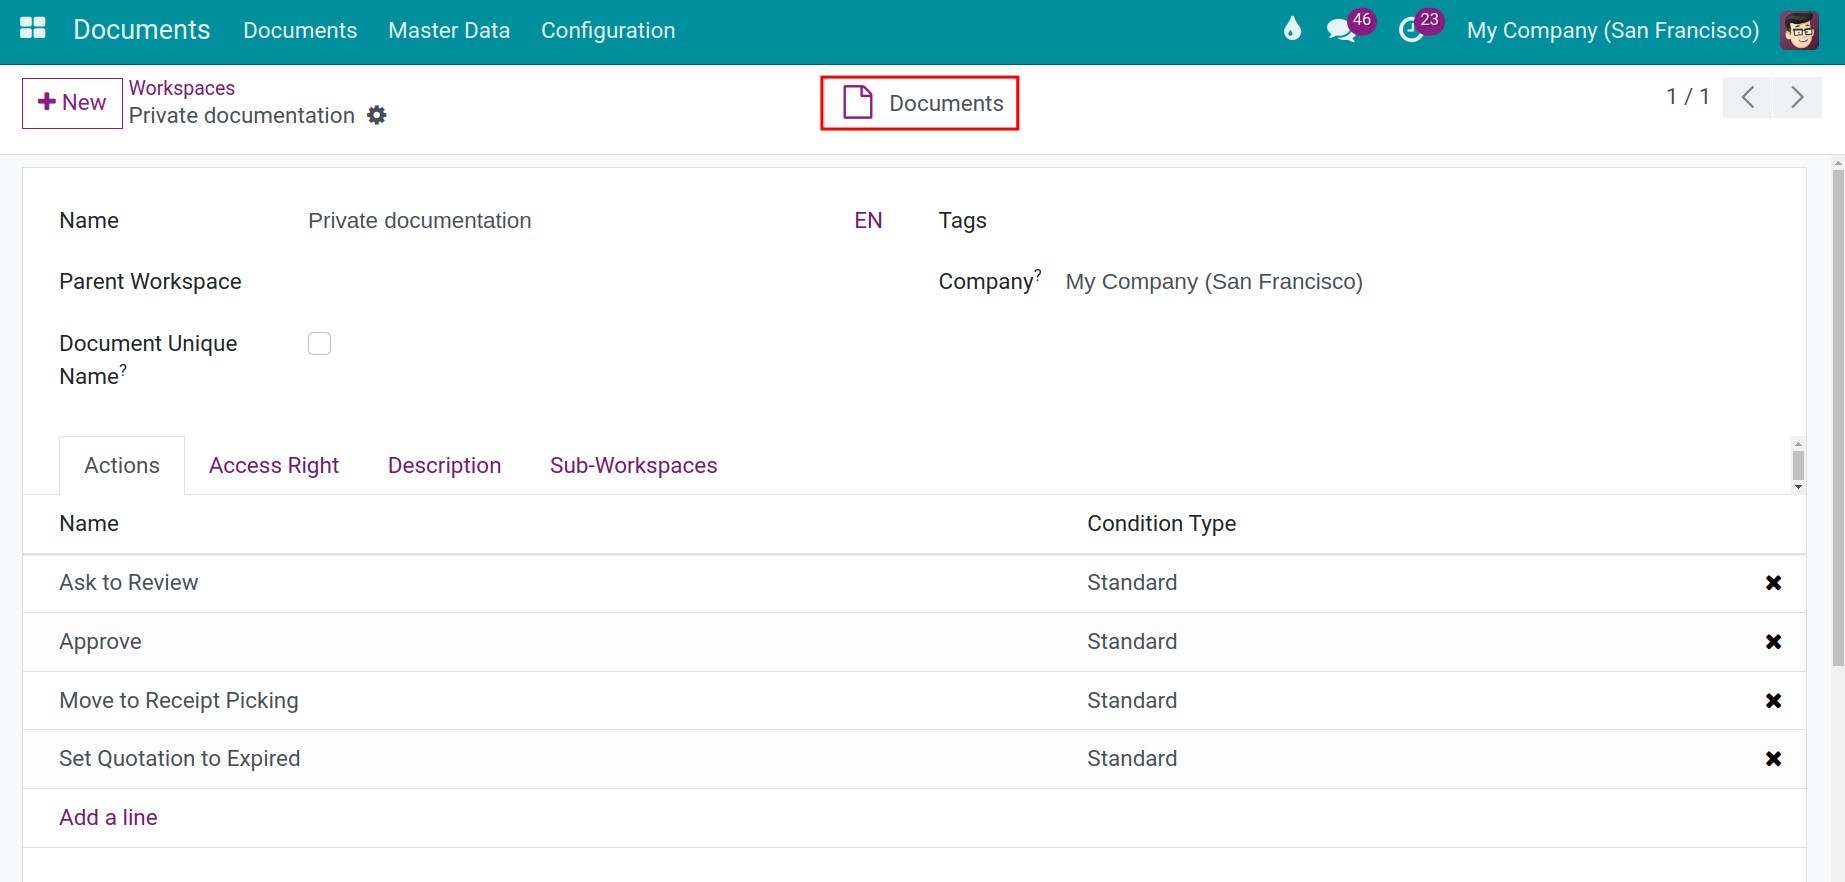
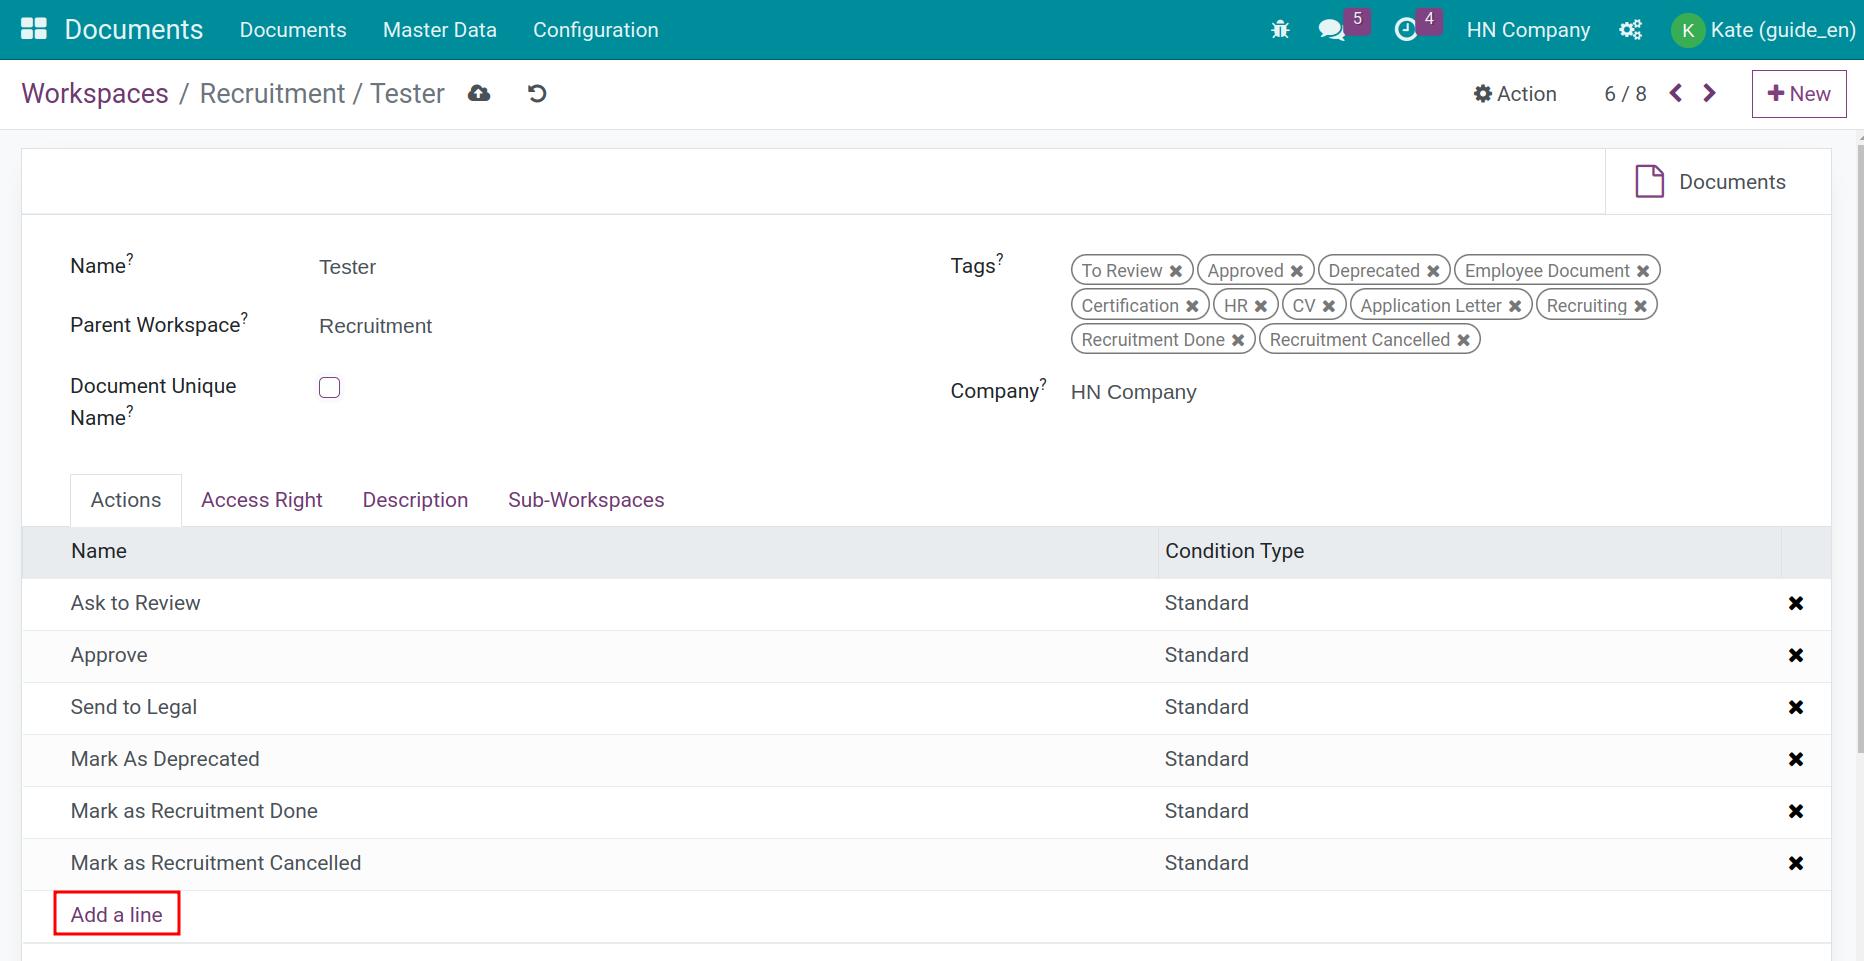
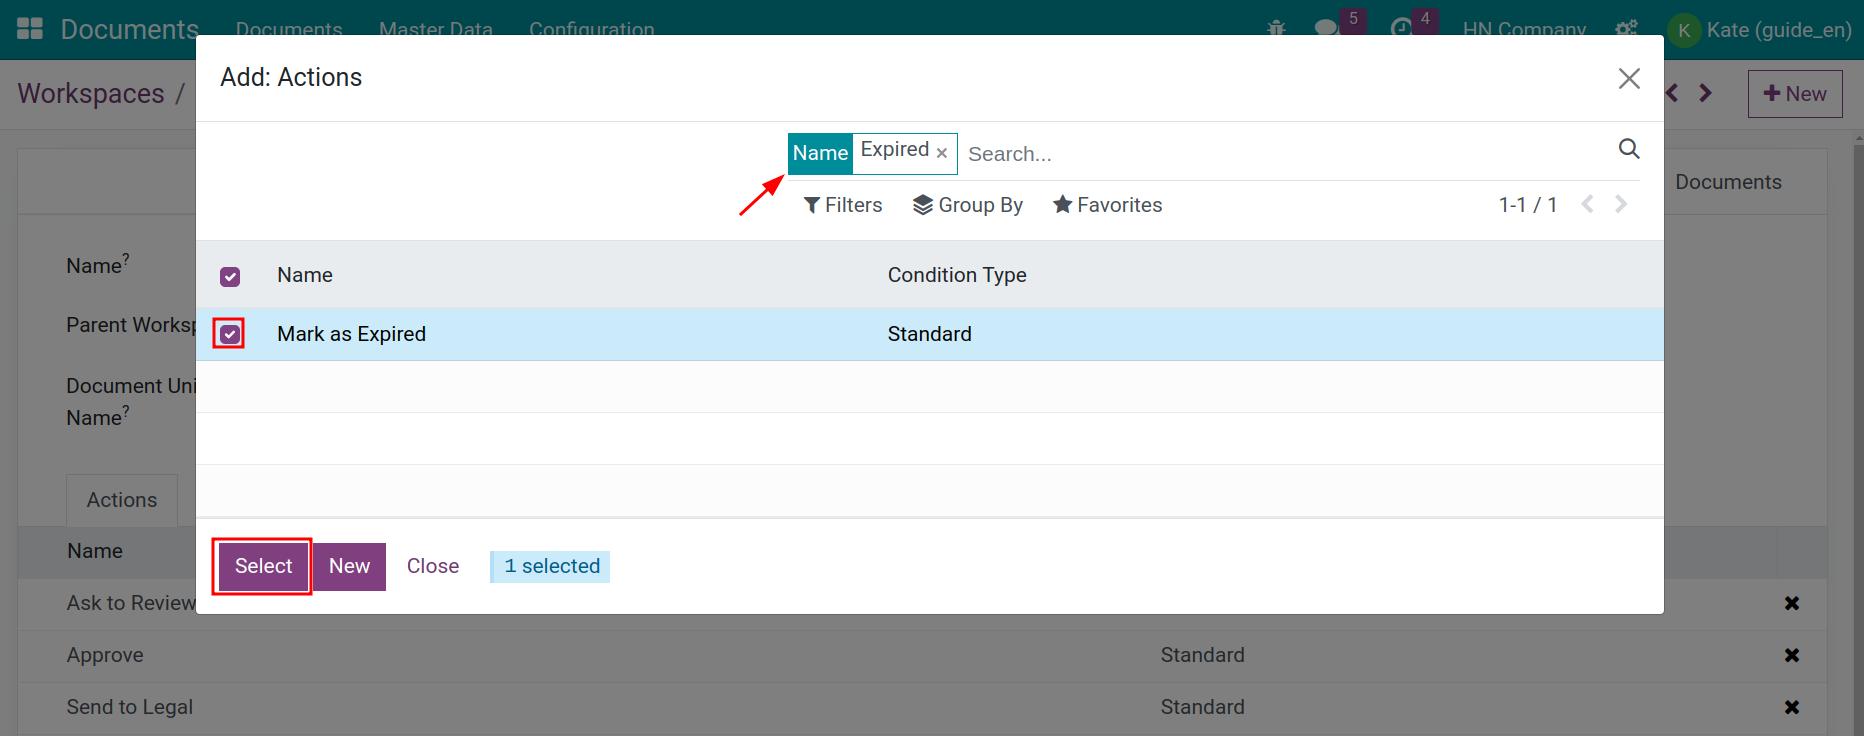
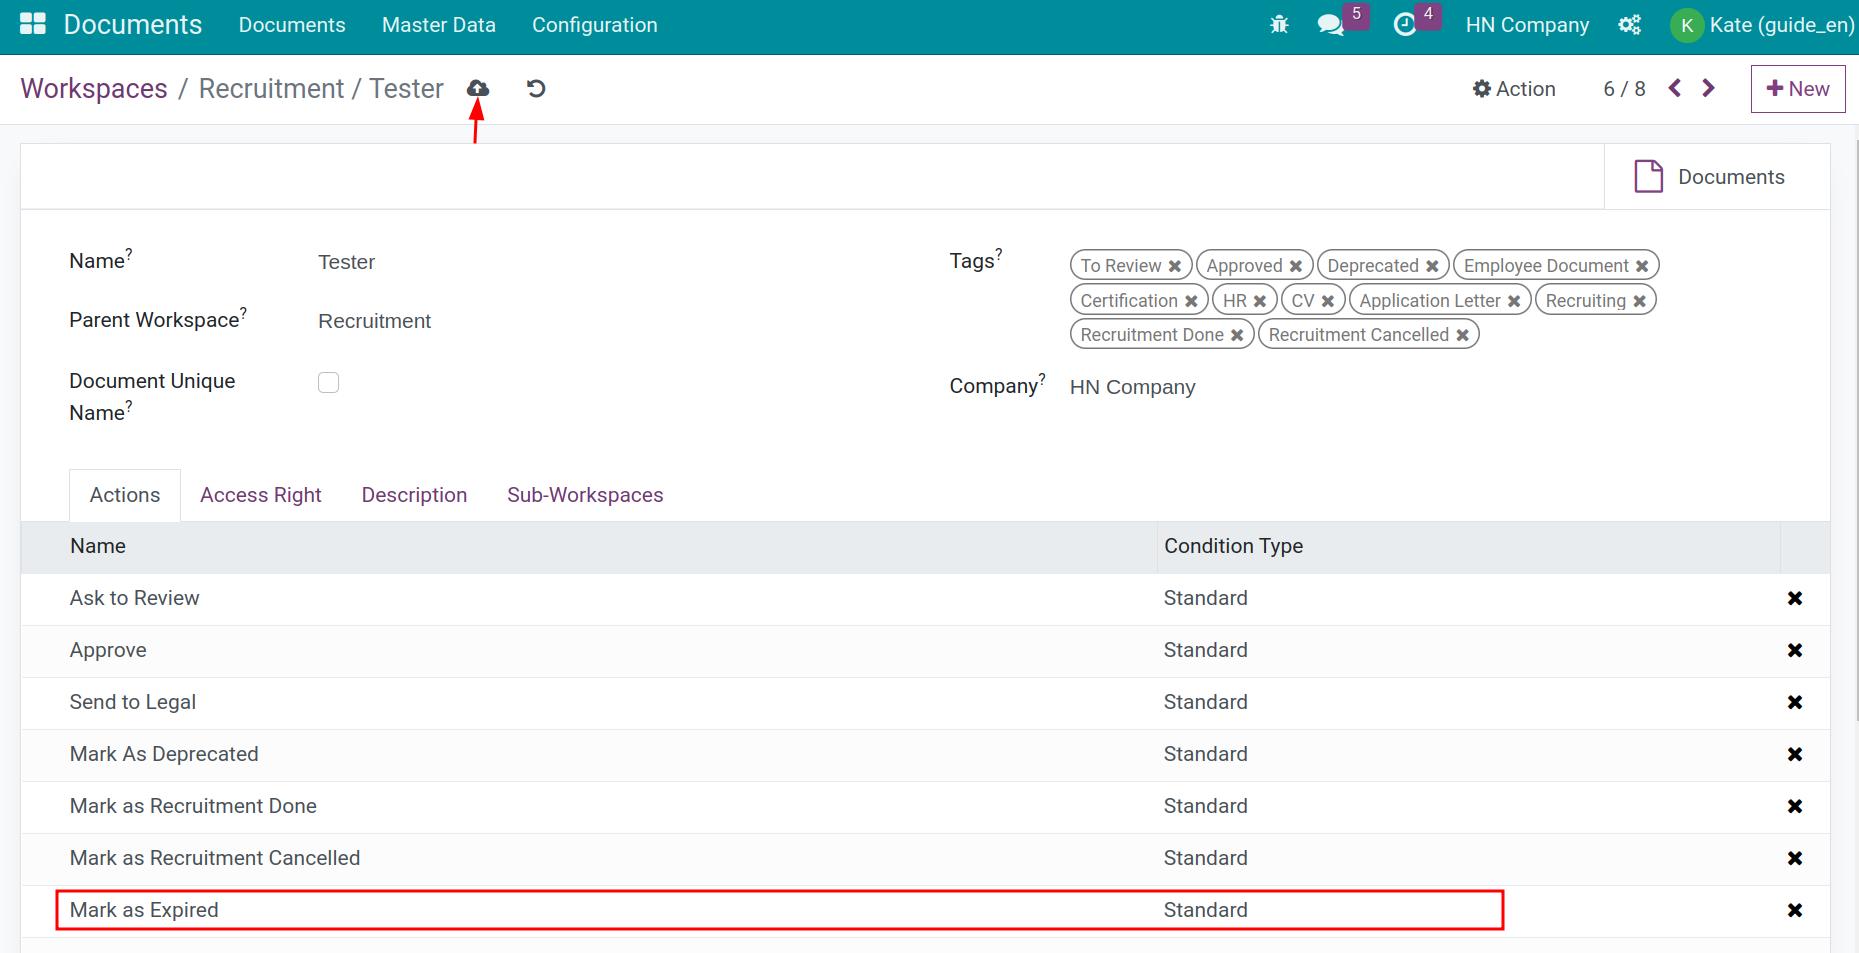
Configure actions for a workspace
To add an action for documents in a workspace, navigate to the Actions tab, press Add a line and select an action from the available list or create a new one.
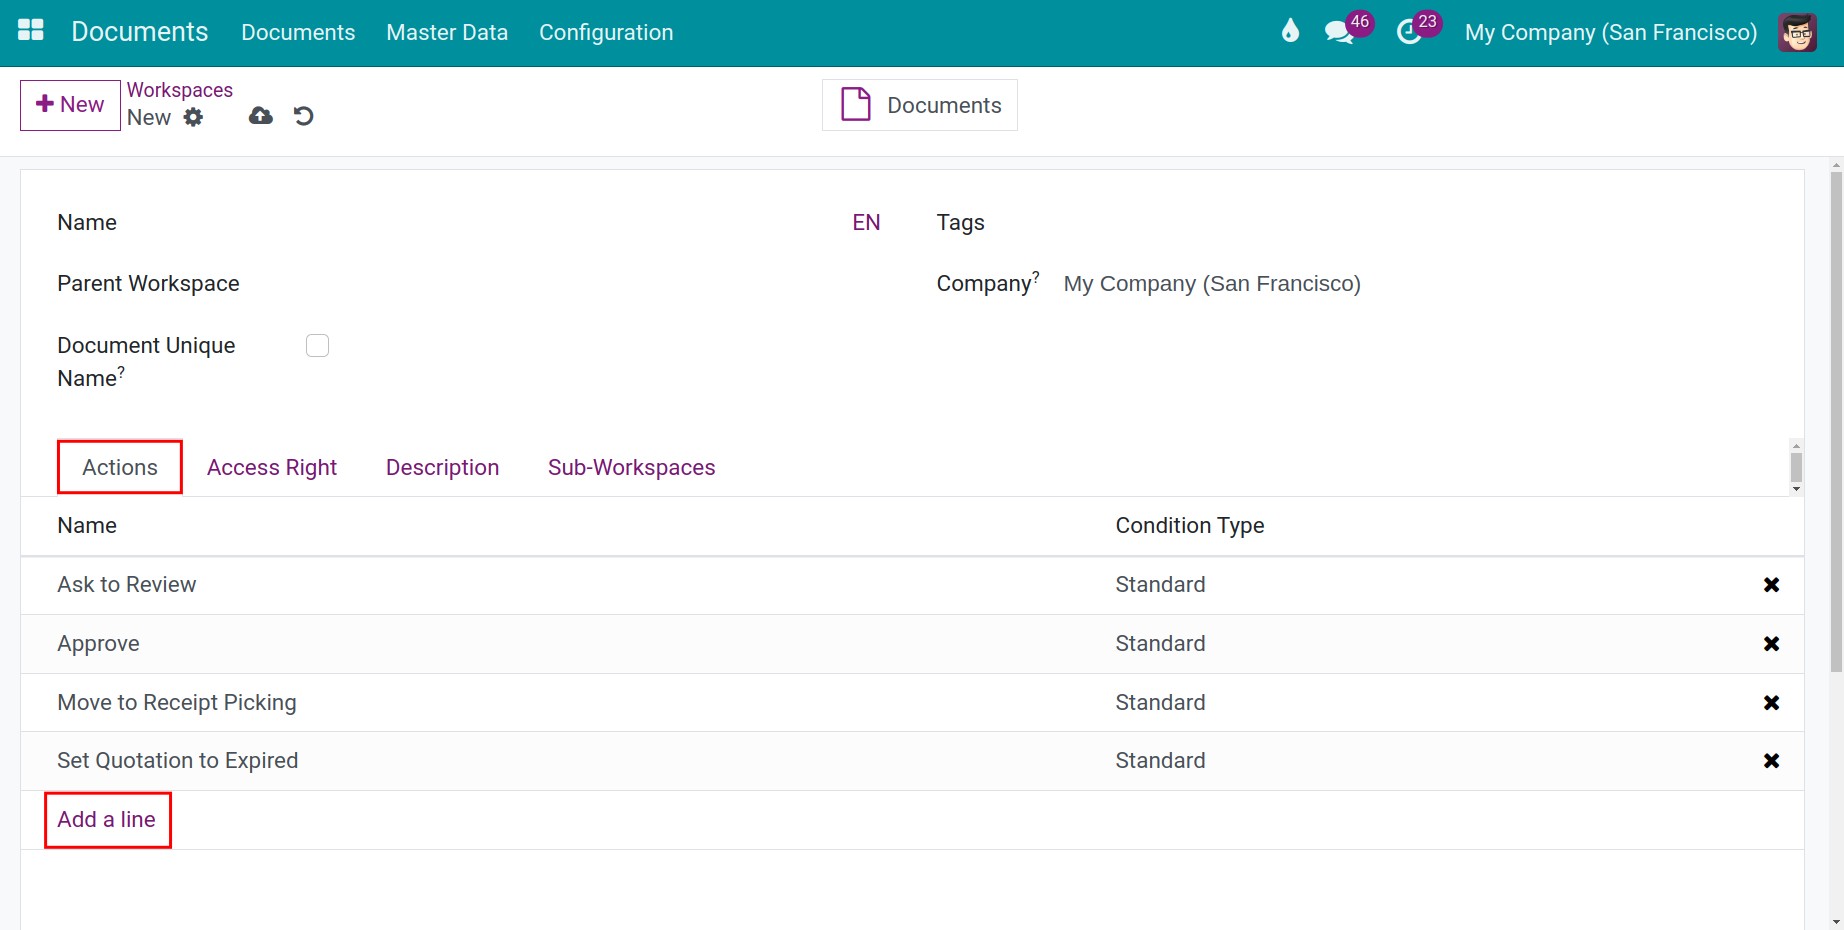
You can add one or various different actions for your workspace. For example: Ask to Review, Mark as Deprecated, etc.
See also
- Document approval
- The status of the document
Set up access rights
In the Access Right tab, you can set up the access rights and upload documents to a workspace according to certain criteria.
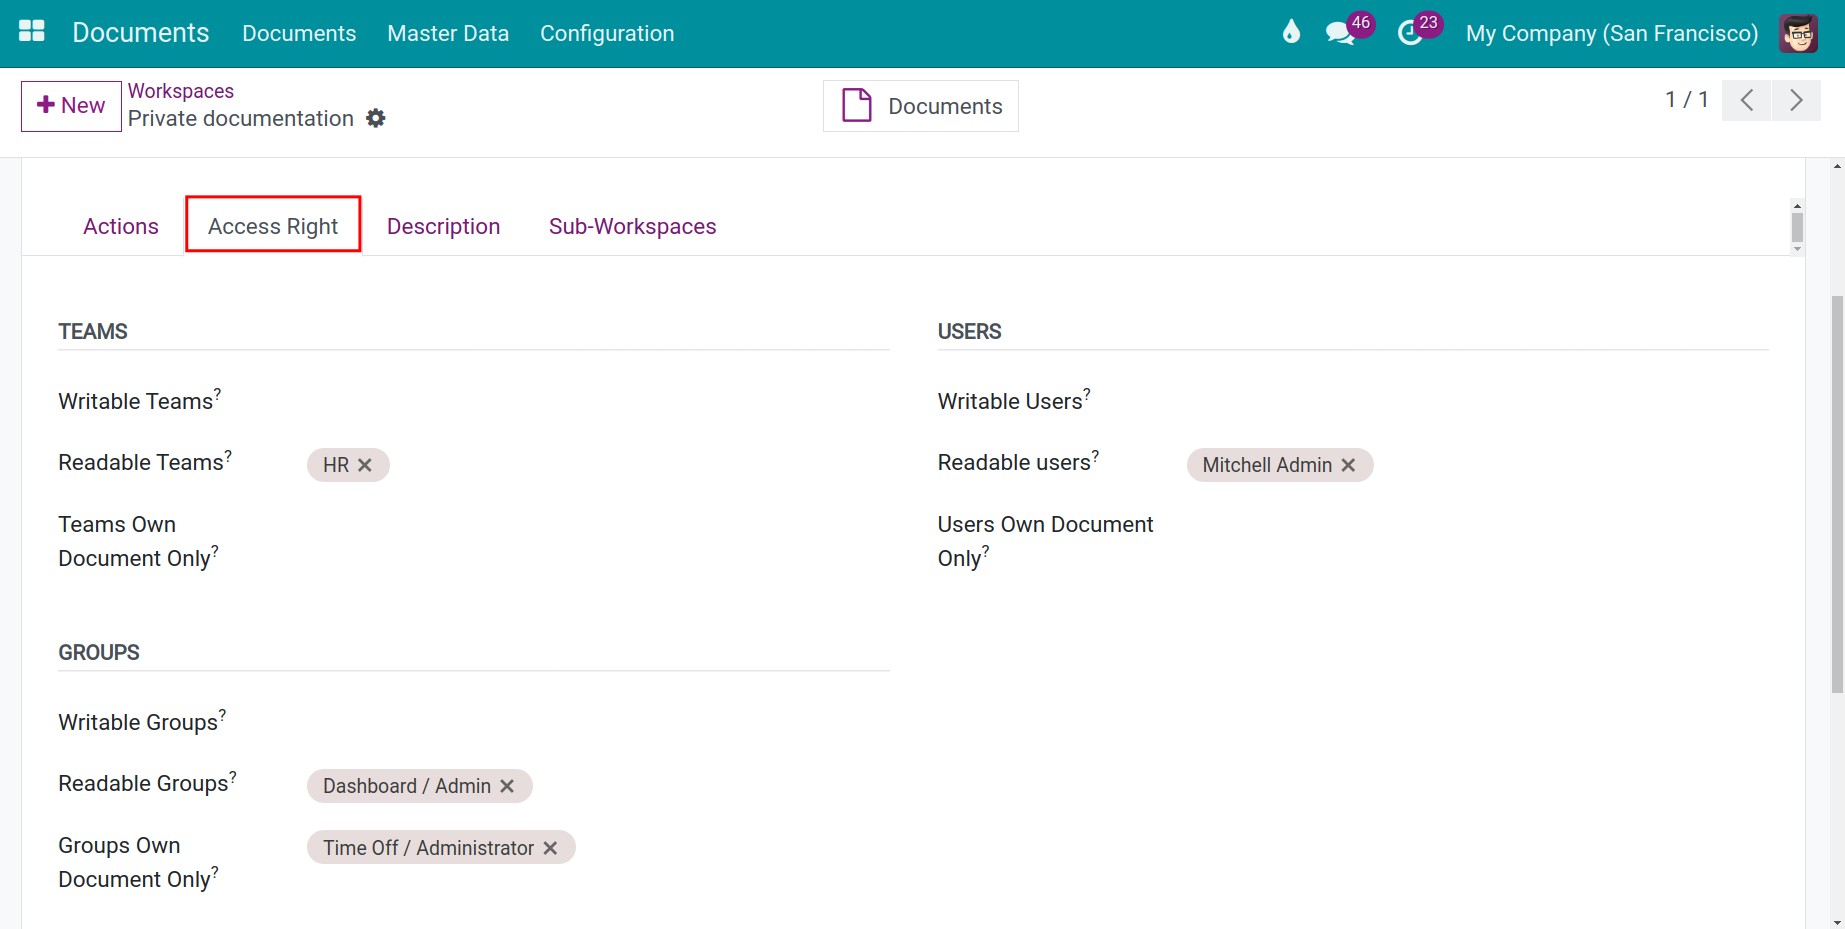
By Teams
From here, you can decide the write and read rights of this workspace for one or multiple teams at the same time.
In which:
- Writable Teams: Members of these teams can read, upload and edit their own documents.
- Readable Teams: Members of these teams can only read documents.
- Teams Own Document Only: Members of these teams can read, upload and edit their own documents.
Note
To create a new team, navigate to Master Data > Teams > Create. From here, you need to choose a name and select a leader for this new team and press Save.
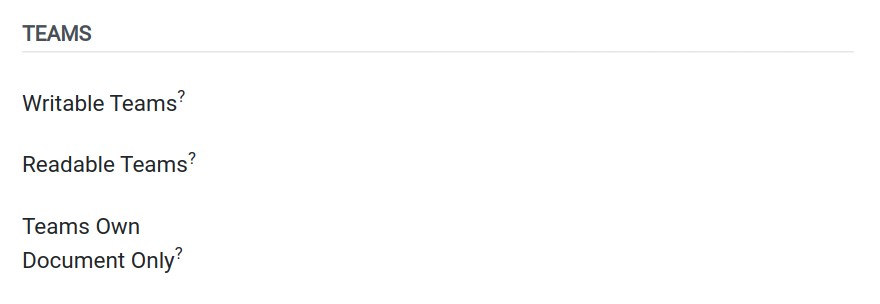
By Users
In this section, you can configure the edit and read rights for documents in this workspace for one or multiple individual user accounts at the same time.
In which:
- Writable Users: Users can read, upload and edit their own documents.
- Readable Users: Users can only read documents in this workspace.
- Users Own Document Only: Users can only read, upload and edit their own documents. Cannot view documents uploaded by other users.
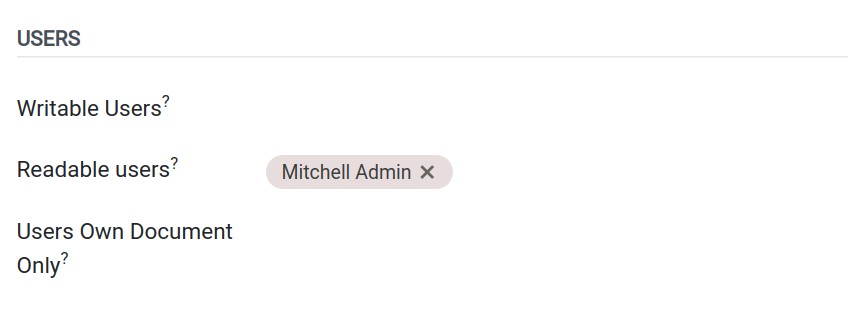
By Groups
You can set up edit or read rights for documents in a workspace for one or multiple group users who have certain access rights groups.
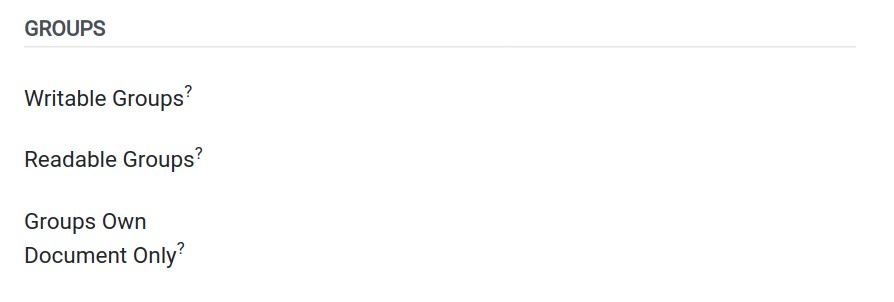
- Writable Groups: Users who have these groups of rights can read, upload and edit documents in this workspace.
- Readable Groups: Users who have these groups of rights can only read documents in this workspace.
- Groups Own Document Only: Users who have these groups of rights can read, upload and edit their own documents in this workspace.
You can navigate to the documents list of the newly created workspace by pressing the Documents button on the top right corner of this workspace view.
See also
Related articles
- Categorize documents with tags
- Upload documents to Odoo
- How to share documents in Odoo
- Document approval
- The status of the document
- How to search document in Odoo
Optional modules
- Documents - HR
- Documents - Accounting
- Documents - Payroll
- Documents - Sale
- Documents - Inventory
Categorize documents with tags
Categorize documents with tags
Documents and links in the Documents app can be categorized and sorted by tags and tag categories.
Requirements
This tutorial requires the installation of the following applications/modules:
- Documents Management
Configure a Tag category
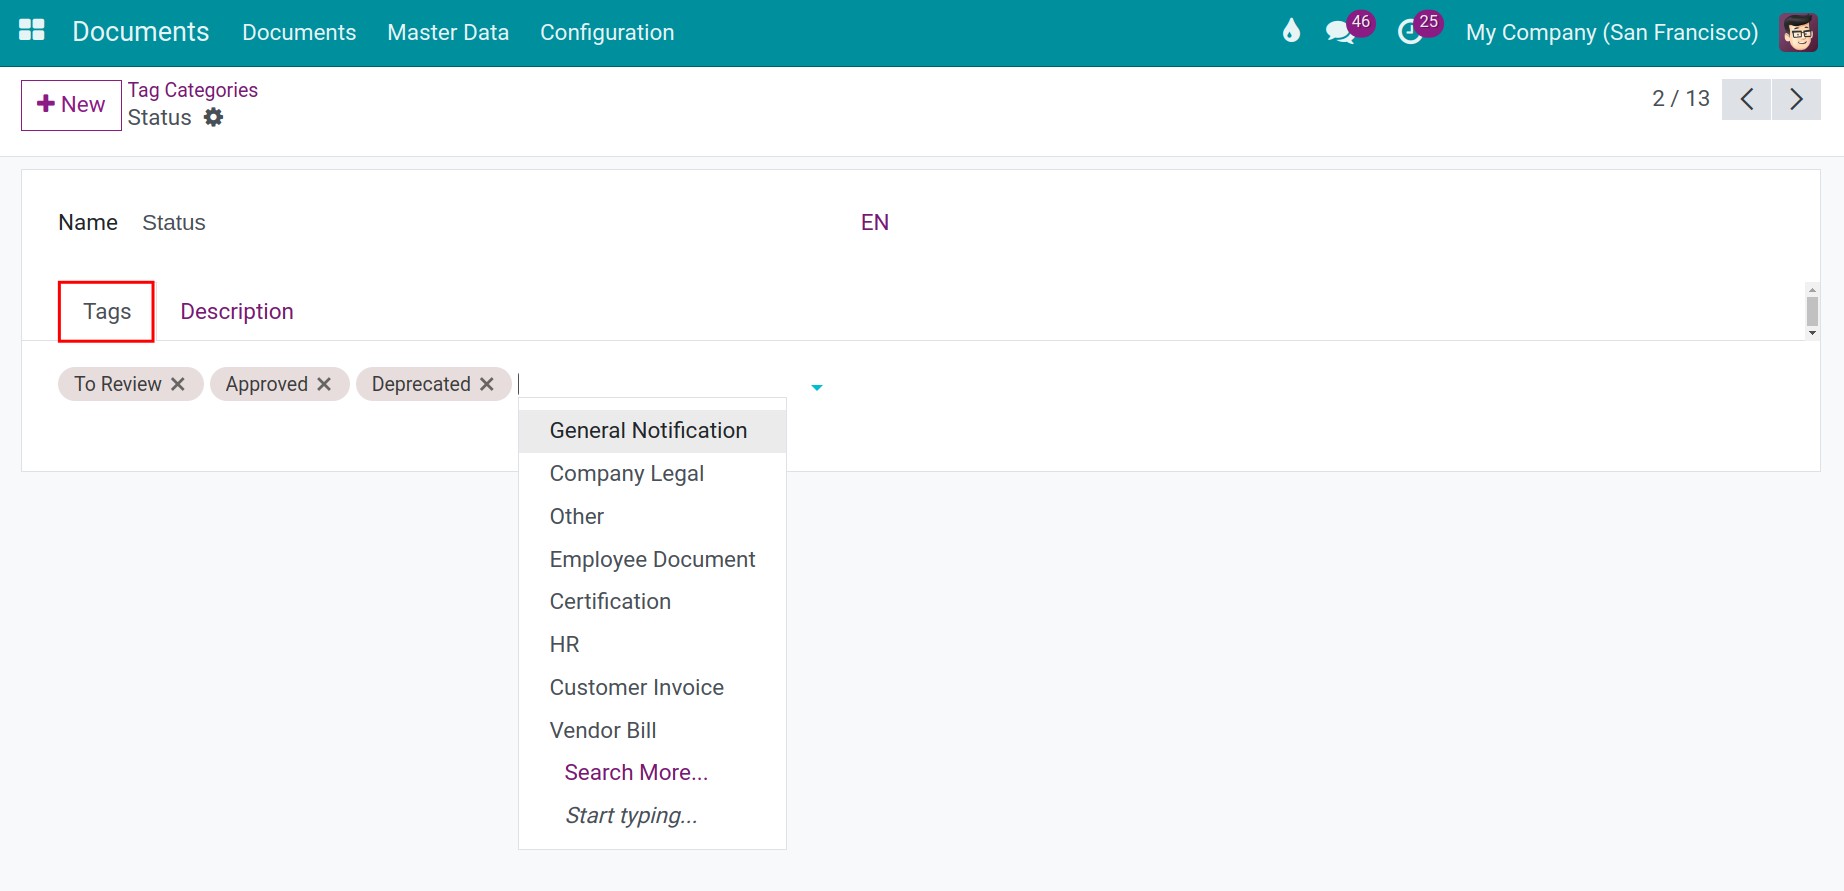
Tag categories are used to categorize the tags system into groups, based on different criteria and your usage purposes. For example: tags related to Status, Labor contracts, Accounting documents, etc.
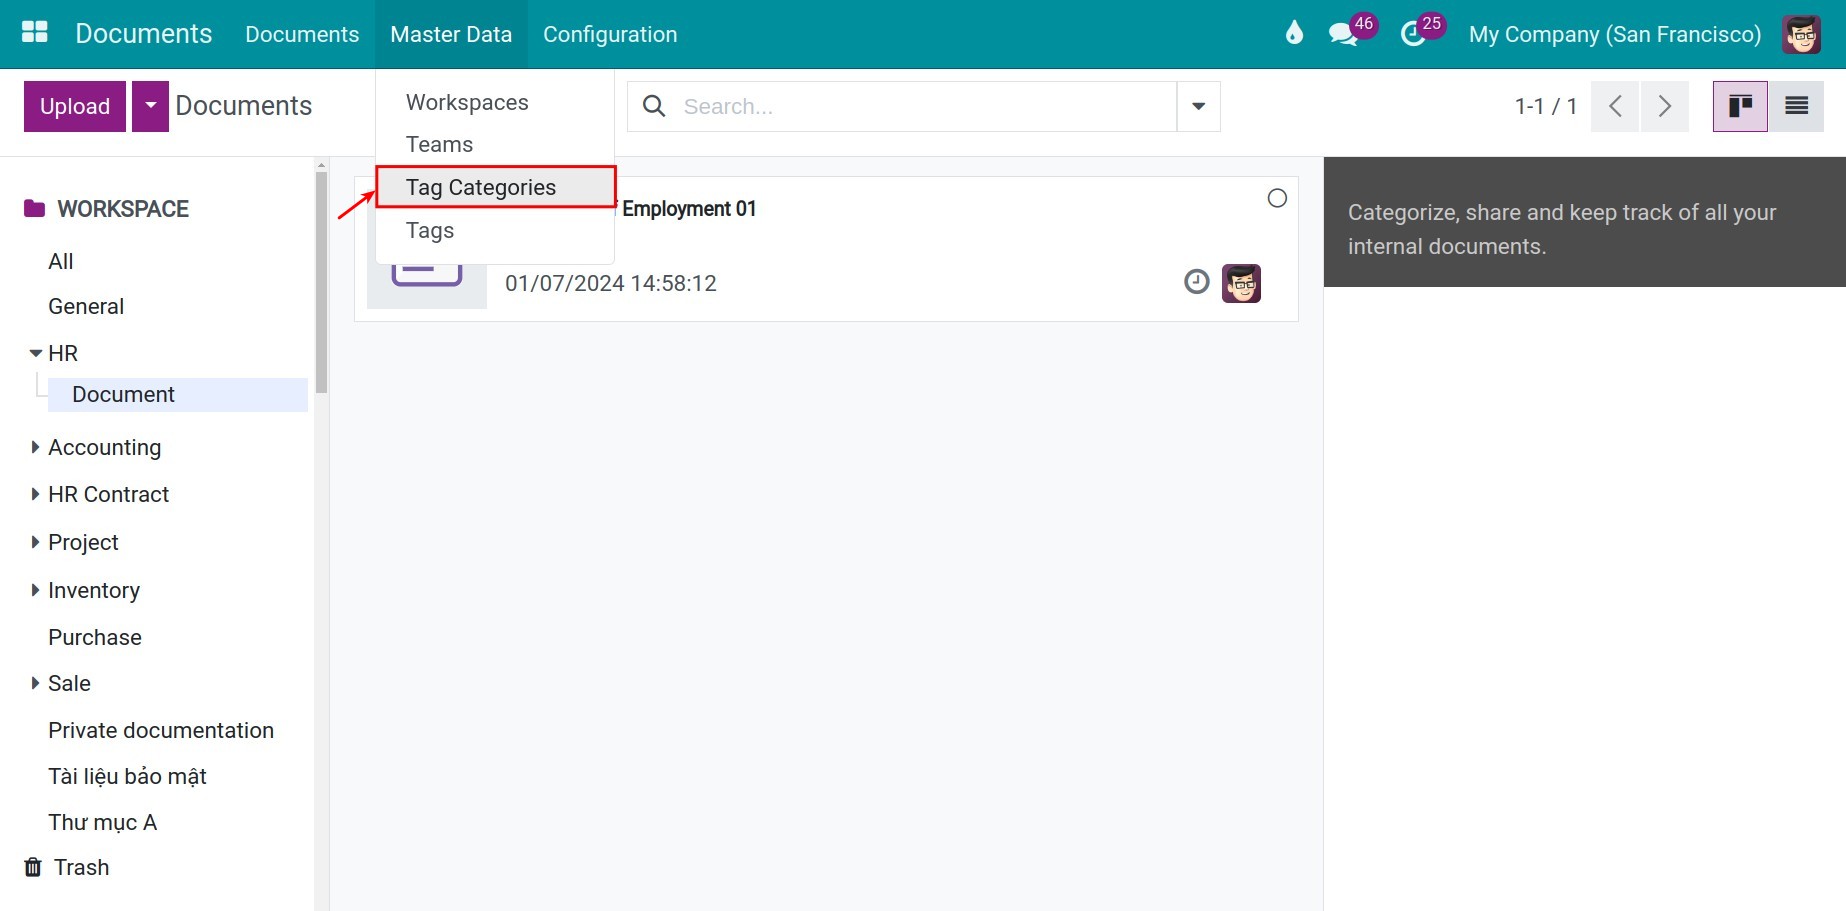
Navigate to Master Data > Tag Categories > New to set up a new tag category.
At the Tags tab, add one or various existing tags to this category. You can also add an explanation of the usage purpose for this tag category in the Description tab.
Configure a Tag
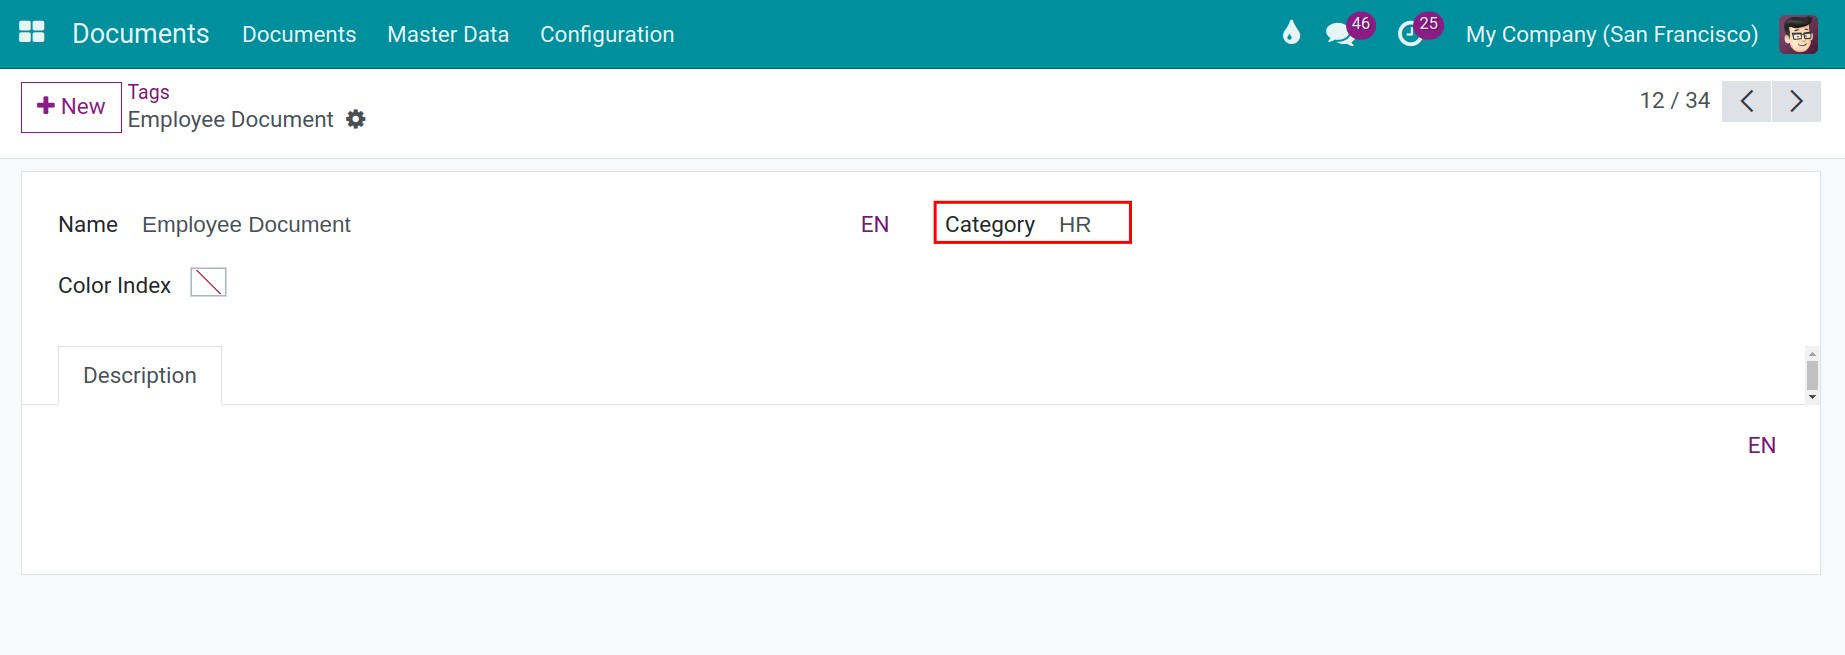
To set up a tag, navigate to Master Data > Tags > New. From here, configure the name and categorize this tag accordingly as well as describe the usage purpose of the tag at the Description tab.
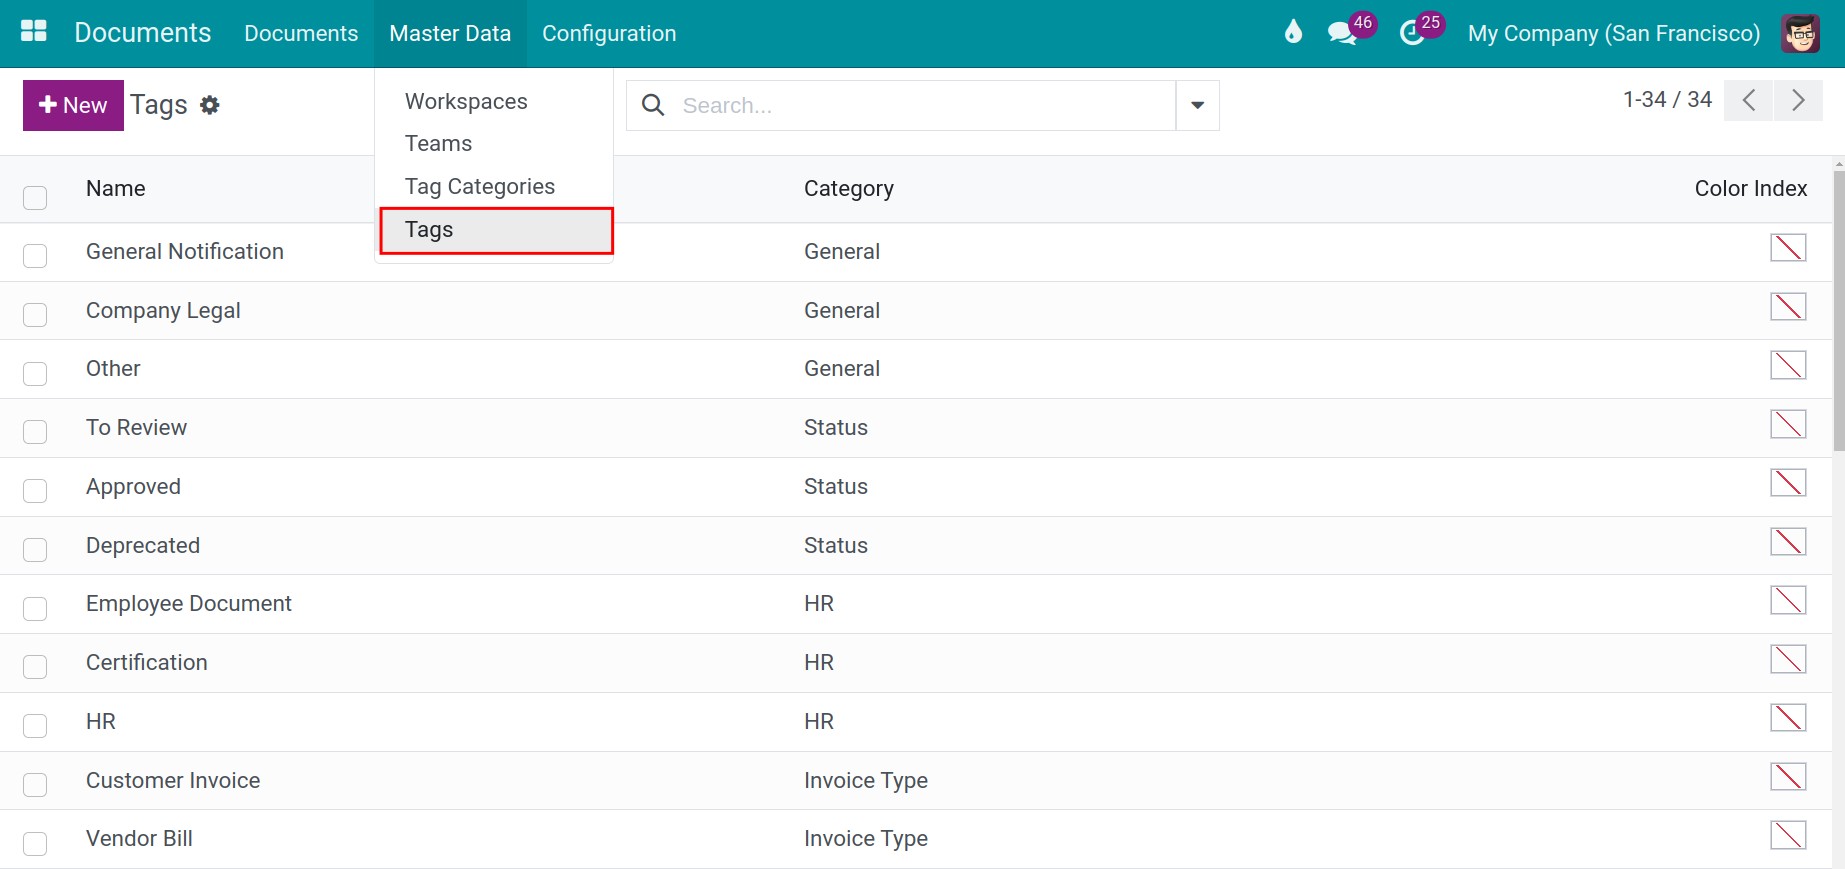
However, you just can categorize this tag into only tag category at the same time.
Tags and tag categories application in documents management
You can use the tags and tag categories system flexibly to manage workspaces, documents, and saved links in the Documents app by adding one or multiple tags to the documents that needed to be organized.
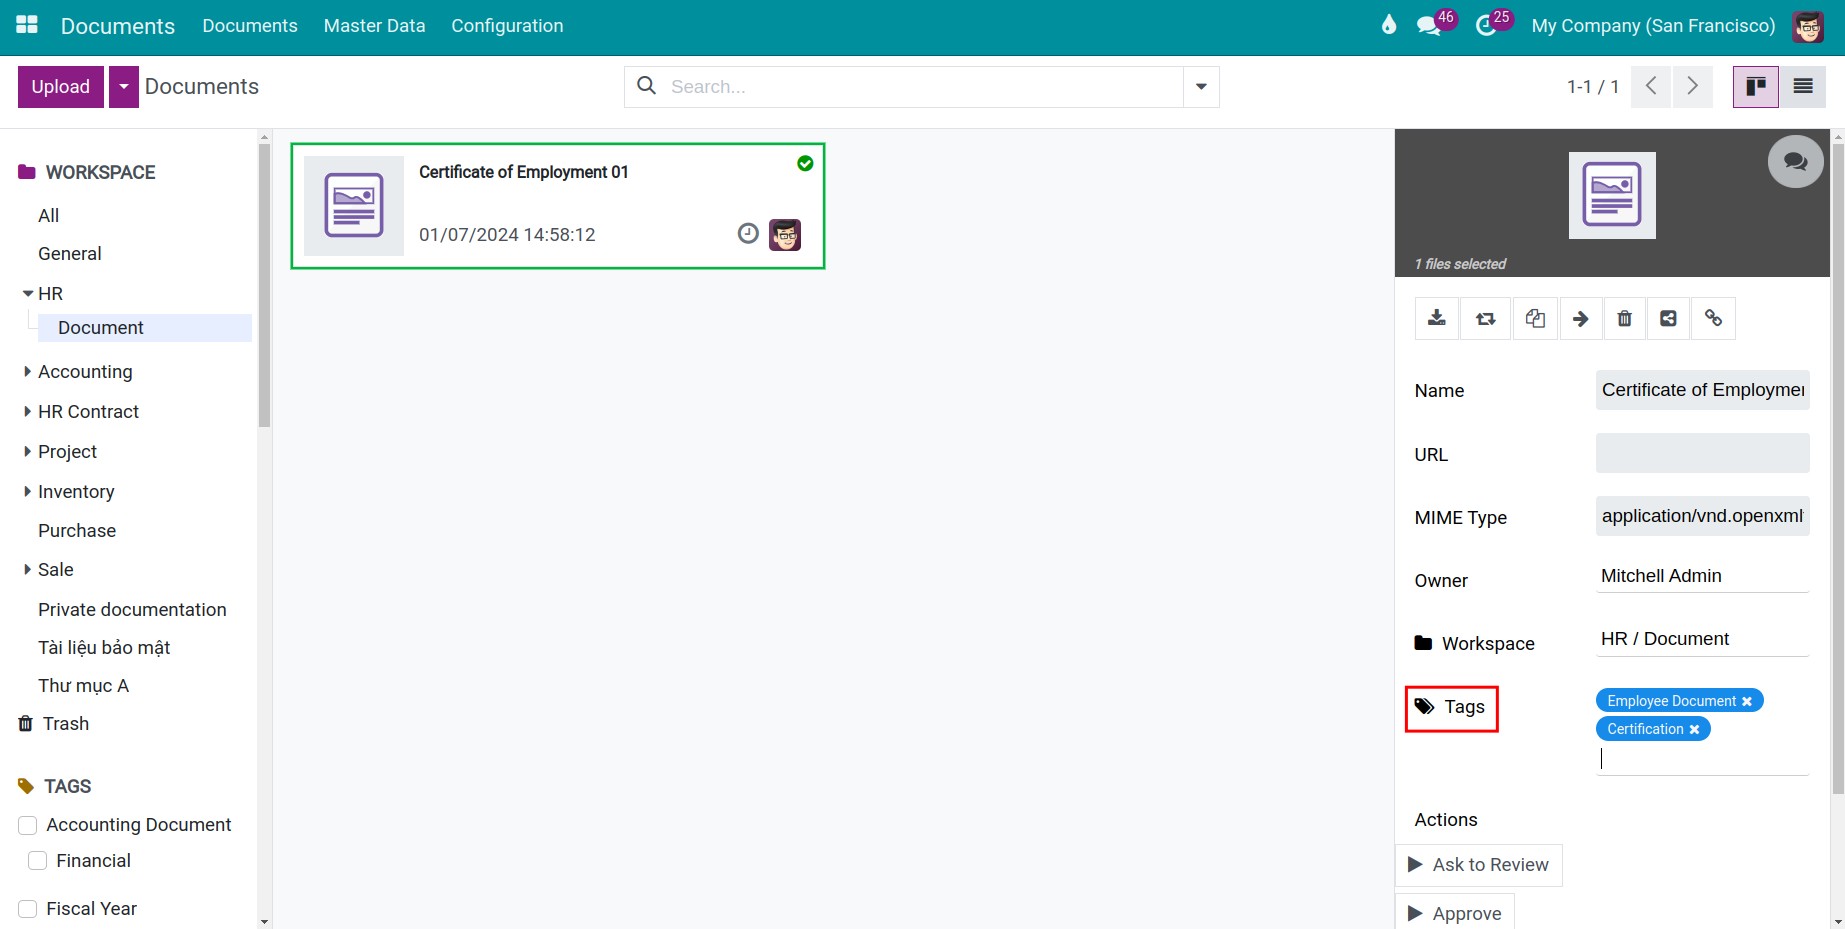
On the workspace view, tags attached to each document help you search and find documents/links easily at the first glance.
The document manager can track the history of changes to the tags attached to each document in the document’s discussion area.

On the other hand, the filter and groups feature also helps you search documents by tags quickly.
See also
Related articles
- Upload documents to Odoo
- How to share documents in Odoo
- Document approval
- The status of the document
- How to search document in Odoo
Optional modules
- Documents - HR
- Documents - Accounting
- Documents - Payroll
- Documents - Sale
- Documents - Inventory
How to share documents in Odoo
How to share documents in Odoo
Odoo Documents app supports not only sharing documents between departments but also sharing documents with portal users.
Requirements
This tutorial requires the installation of the following applications/modules:
- Documents Management
Generate URL to share documents
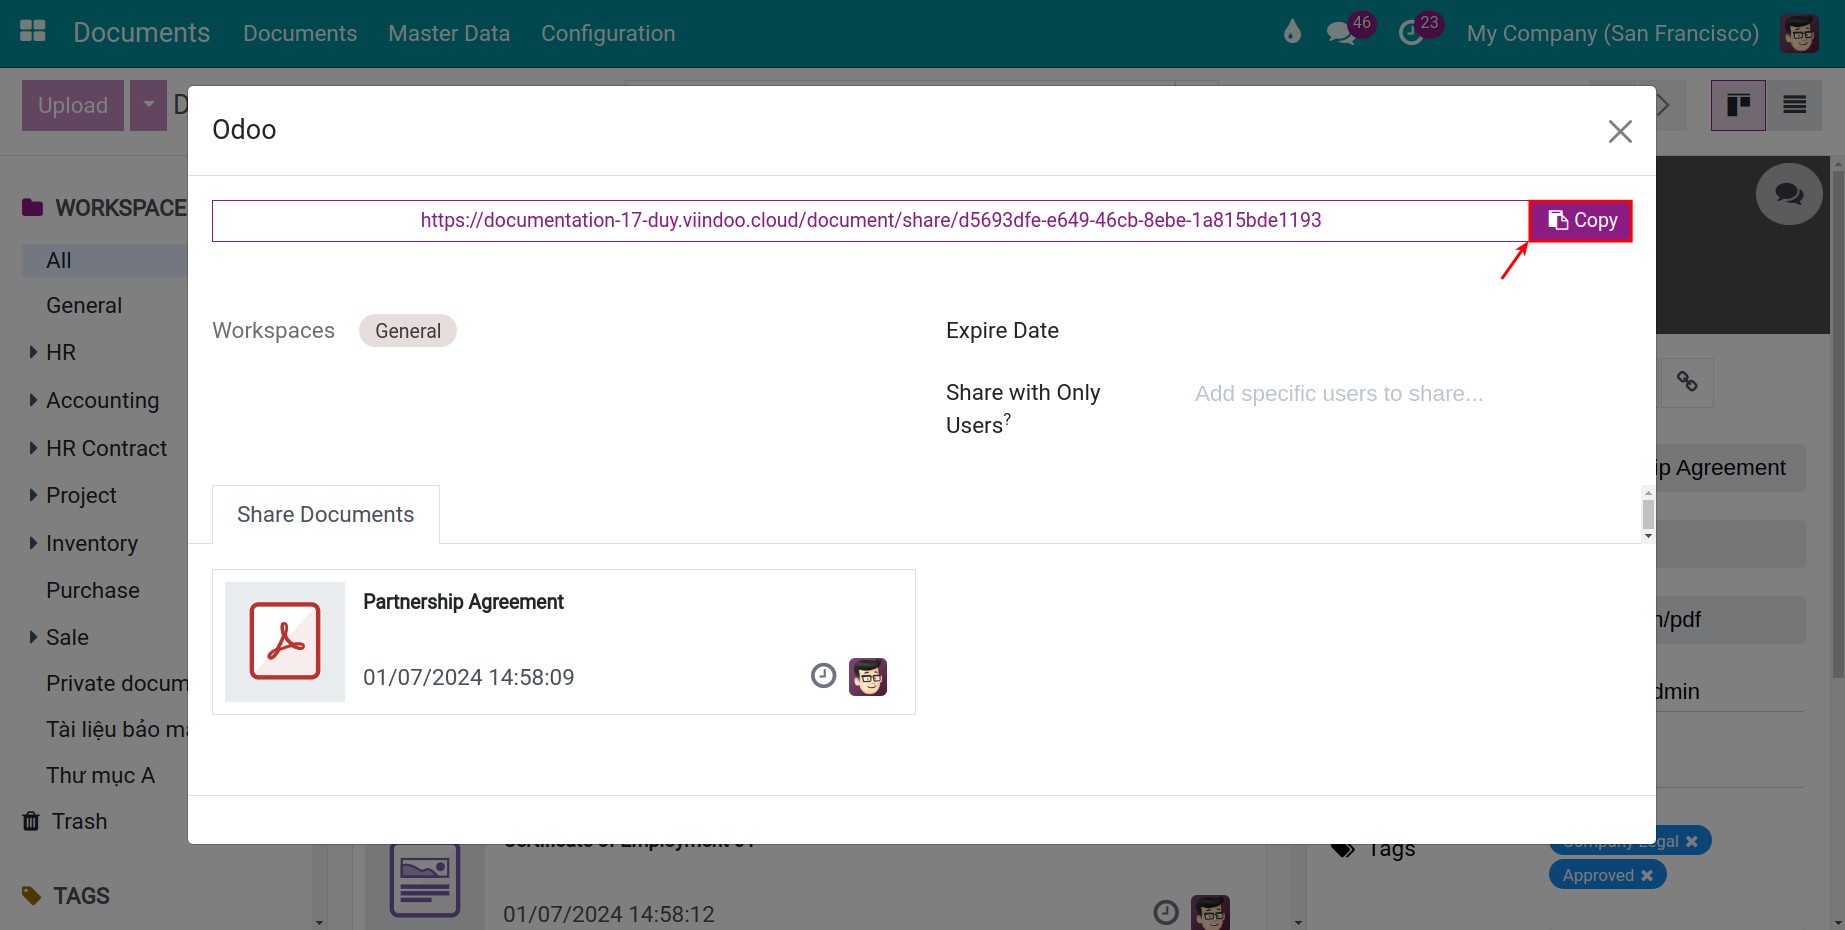
To share a document to your internal teams, navigate to your uploaded documents and press on the sharing icon as follow:
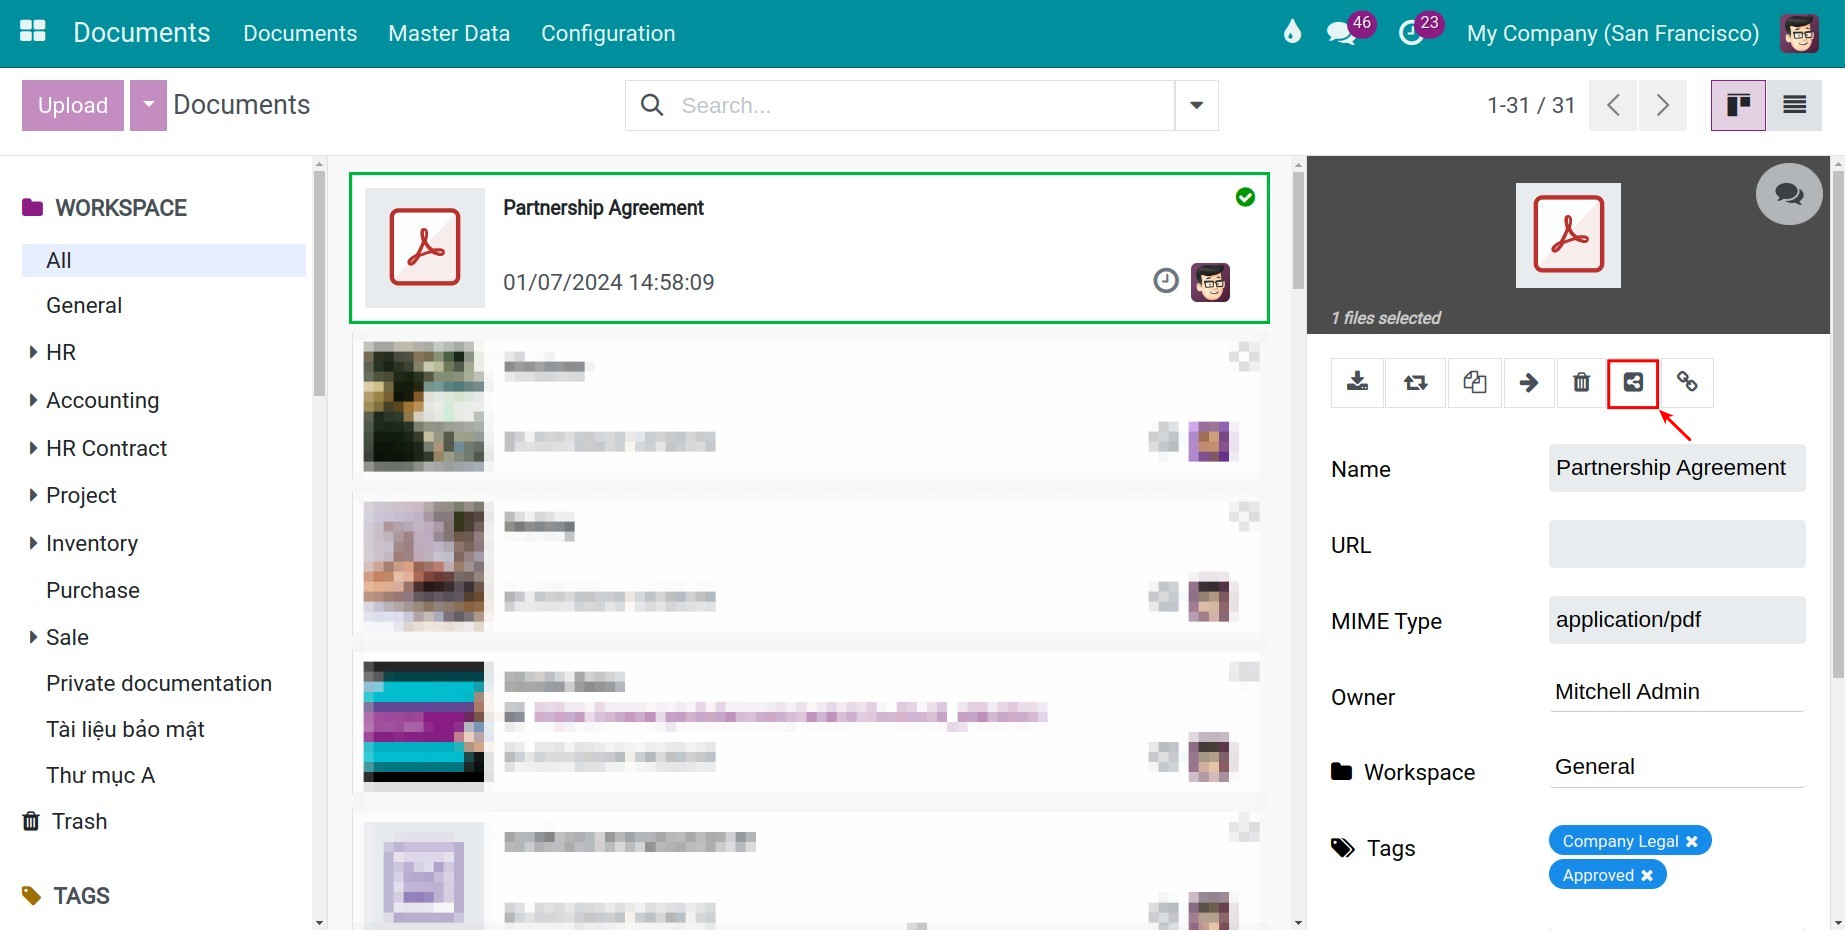
On the pop-up window, press on Generate URL > Copy to copy and share the URL generated by the system. Internal users and portal users can access the shared documents through this link.

Shared links history
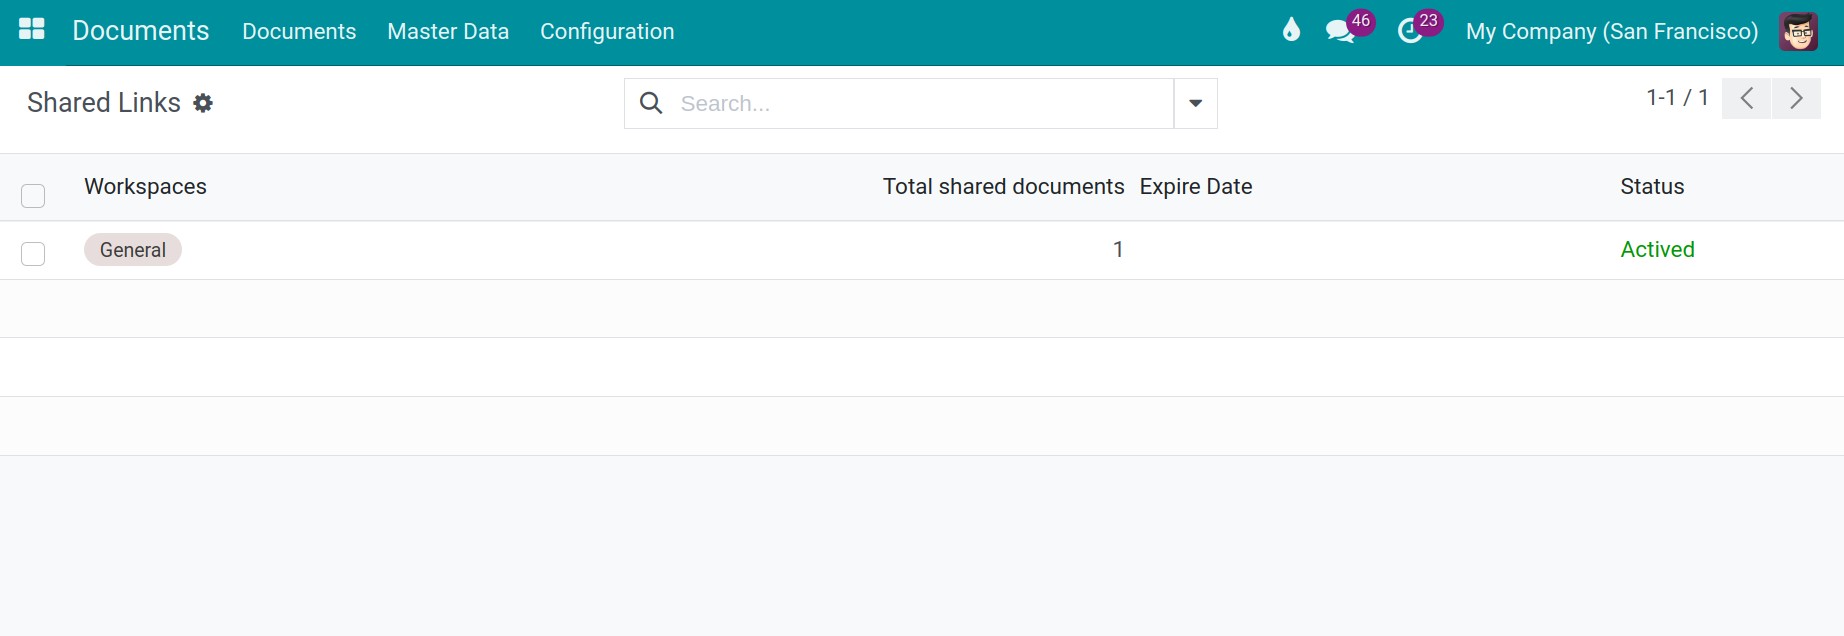
To view the links sharing history, navigate to Configuration > Shared Links.
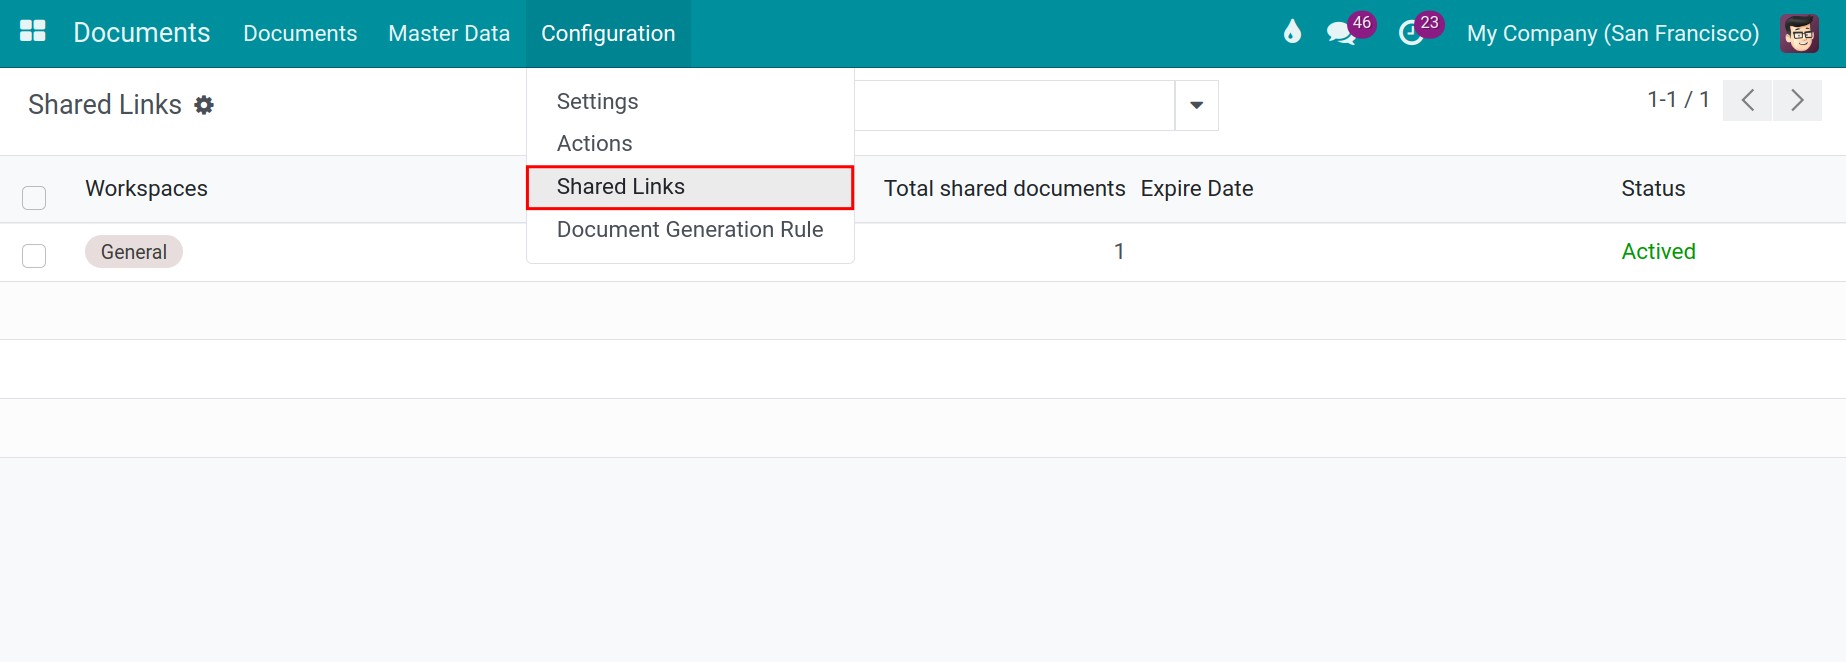
Here, you can view the total number of documents shared in each URL created previously.
- Workspaces: Name of the workspace contains documents shared in this link.
- Total shared documents: Quantity of documents shared in this link.
- Expire Date: The moment the shared link expires. You can see configuration details in the Expire Date section.
- Status: Displays the current status of shared links. For example: Activated, Expired.
Configure expiration date for documents sharing links
You can set up the expiration time for document sharing links by navigating to Settings > General Settings > Permissions > Default Token Lifetime.
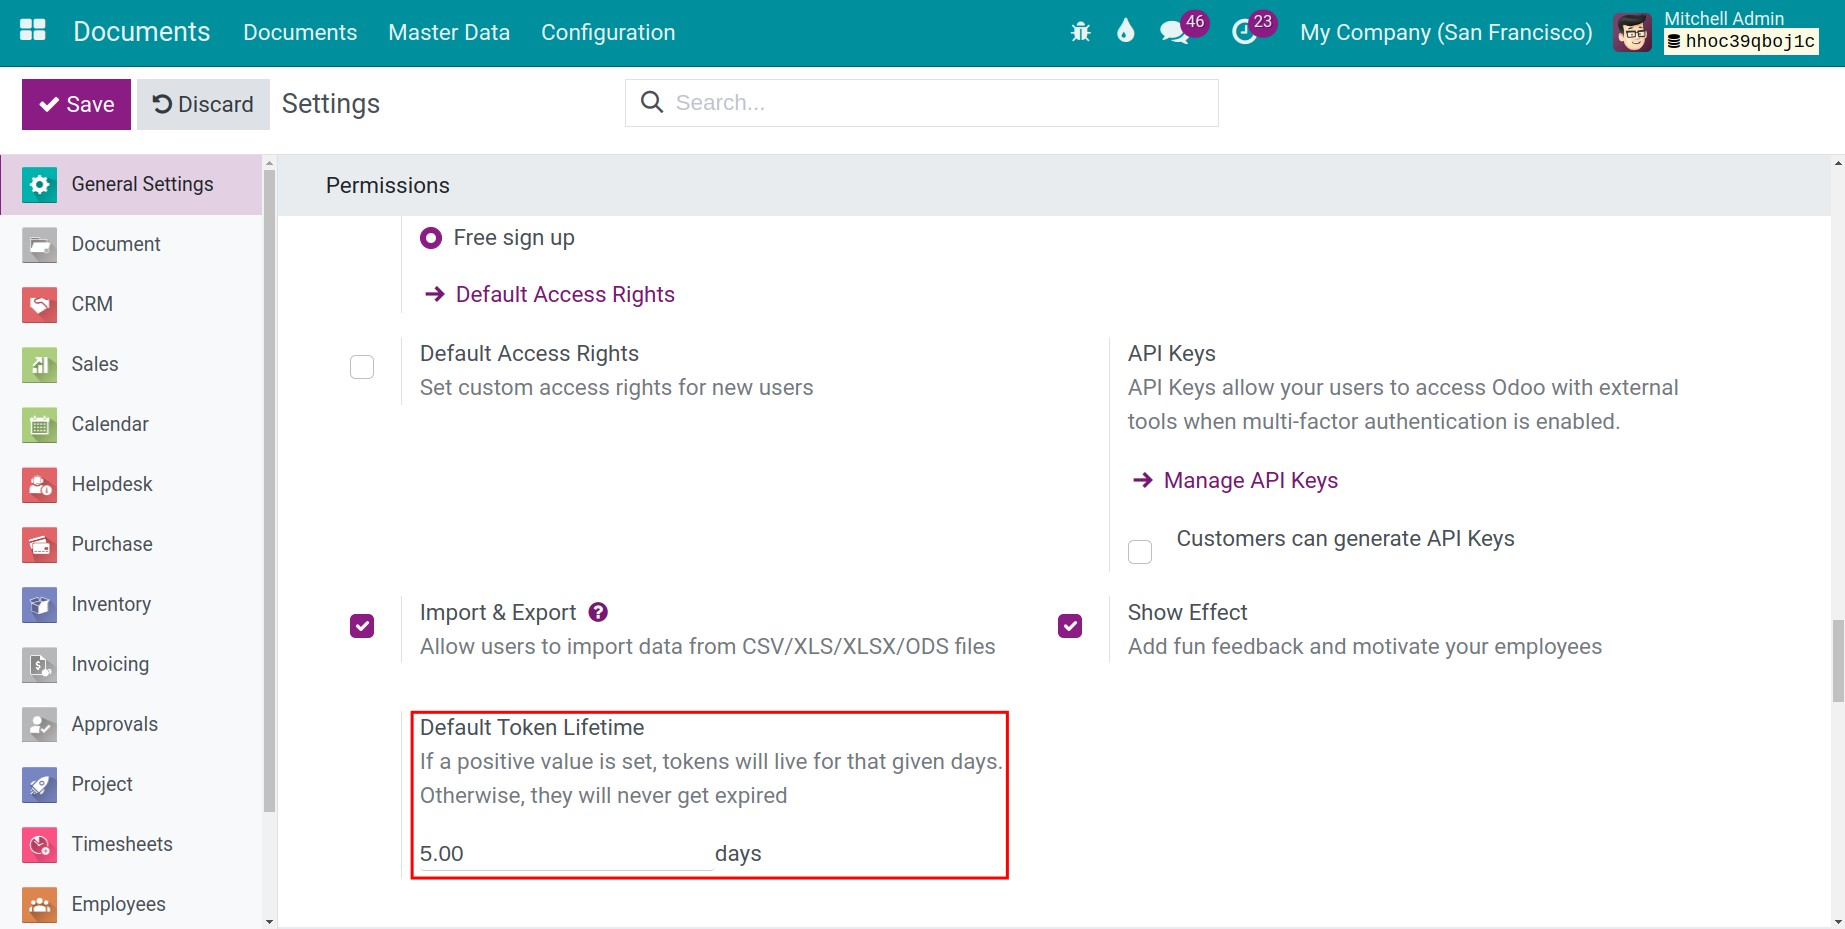
In this section, you can decide the lifetime of documents sharing links by a positive value (calculated by Days). Otherwise, your shared links will never expire.
Note
To make this setting, you need activate developer mode.
See also
Related articles
- Document approval
- The status of the document
- How to search document in Odoo
Optional modules
- Documents - HR
- Documents - Accounting
- Documents - Payroll
- Documents - Sale
- Documents - Inventory
Document approval
Document approval
With the documents managed by Odoo Documents app, you can Ask to Review and Approve them.
Requirements
This tutorial requires the installation of the following applications/modules:
- Documents Management
Required settings
Set up actions for the approval features
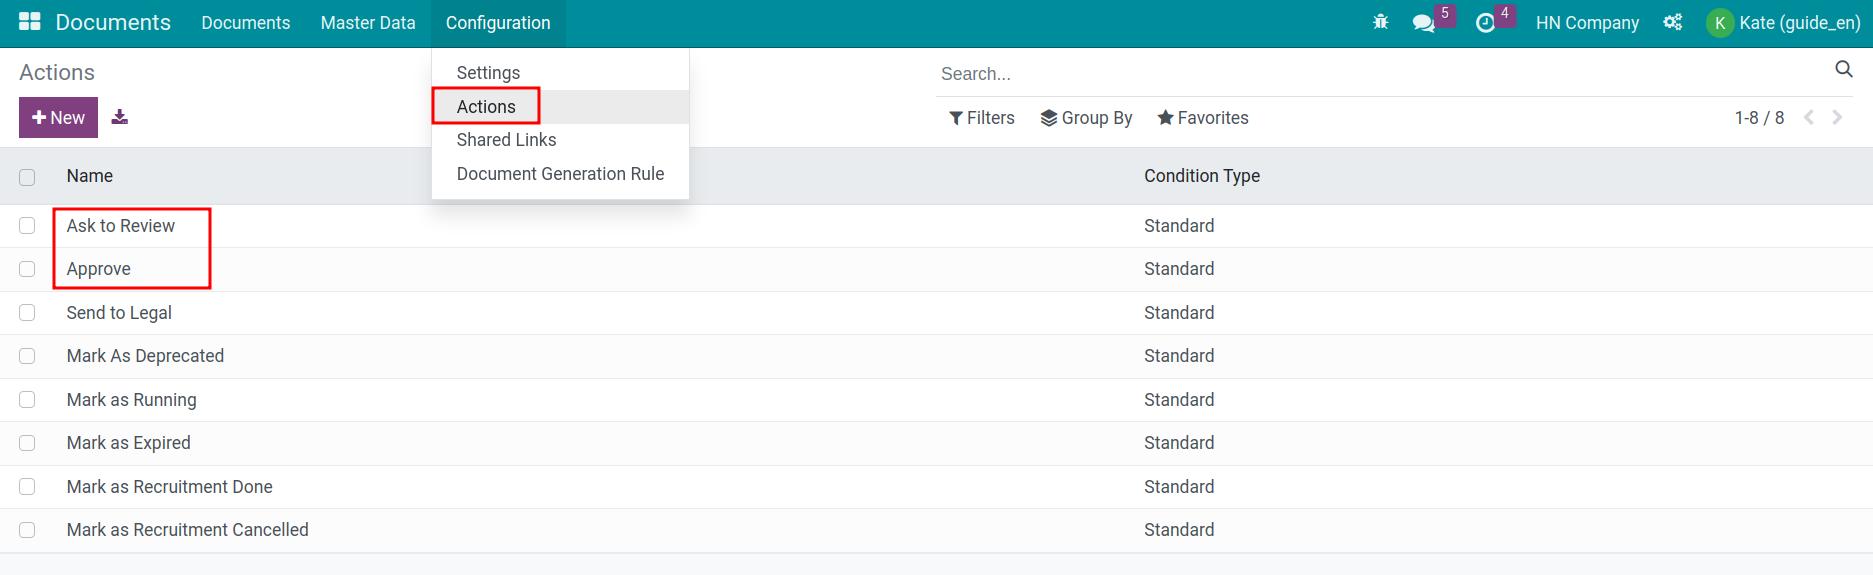
After installing the Documents app, Ask to Review and Approve actions will be auto-created. To view the settings for these actions, navigate to Documents > Configuration > Actions.
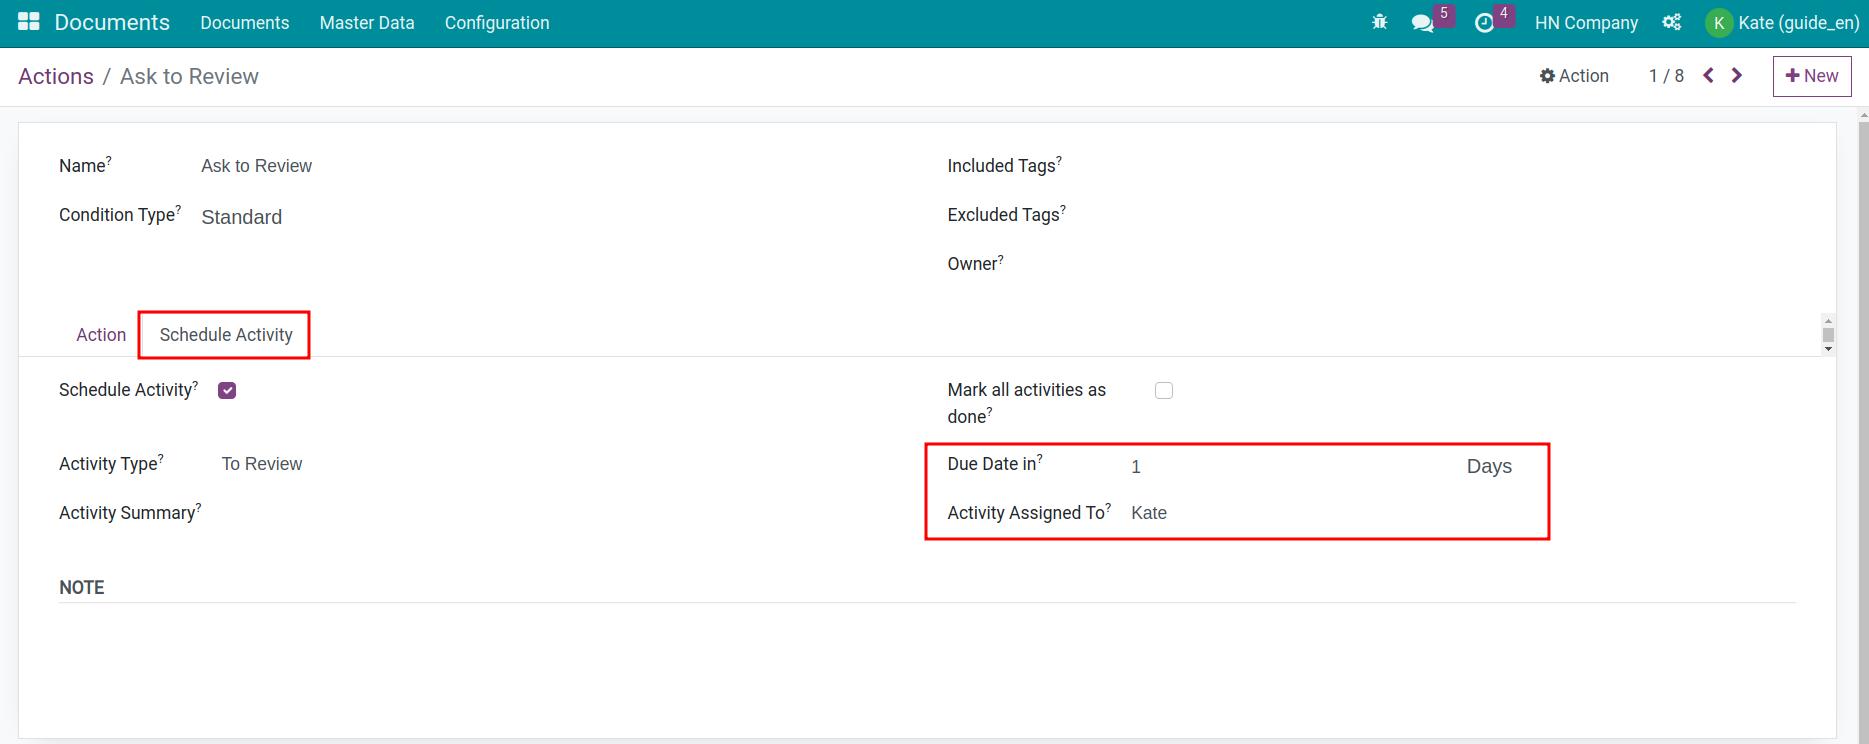
With the Ask to Review action, make sure you have the right settings for the due date and the assigned person on the Schedule Activity tab.
Set up the file that contain the documents to review
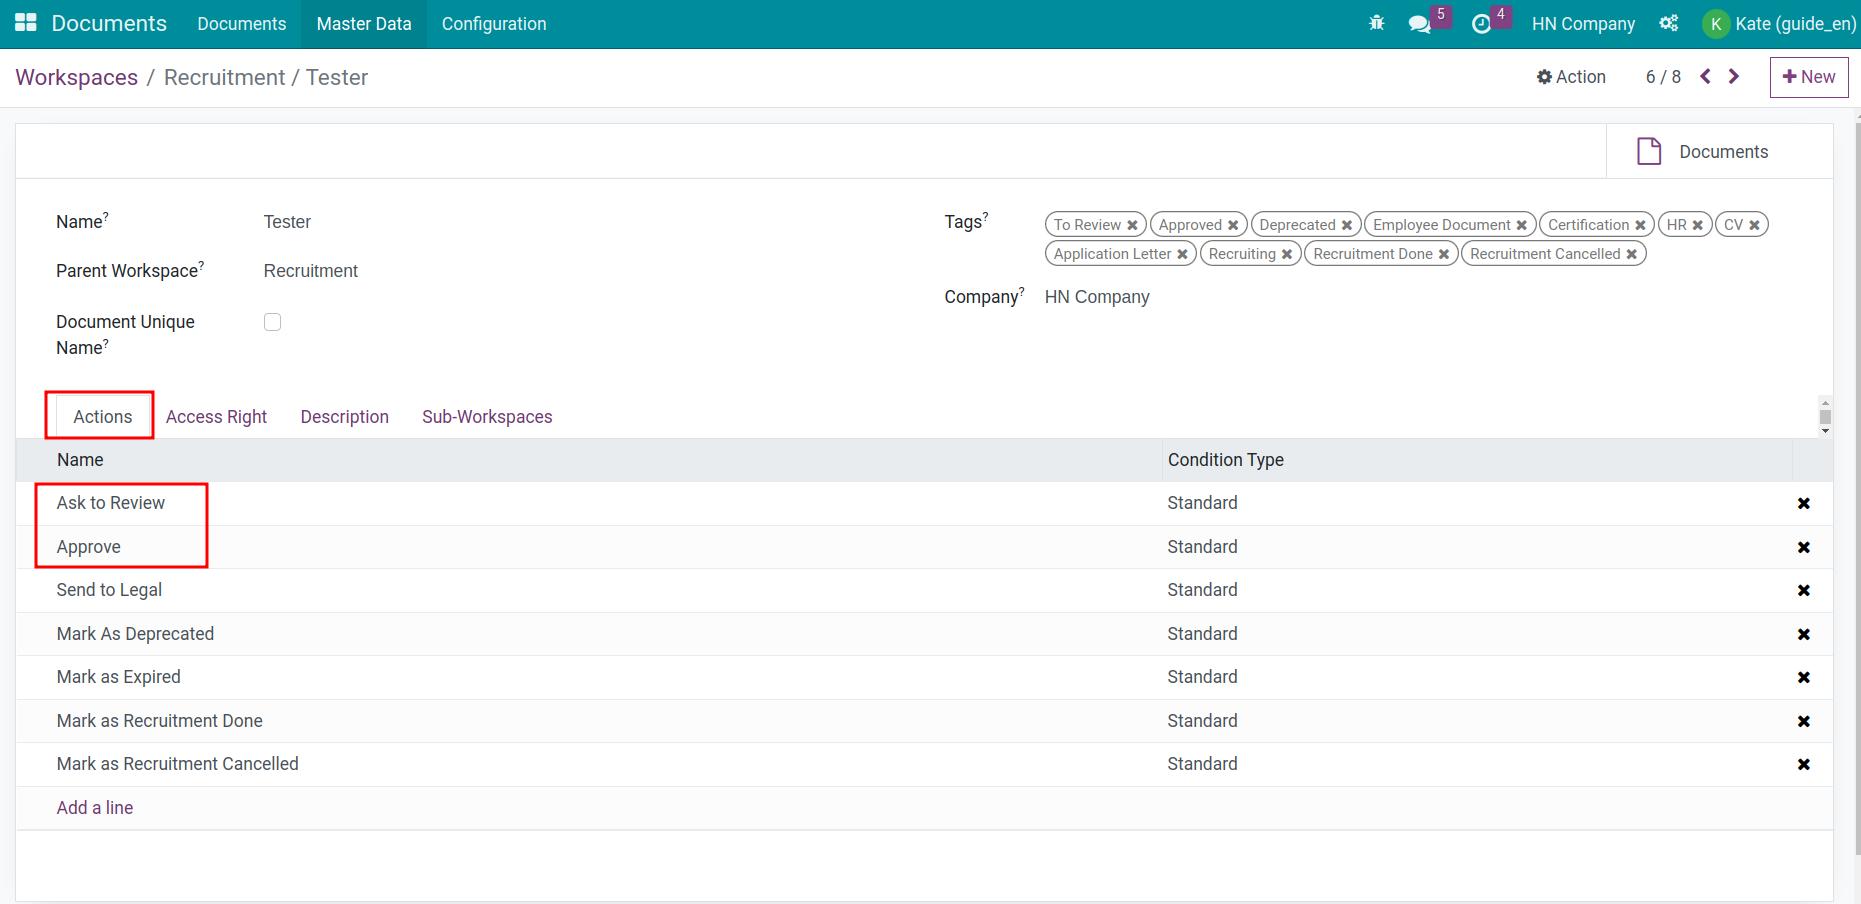
On the settings of the file that contains documents to review, you will need to add co-responding actions which are Ask to Review and Approve.
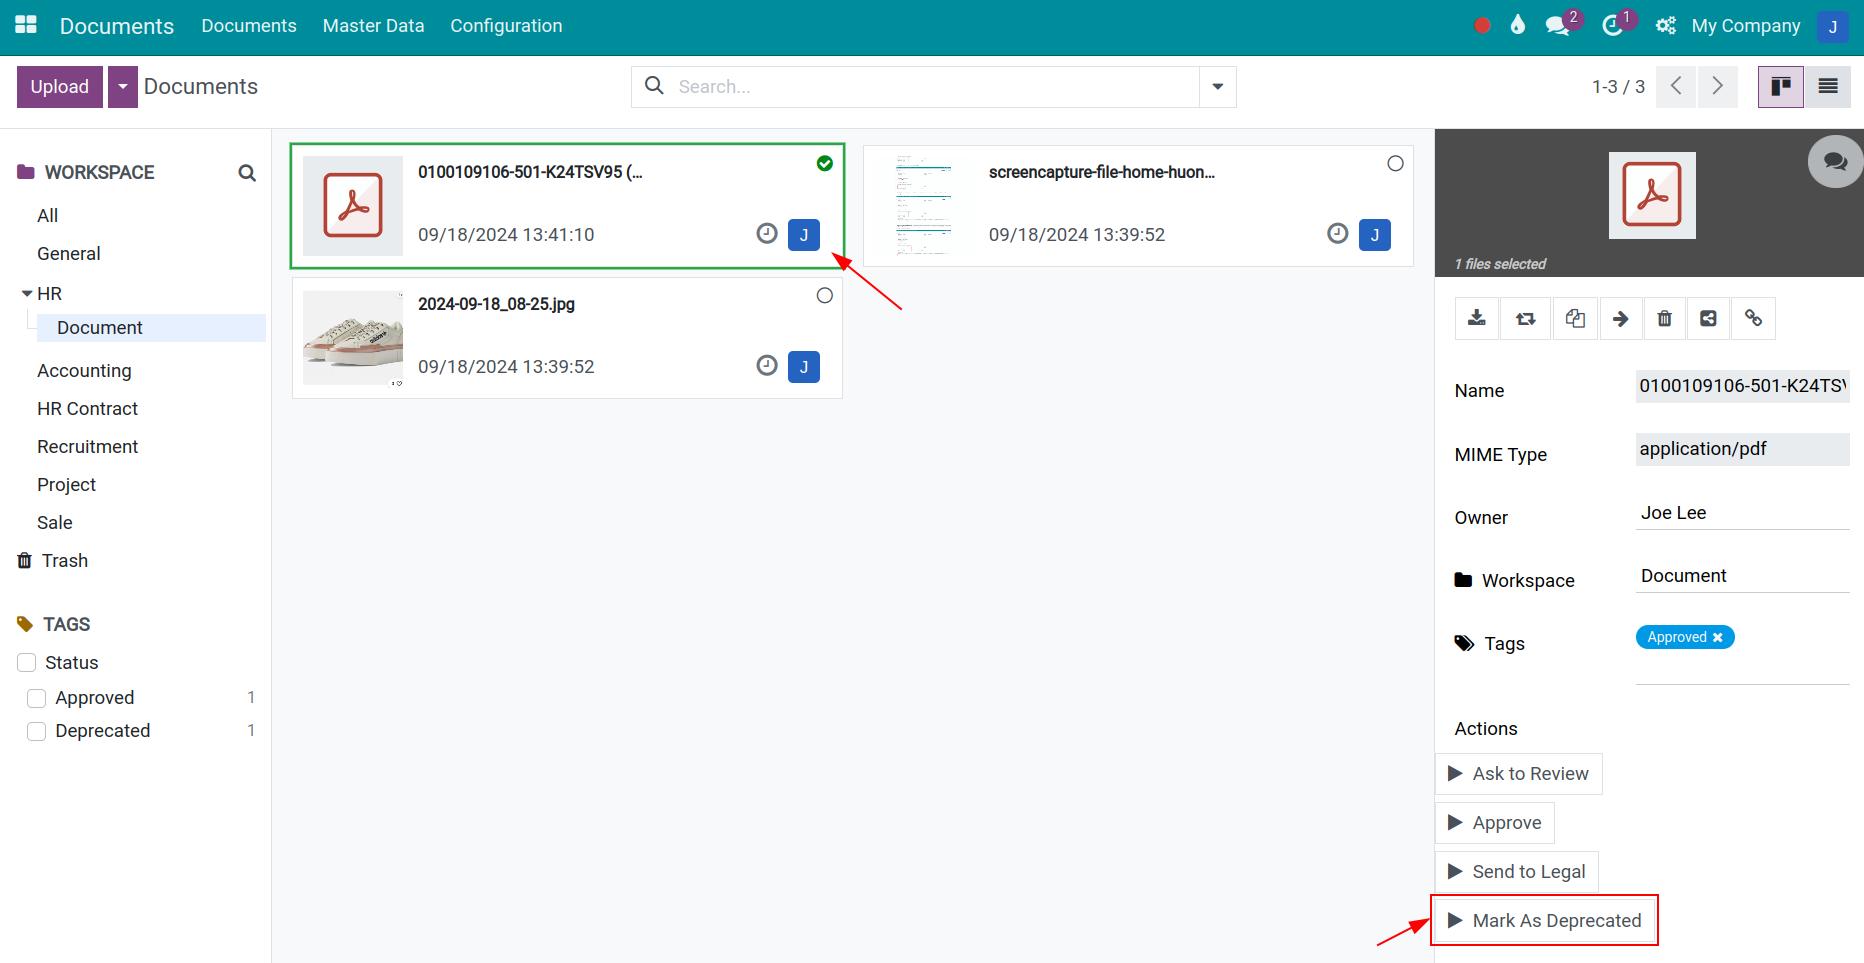
Approve the document
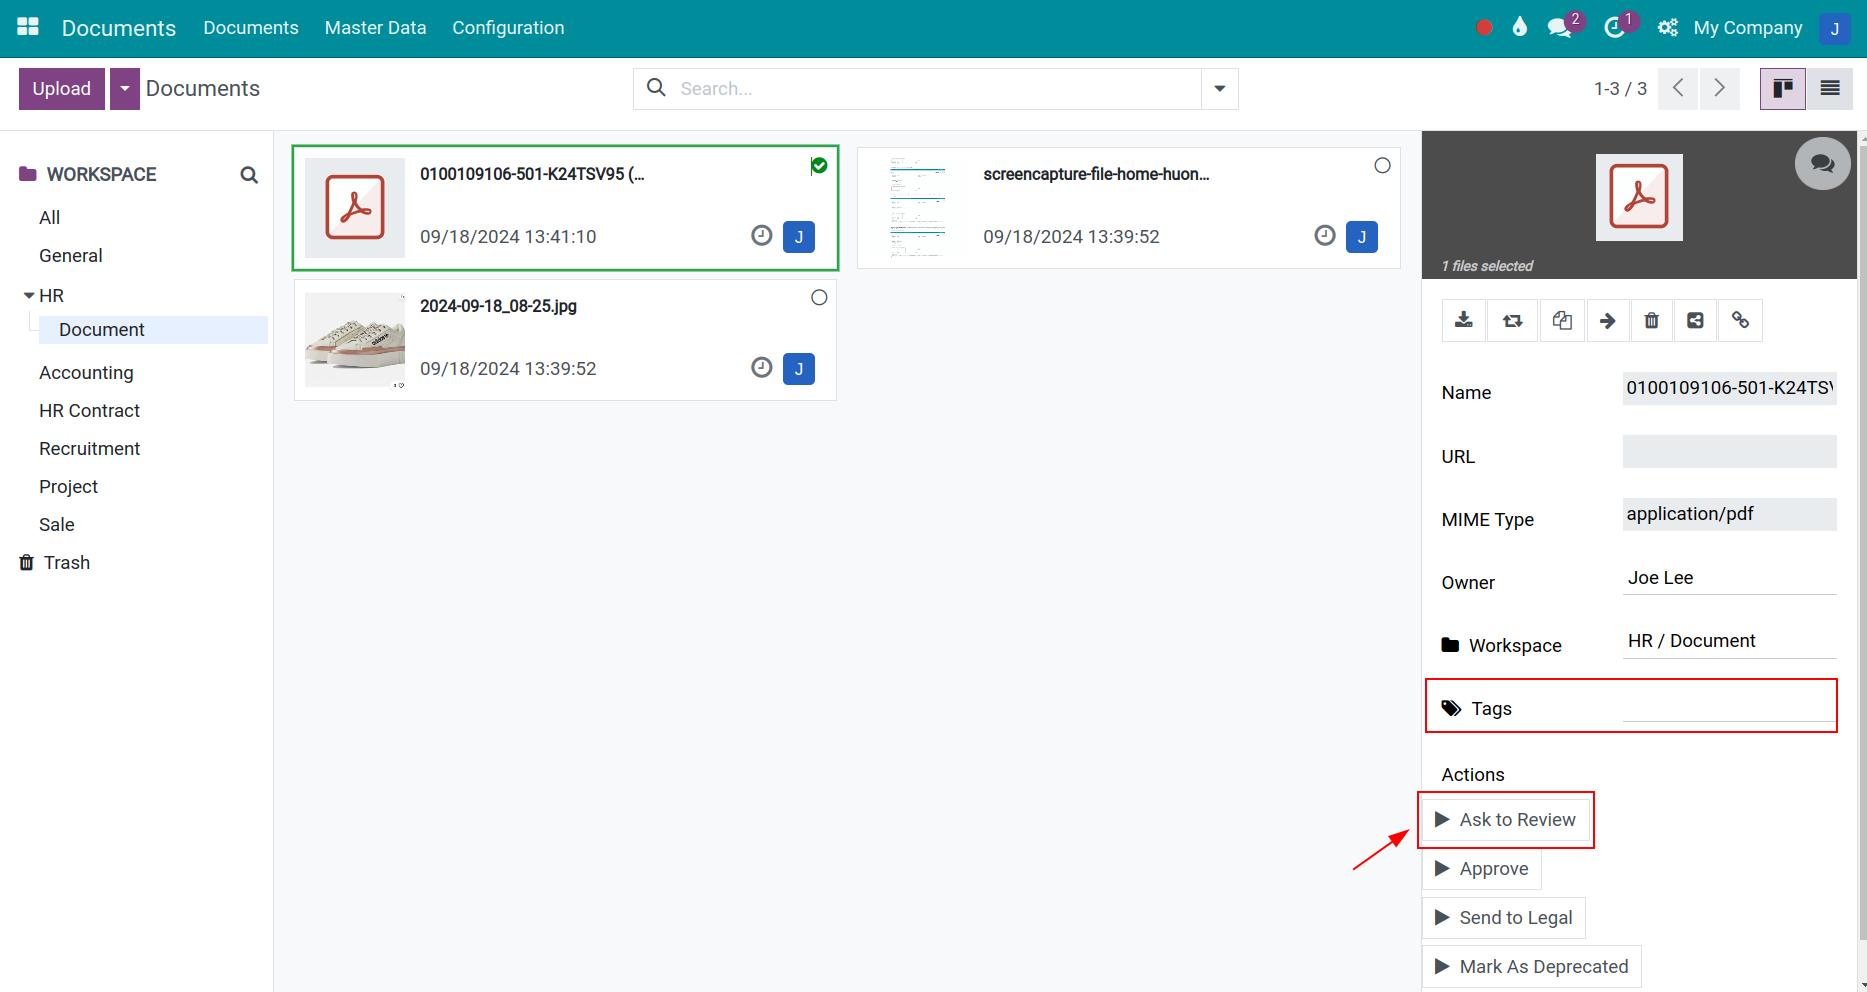
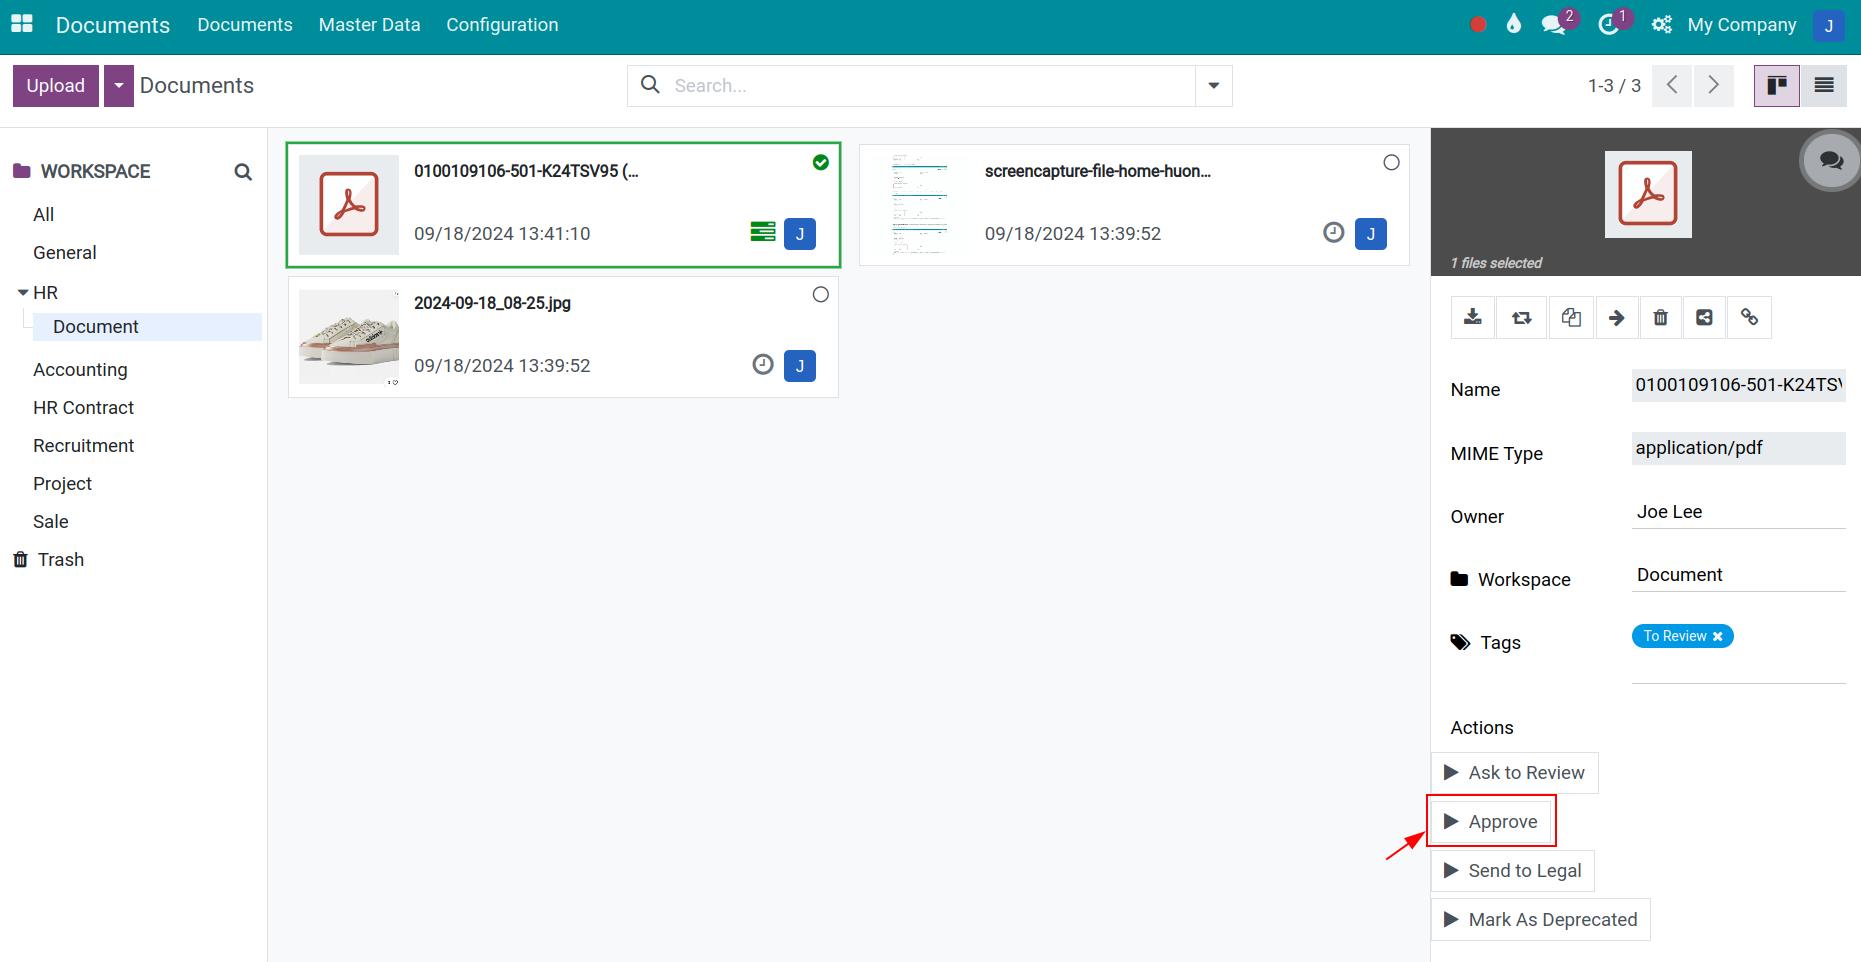
With the above settings, the documents uploaded to this file will be suggested with the following actions.
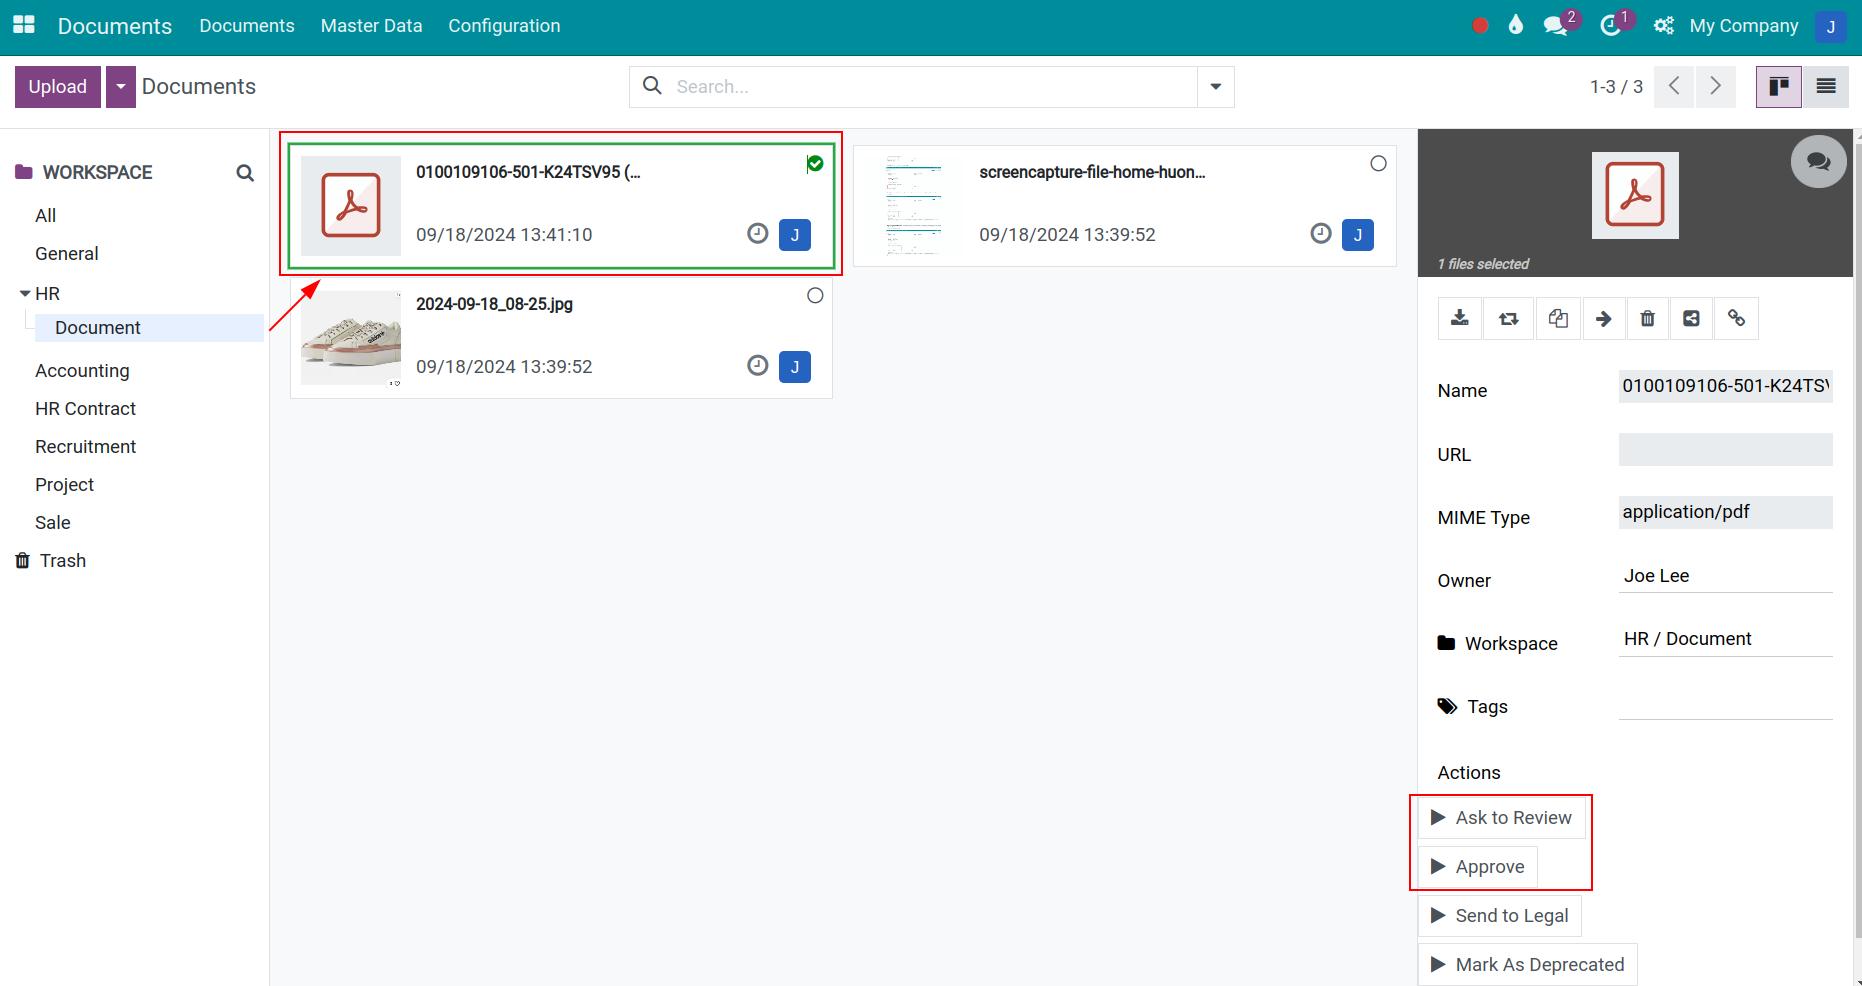
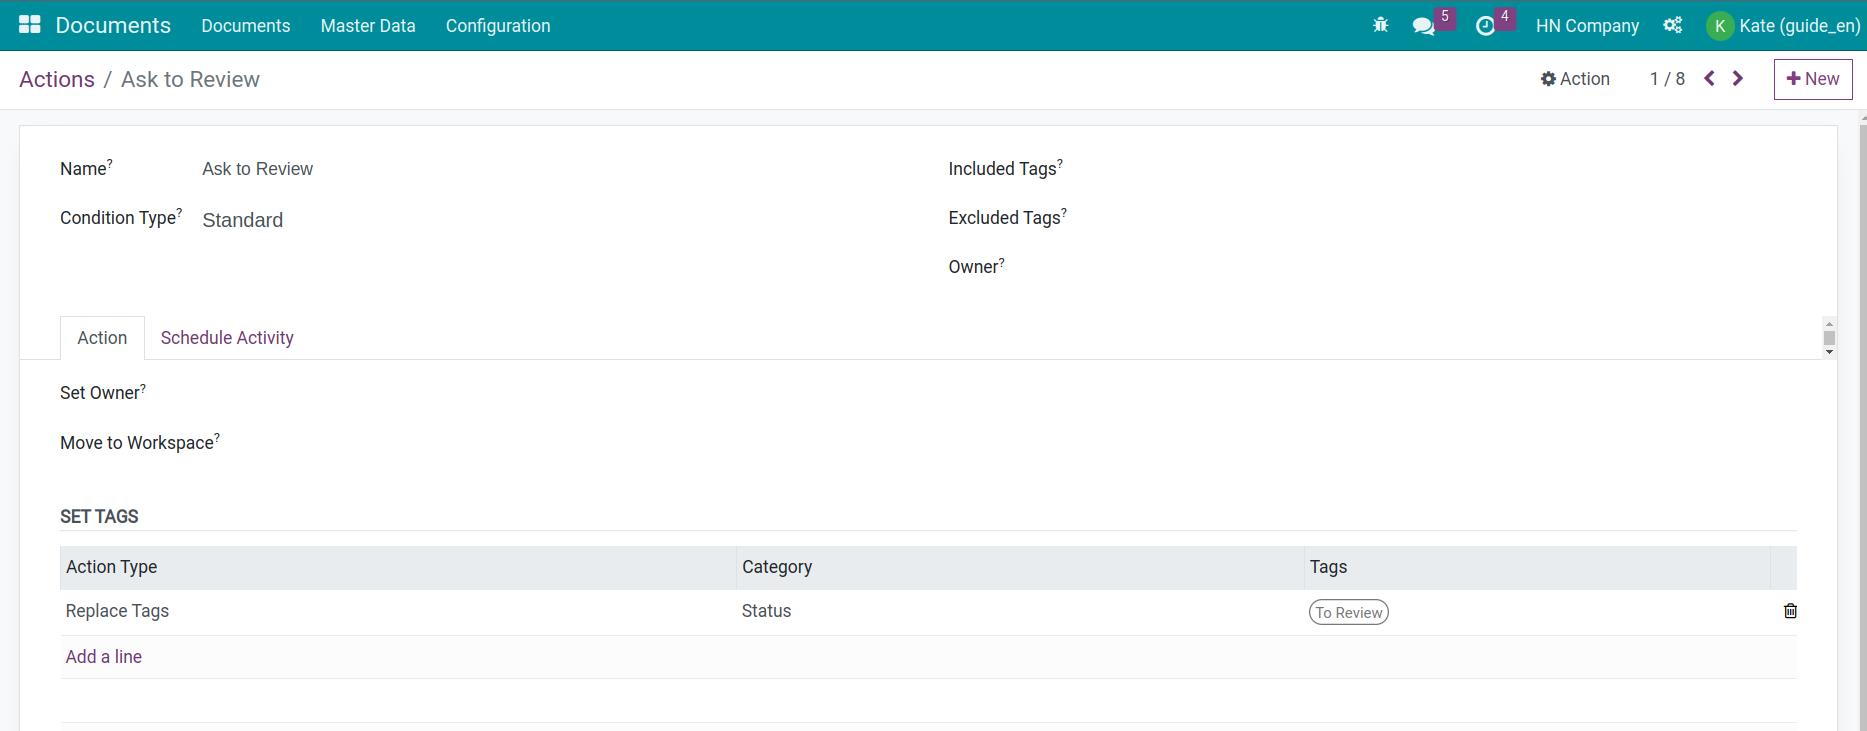
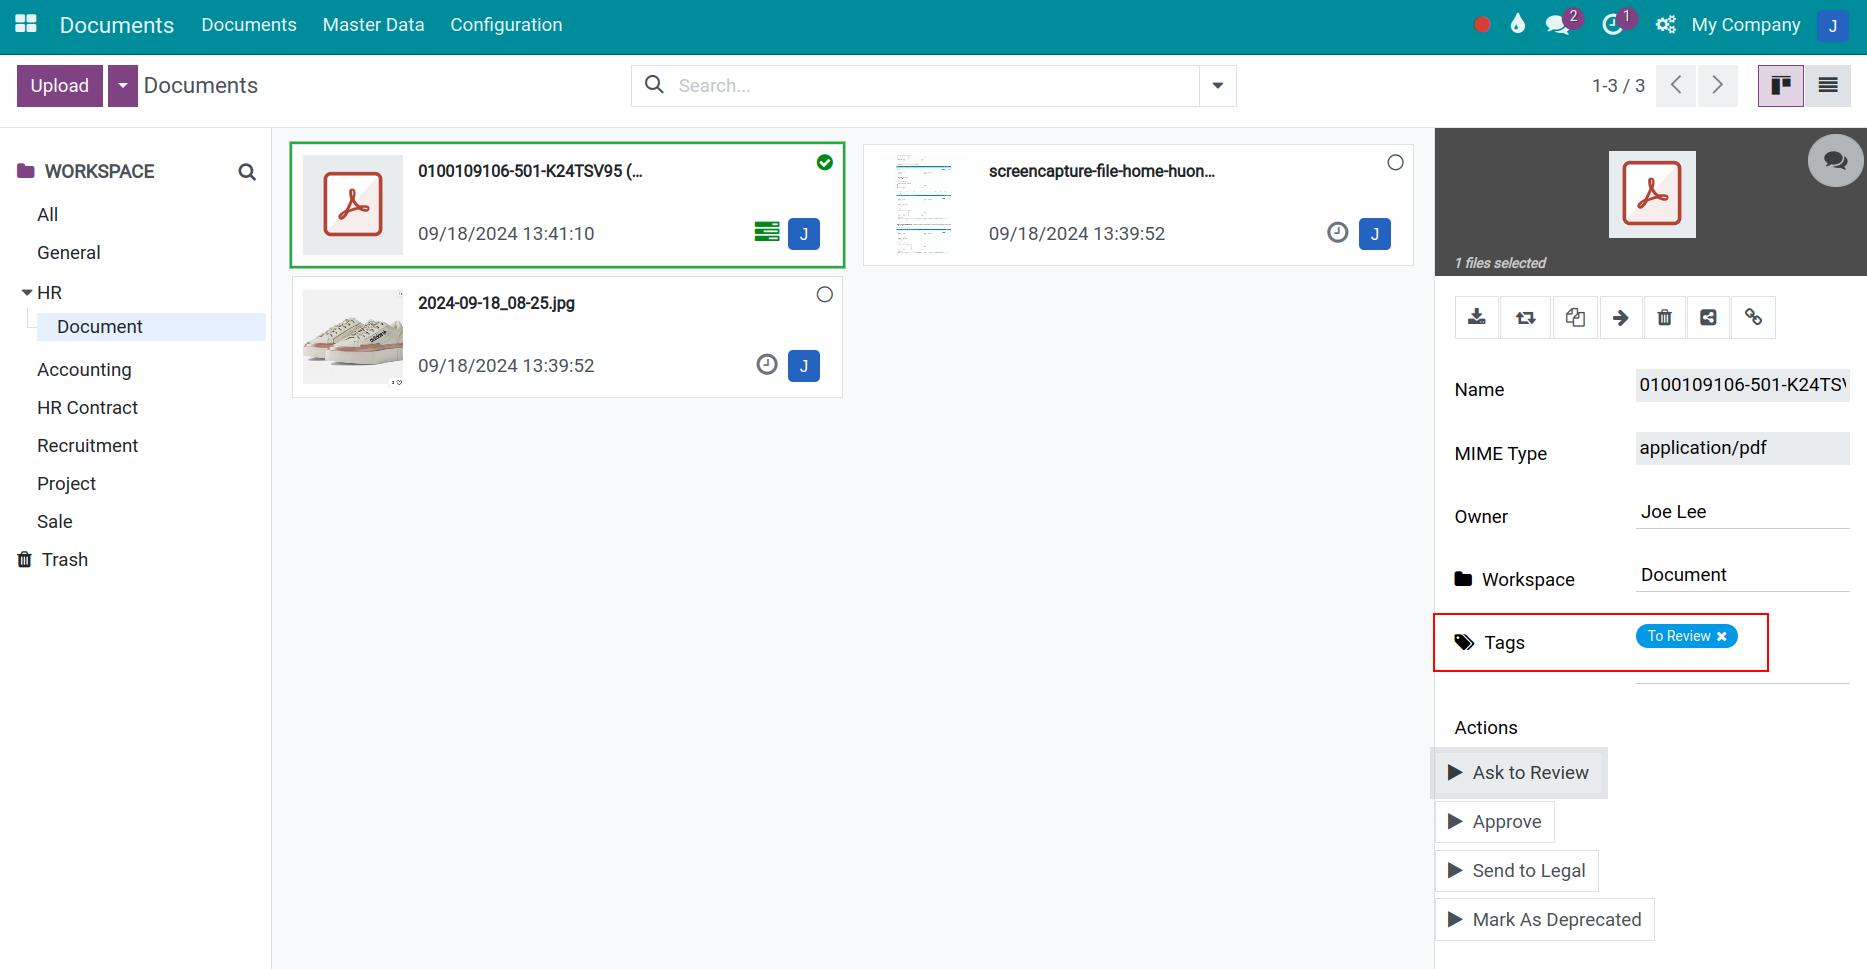
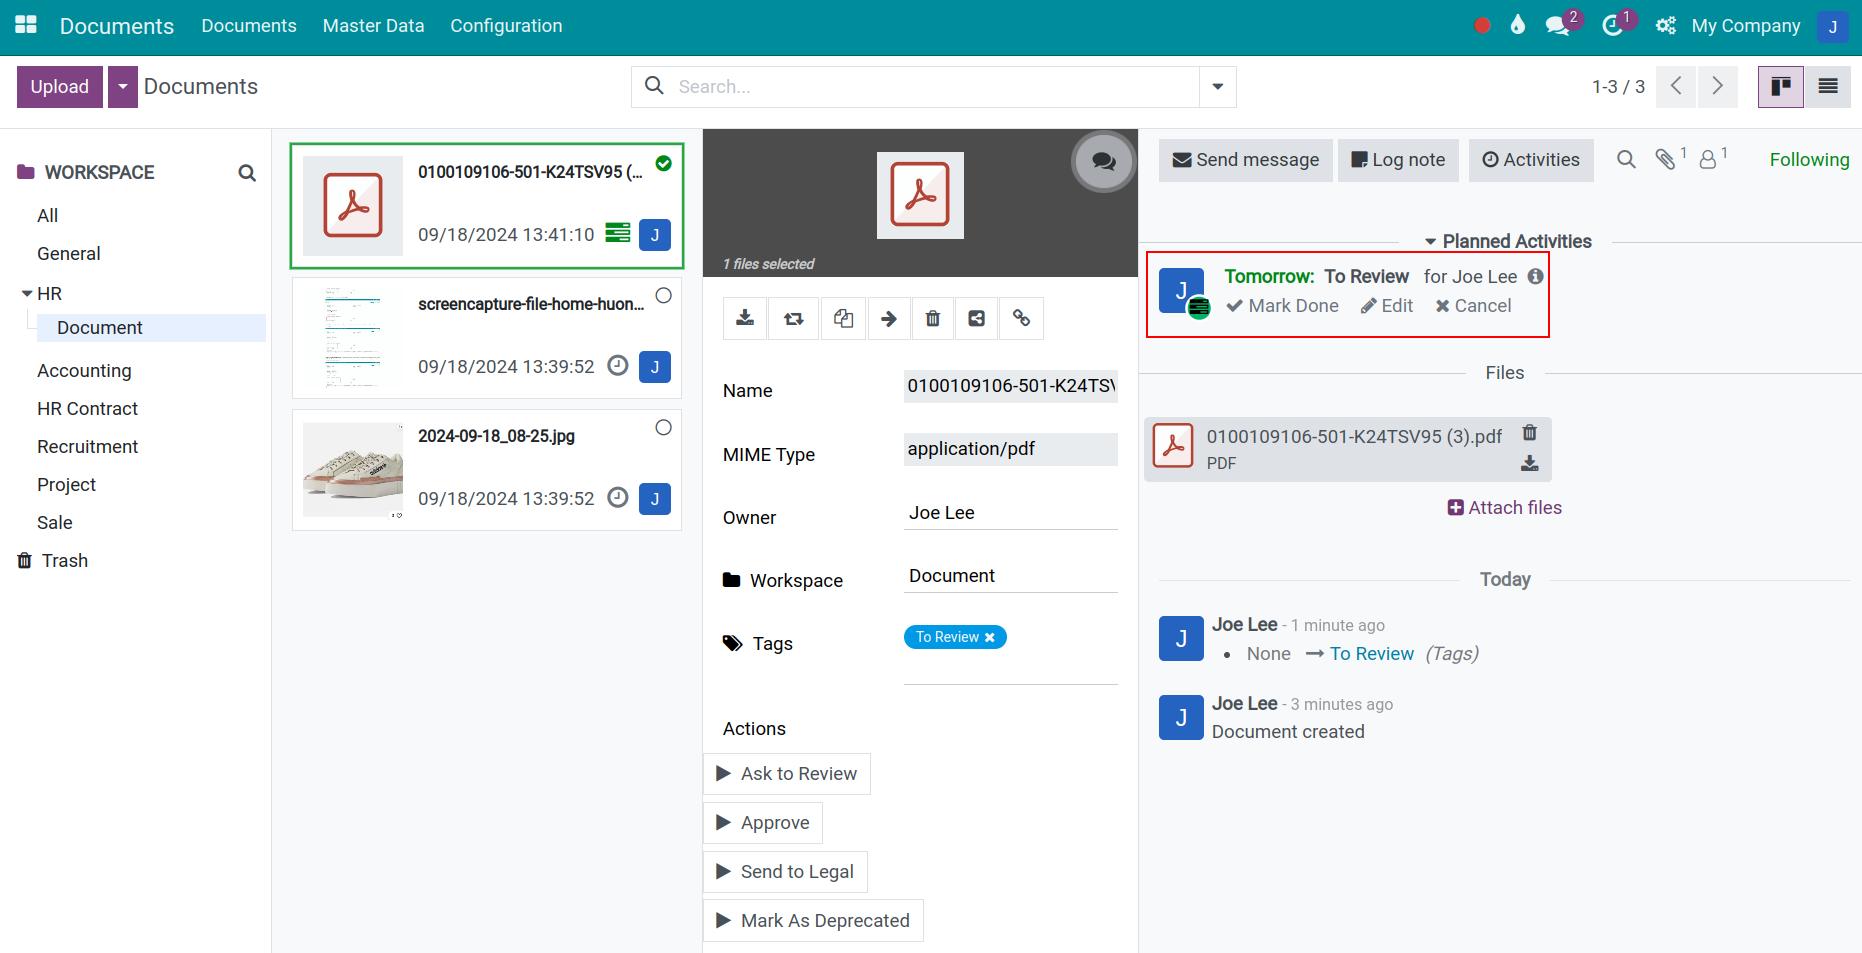
Here, select Ask to Review, the system will auto-change the document’s tags (on the tags field and on the product’s label) to To Review and at the same time schedule an approval activity for the assigned person based on the pre-set information.
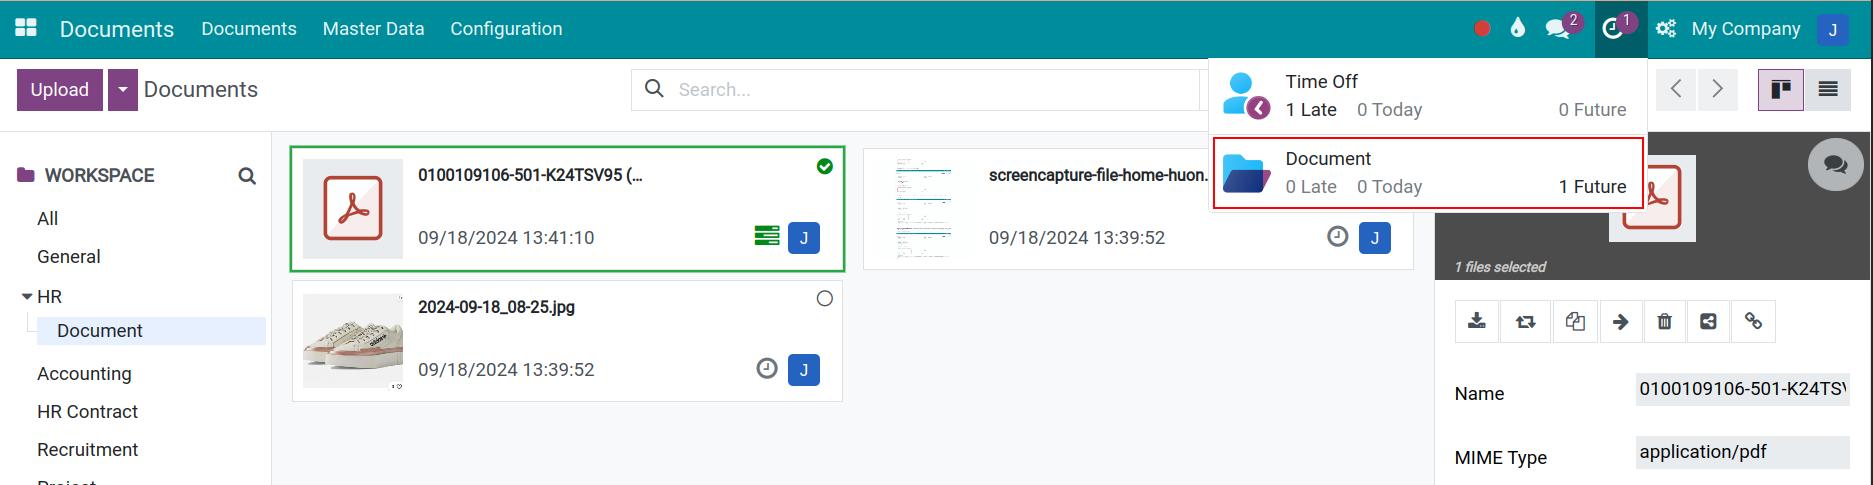
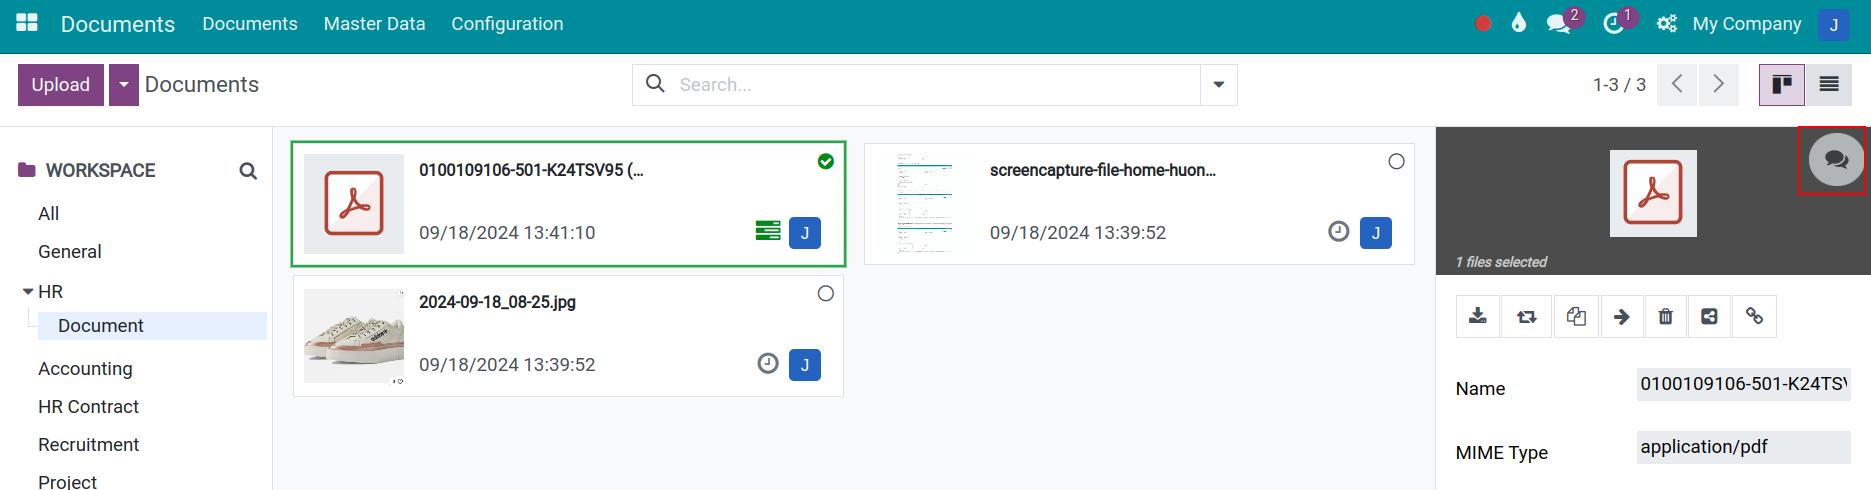
As an approver, you can access the Clock icon to view your scheduled activities.
Moreover, you can select the Discuss icon to view the discuss view which has the exchanged information about this document and the scheduled activities for this document.
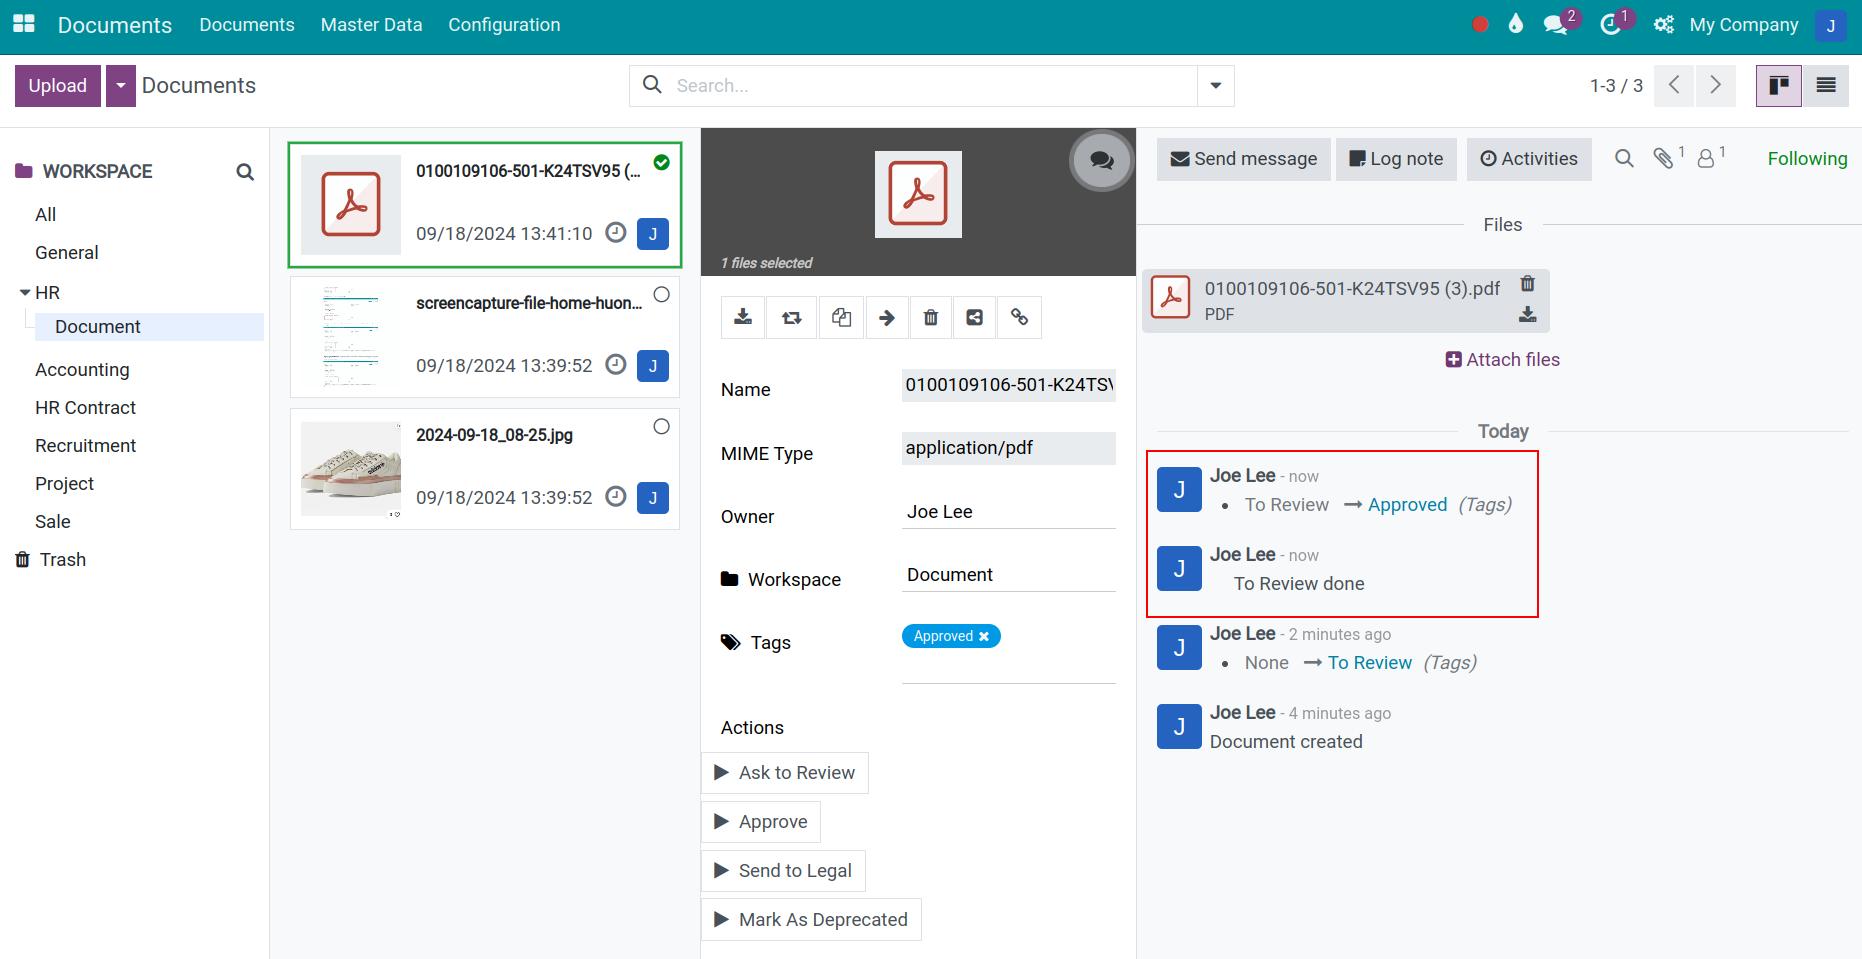
After checking the document’s information, the assigned person will select Approve.
Now, the tags attached to this document will be changed accordingly to Approved.

See also
Related articles
- The status of the document
- How to search document in Odoo
Optional modules
- Documents - Recruitment
- Documents - Accounting
- Documents - Payroll
- Documents - Sale
- Documents - Inventory
The status of the document
The status of the document
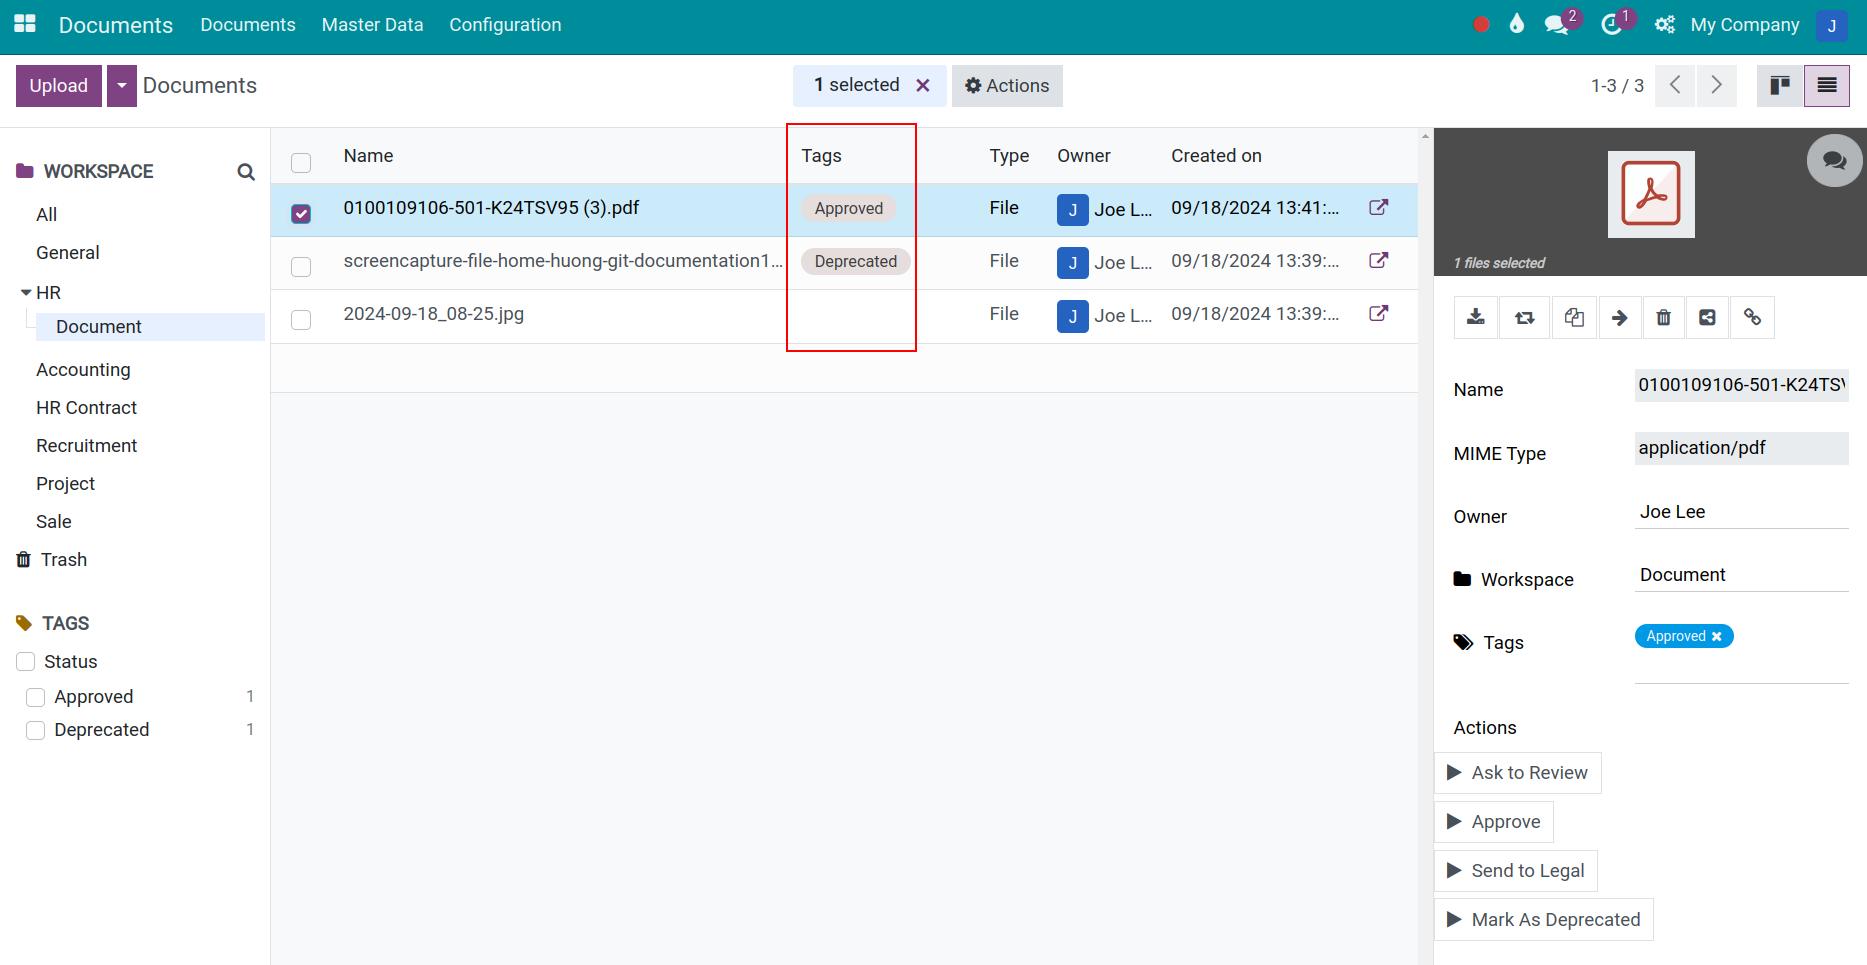
In Odoo Documents app, you can see of document’s status here:
There are 2 ways to update the document’s status:
- 1st: Attach the status manually.
- 2nd: Auto-update the document’s status.
Requirements
This tutorial requires the installation of the following applications/modules:
- Documents Management
Attach document status manually
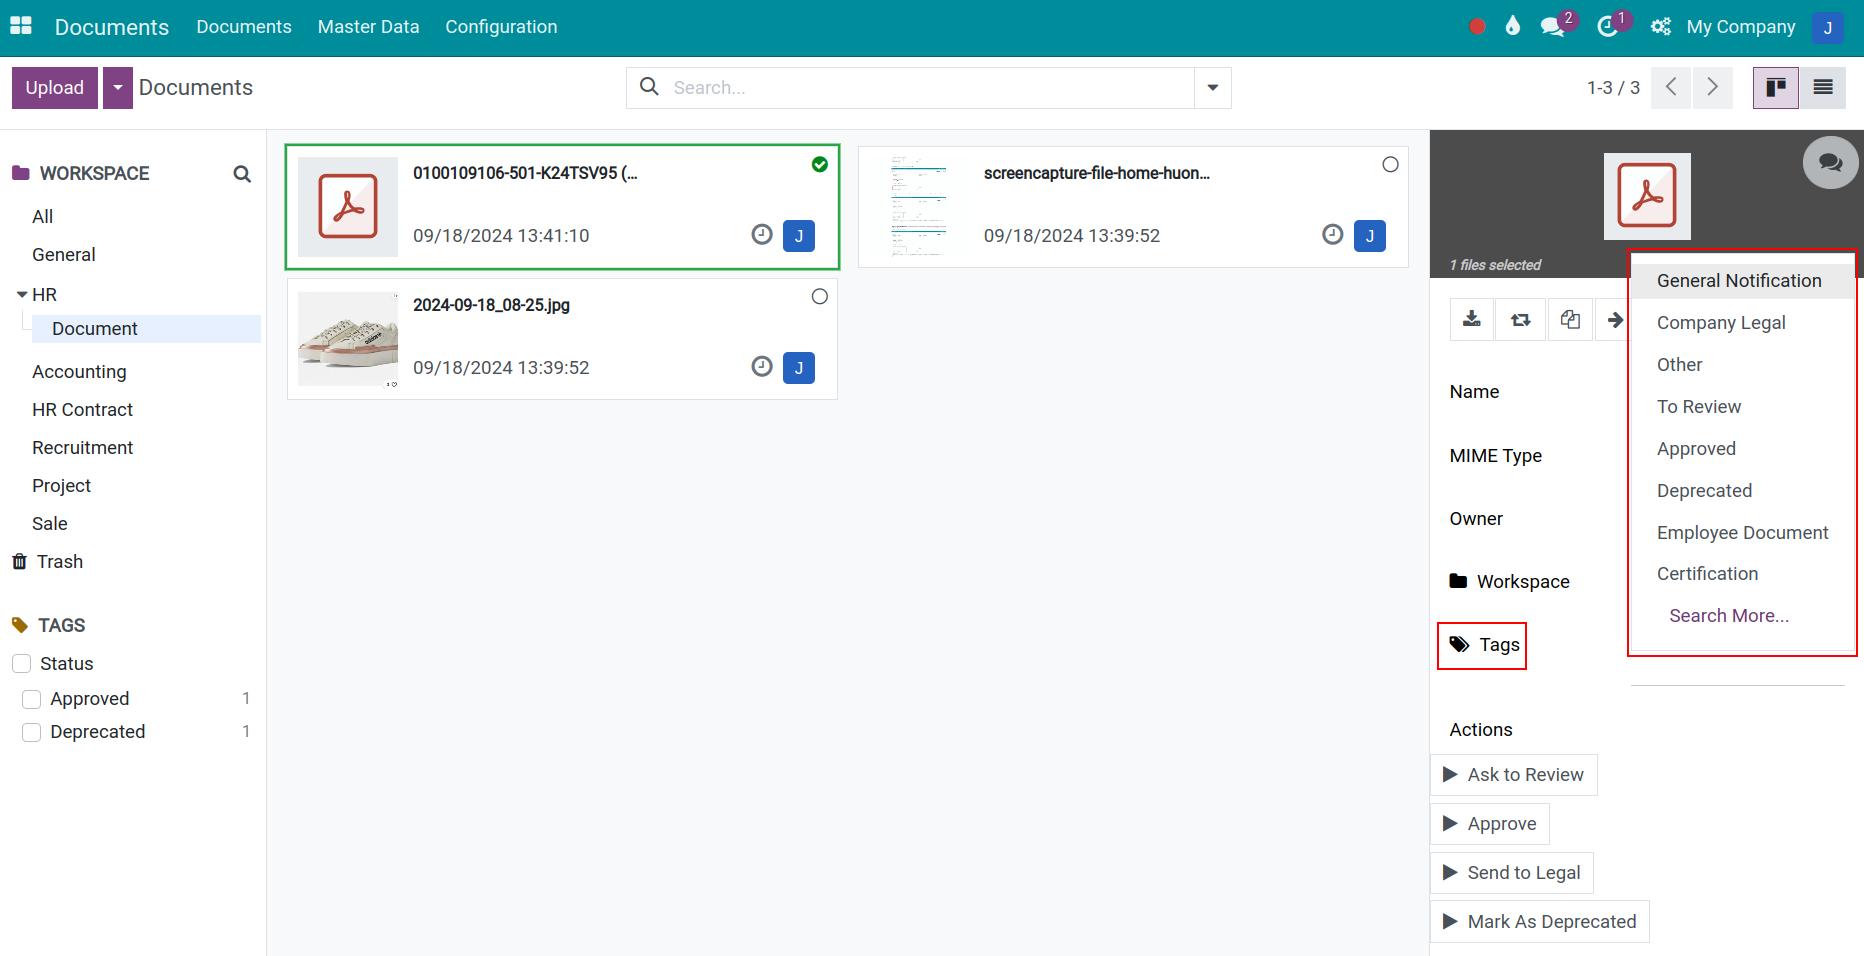
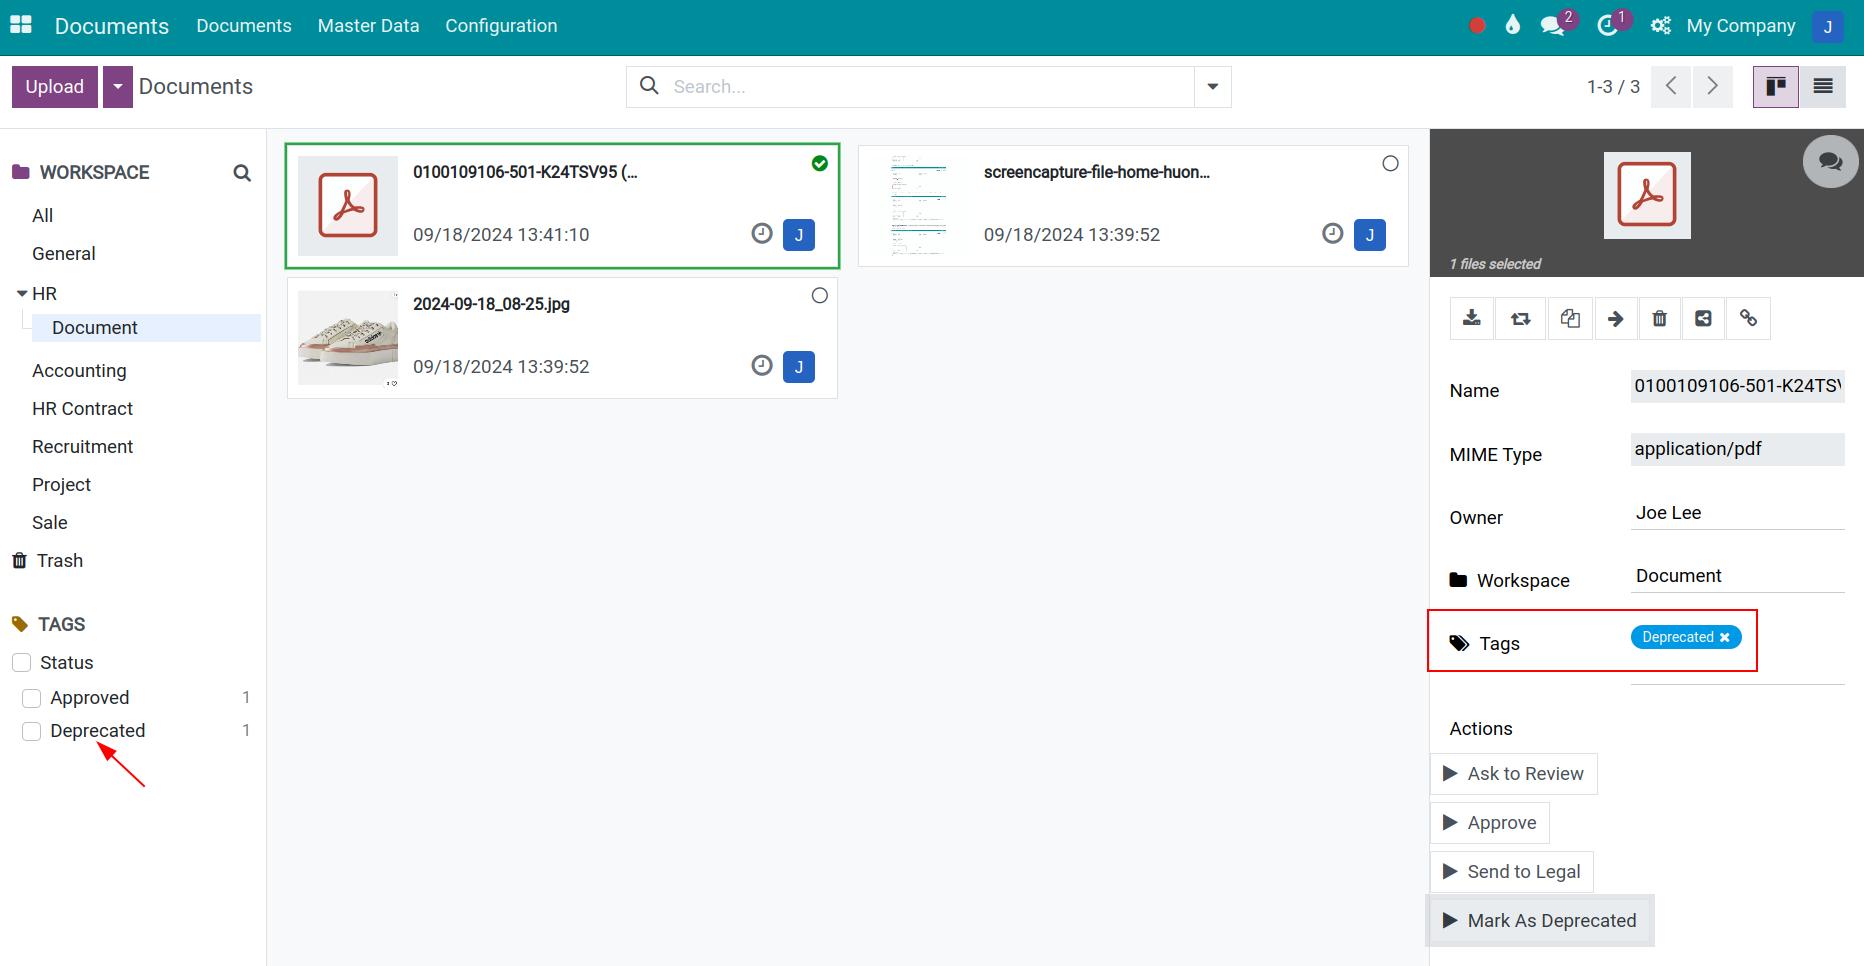
To attach document’s status manually, you need to create tag that have the same name as the document’s stages and add them to the Tags field in the document detail view.
Auto-update document status
To update the document’s status automatically, follow the steps below:
Step 01: set up actions.
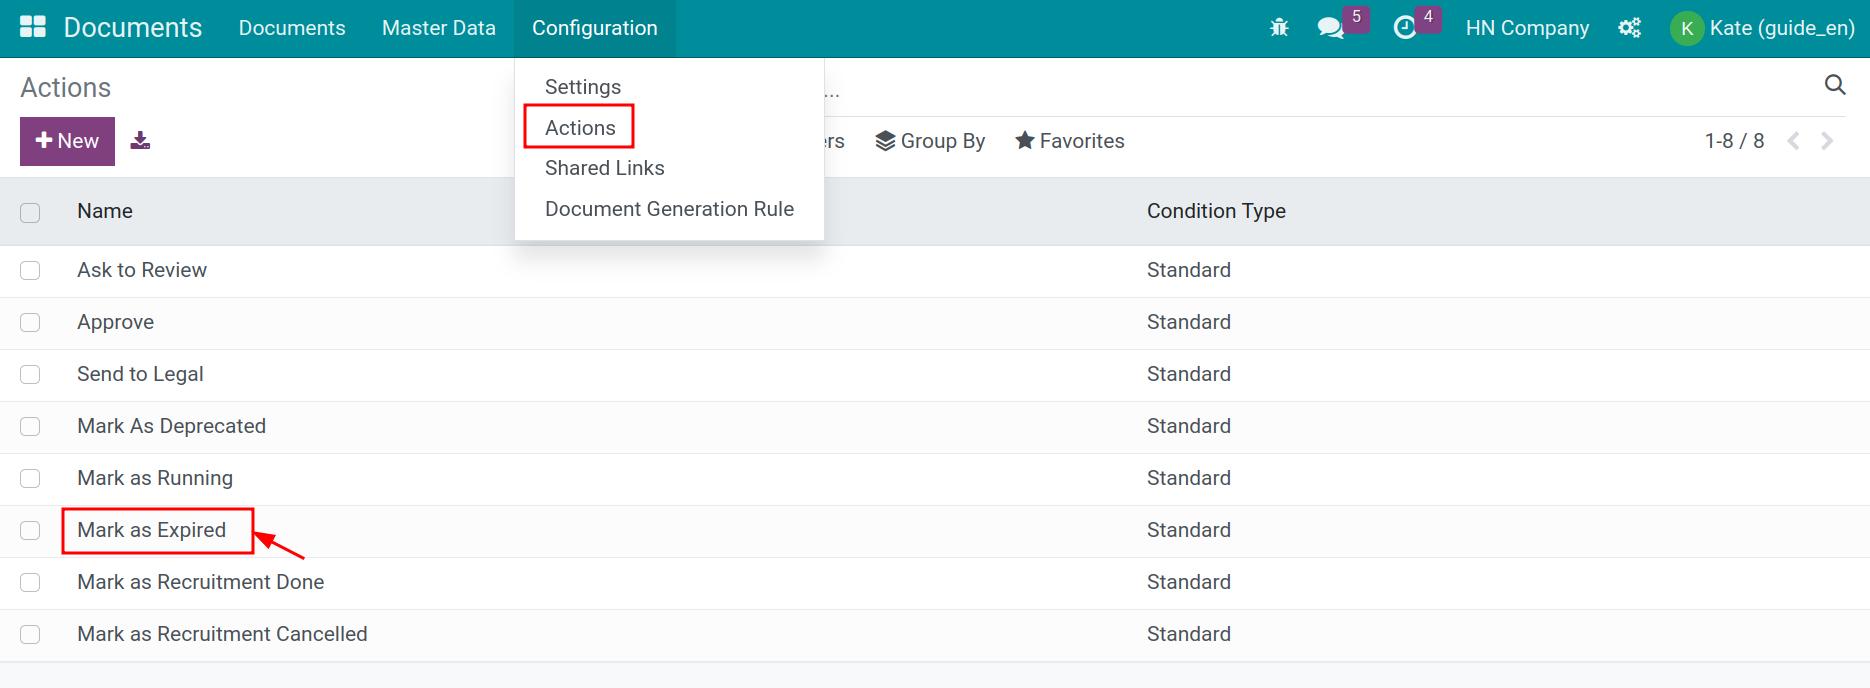
Firstly, you need to set up actions by navigate to Documents > Configuration > Actions.
You can press New to create a new action or select an existing action that needs to be set up.
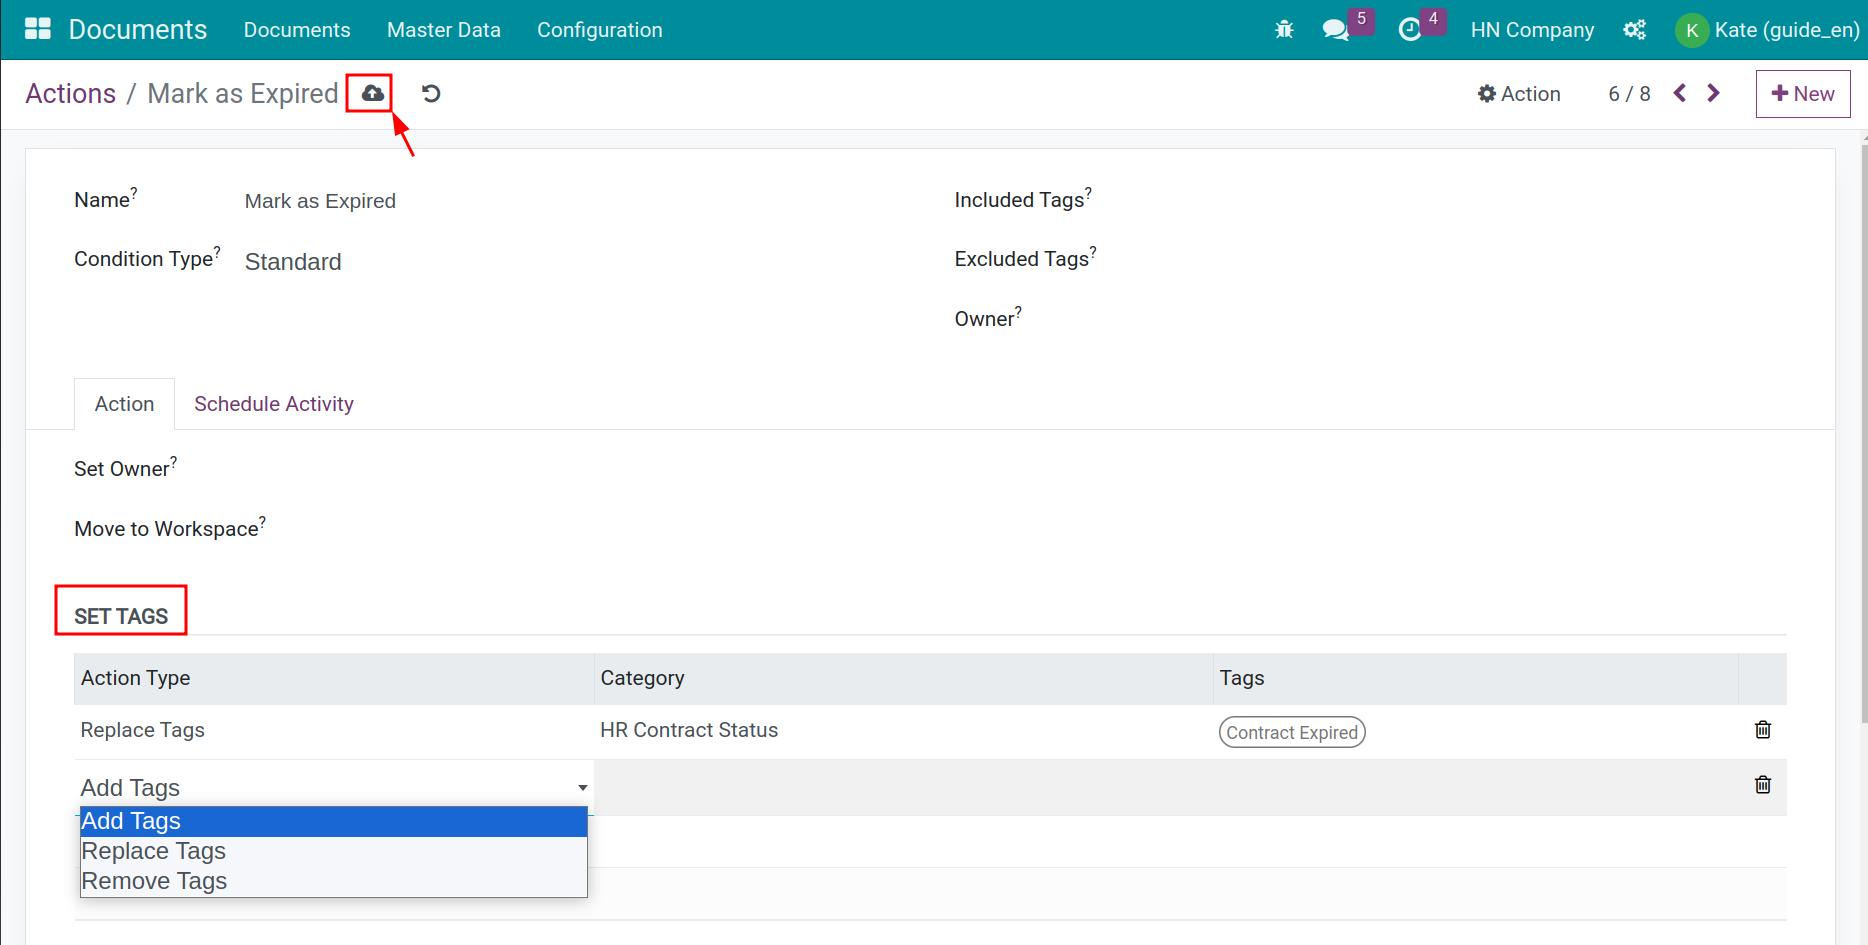
In this view, set up the information of the Set Tags section as follow:
- Action Type: select one of the following action type:
- Add Tags: Auto-add the selected tags when this action is activated on the uploaded document.
- Replace Tags: Auto-remove the document’s current tag and replace it with this tag when this action is activated on the document.
- Remove Tags: Remove this tag when this action is activated on the document.
- Category: select the corresponding tag category for the document’s status.
- Tags: select the corresponding tag for the document status.
After filling in the information, press Save to save the setting.
Step 02: attach the action to the document.
Navigate to Document > Master Data > Workspaces and select the workspace that has the document you want to set up.
In the workspaces view, press Add a line on the Actions tab to add an action for the documents that belonged to this workspace.
You will be navigated to the Actions list. Here, you can search for the action set in step 01 and press Select.
And then save the workspace settings.
Step 03: select the action on the document.
Navigate to Documents > Documents and select the document.
On the right side of the document, you can see a list of the actions set on the workspace of this document at step 02. Here, select the action you want to do with this document.
After selecting the action, the tag and the status of the document will be auto-added, replaced, or removed depending on the pre-set actions in step 01.
See also
Related articles
- How to search document in Viindoo
- Getting started with OKR App
- Set up the OKR hierarchy structure
Optional modules
- Documents - HR
- Employee Documents
- Documents - HR Contract
- Documents - Sale
- Documents - Project
How to search document in Odoo
How to search document in Viindoo
Odoo Documents app supports searching files and saved links in workspaces by using the tags system implemented throughout the software.
Requirements
This tutorial requires the installation of the following applications/modules:
- Documents Management
Quick search using Search bar
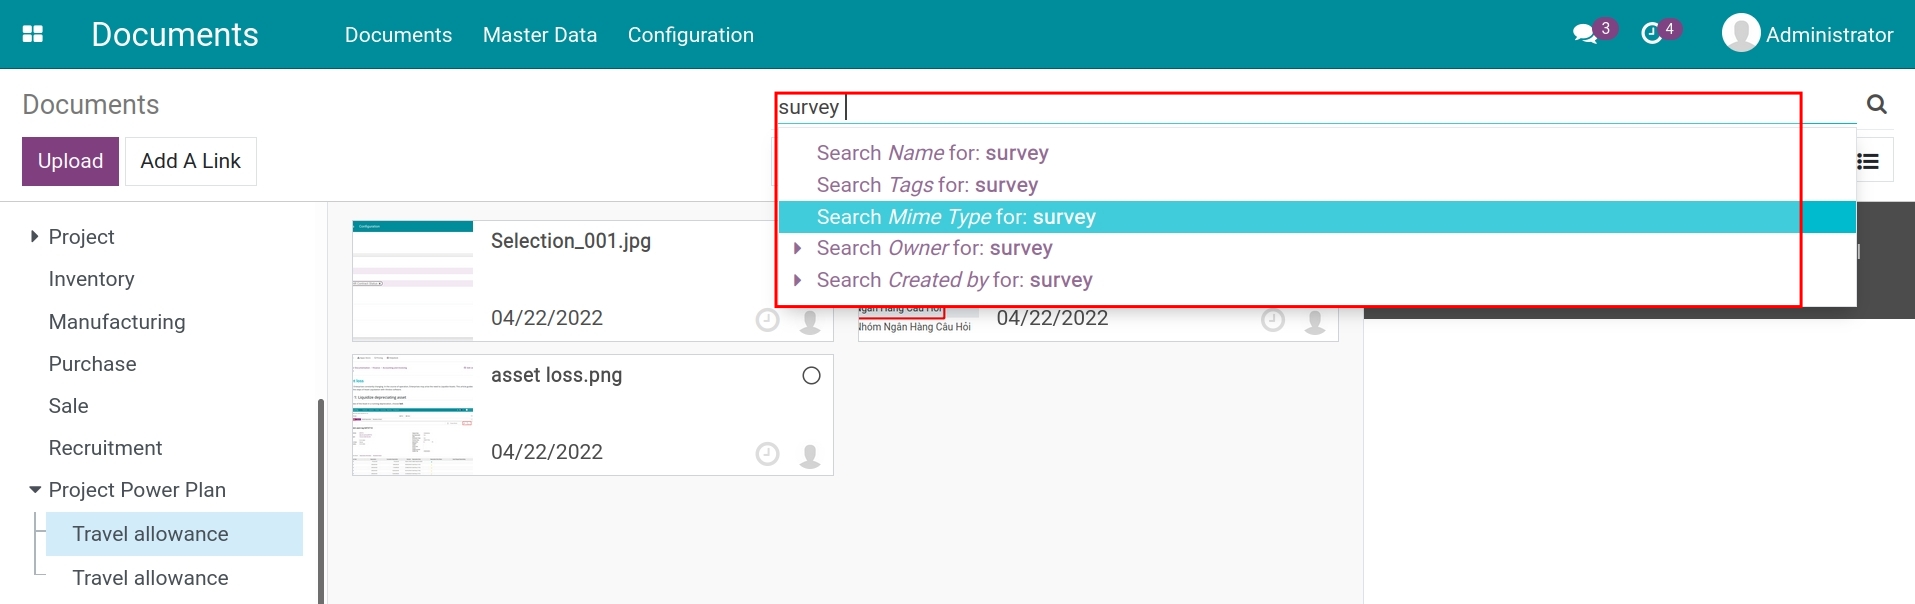
Documents and saved links can be easily found by using the Odoo searching and filtering the record feature. With this feature, type a keyword (e.g: a document title, a tag attached to the file, etc.) to the into the search bar which is located on the top right corner of your screen to filter out records.
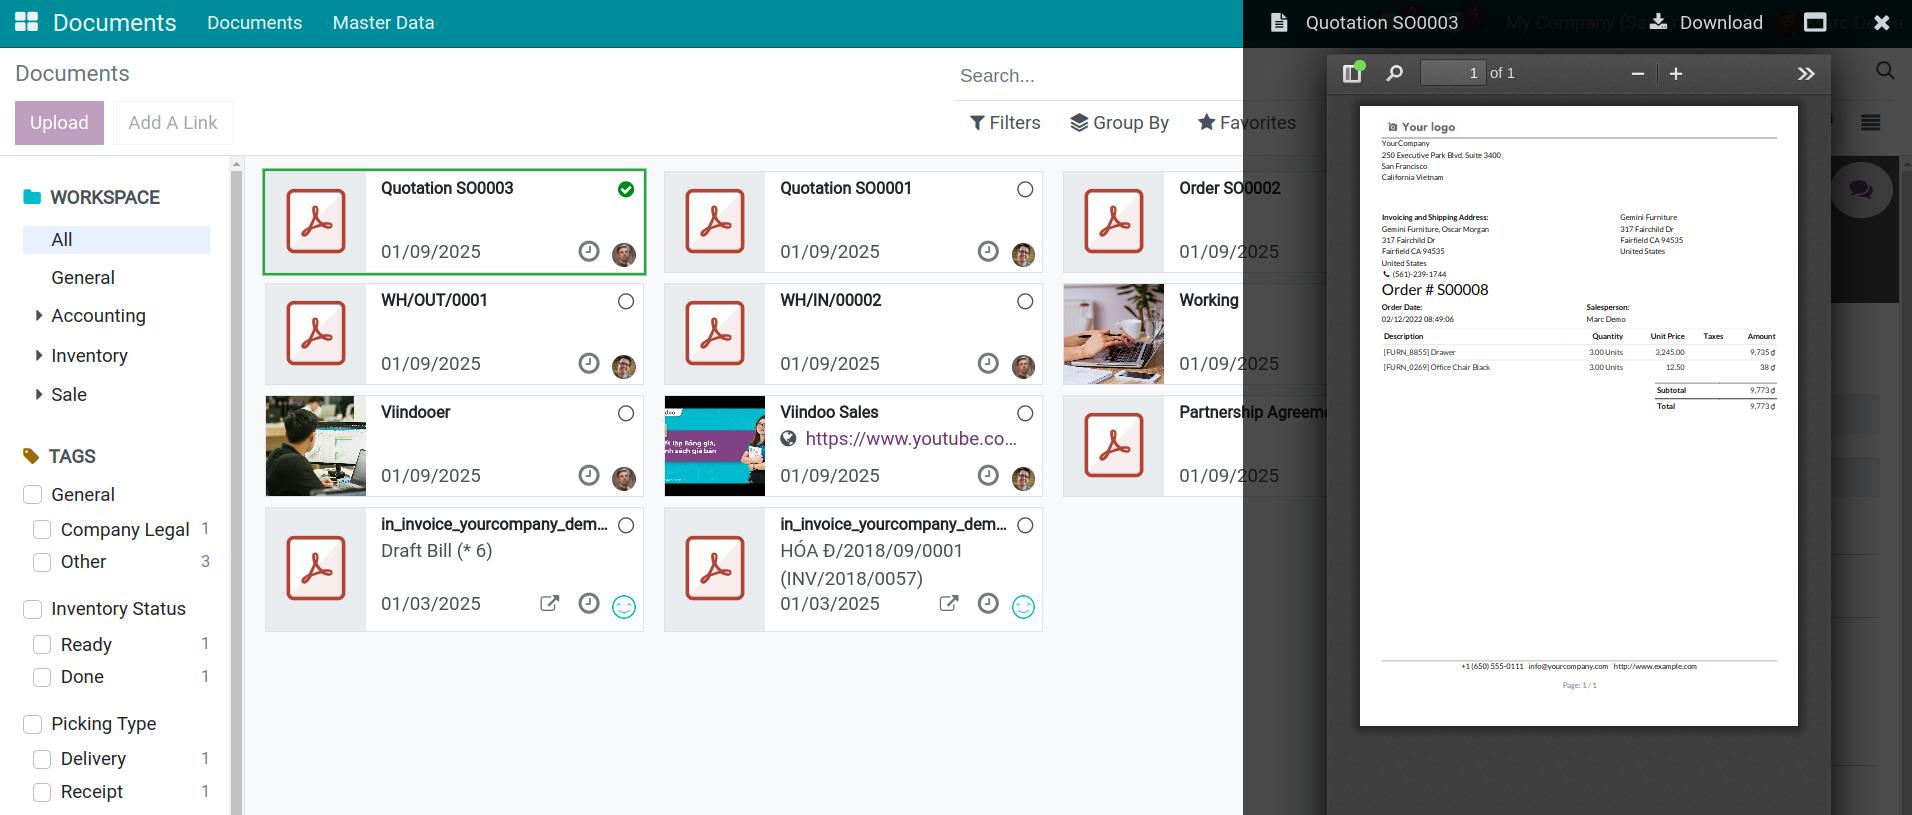
Click on a document to preview its content.
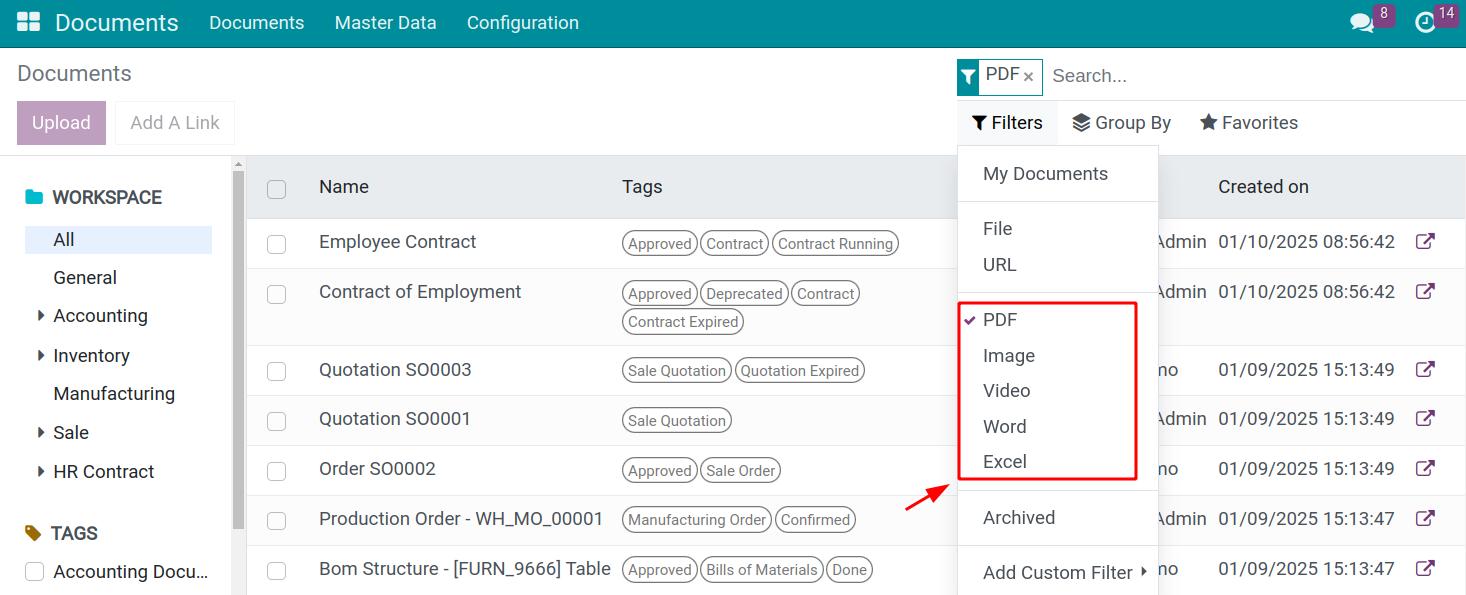
Search with filters and groups
You can use the filters and groups feature to search documents and saved links in different workspaces in the Documents app.
Press arrow icon to use some default filters as well as group such as: My Documents, File, URL, Owner. On the other hand, you can also create your own custom filter according to your needs.
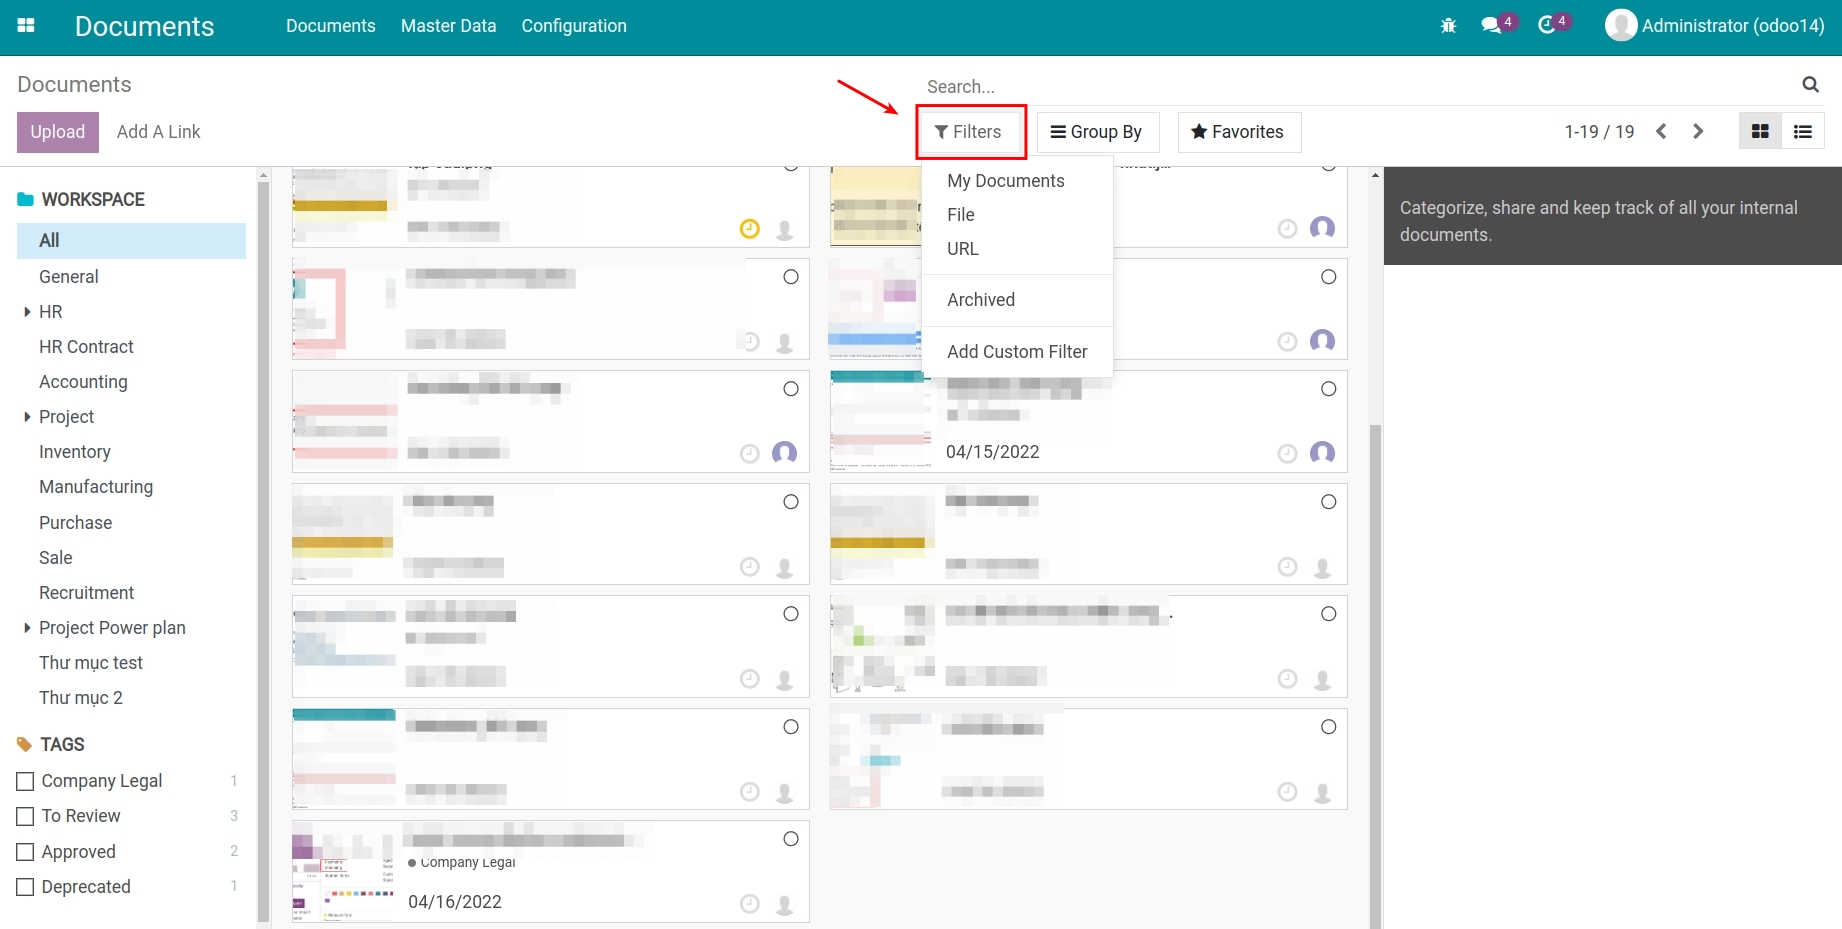
In which:
- File: Filter out existing documents.
- URL: Filter out saved links in the Documents app.
- Owner: Filter out document by who uploaded the document.
On the other hand, you can also search for certain documents by the format criteria. The system provides some ready-to-use filters to faciliate the search such as Excel, PDF, Image, Video, etc.
Search with Tags
You can also use the search feature with tags in the Documents app by navigating to the Tags section and click on your desirable tag.
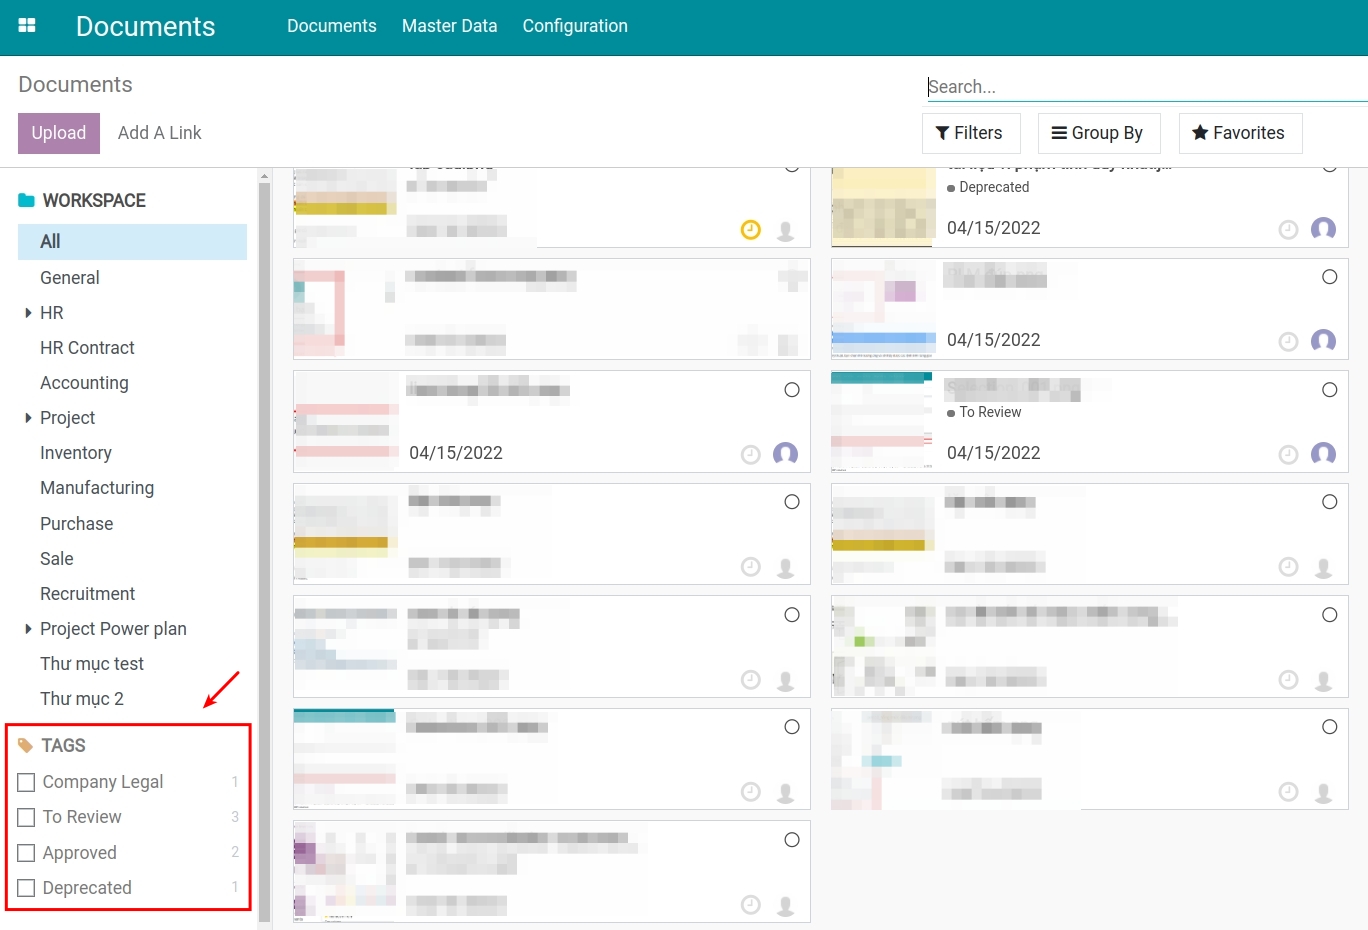
The number of documents categorized with the respective tag is displayed next to each tag for a quick overview.
See also
Related articles
- Getting started with OKR App
Optional modules
- Documents - HR
- Employee Documents
- Documents - HR Contract
- Documents - Sale
- Documents - Project